

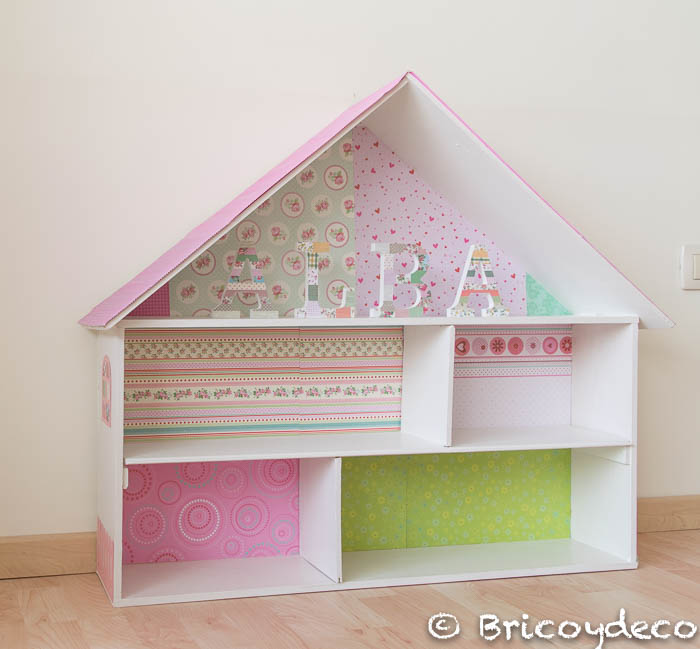
To achieve low-cost decoration, all you need is a little skill and inspiration, such as this one children’s bookcase and dollhouse made with a recycled wooden box. With it you can not only decorate the children’s room, but also get extra storage space and serve as a play area. Do not miss the step by step!
I have had this project pending for quite some time, specifically since the beginning of the year. The idea came about when I showed a friend the bookcase that I had made for my kitchen with a wooden box used for Christmas batches, then she told me that she had been looking for a similar box for her daughter’s room for a long time. .
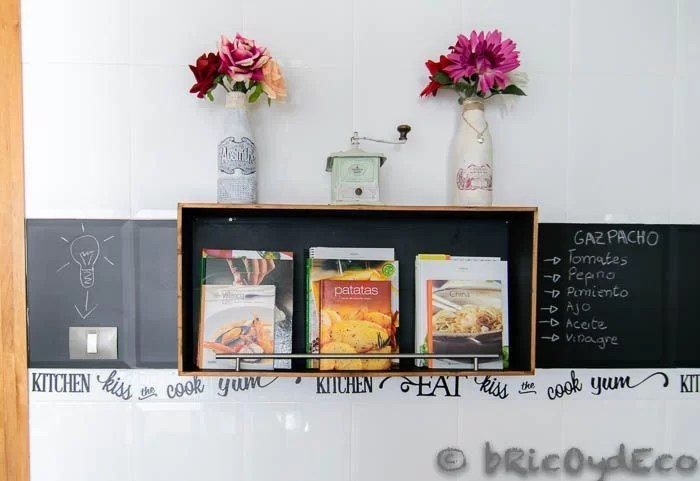
In the following image you can see the bookcase I made with the wooden box (in this link you have the tutorial):
As there were a couple more boxes in my workplace that were going to be thrown away, I told him that with one of them I could make a dollhouse bookcase to decorate your little one’s room. The idea excited us both, particularly me because you know that I love to recycle and tune up, however I must admit that I was a little scared because one thing is to do something for oneself and another for others, you feel the extra responsibility not to disappoint.
Dollhouse made with a wooden box: structure
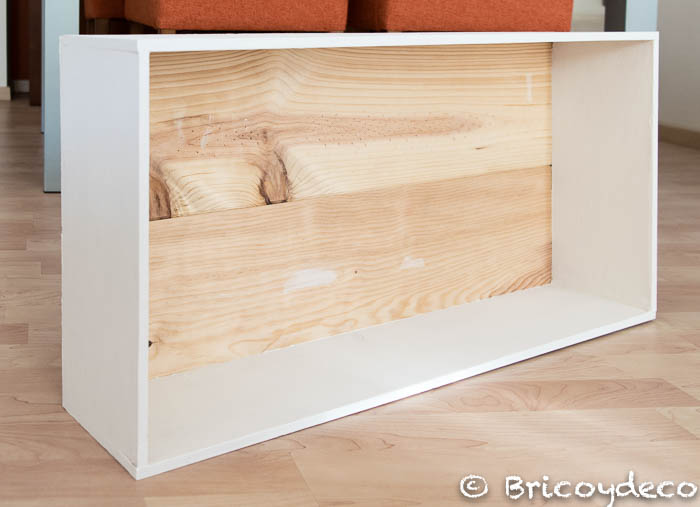
In the following image you can see how the wooden box was before its transformation:
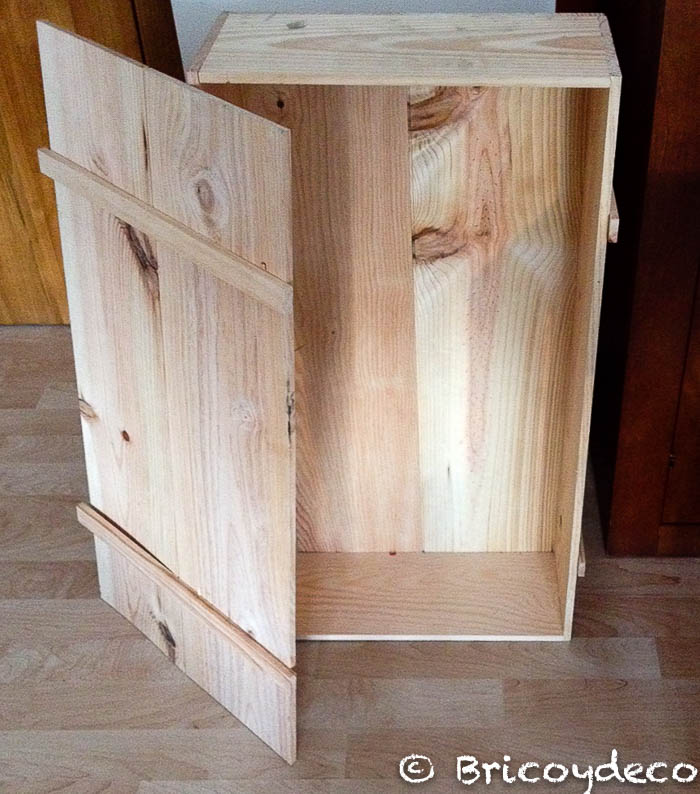
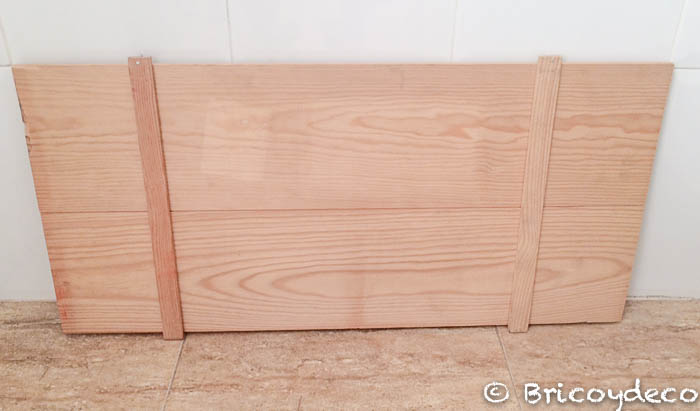
The first thing I did was sand the entire surface since this type of boxes are made with poor quality wood that usually has chips and imperfections. Then I removed all the nails from the top to separate the two tongue-and-groove planks that formed it and use them to make the roof and the shelves.
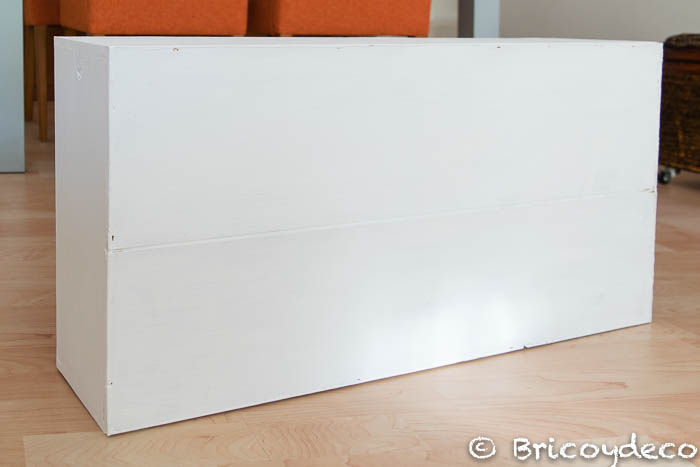
Next I painted the wooden box with homemade chalk paint, for this I used my favorite recipe which you can see in this link. The great advantage of blackboard paint is that it does not require prior priming, in addition to the fact that it has a quick drying and repainting time (about 30 minutes). With a couple of coats I got optimal coverage.
I left the background unpainted because my idea was to cover it with decorated cardboard.
The next step was make the shelves and internal divisions of the bookcase, for this I cut with a multi-tool the boards that I had obtained from the lid of the box. With the help of some double angle clamps (very useful for holding right angles) and some nails, I fixed the vertical panels to the shelves, then I reinforced the joints with carpenter’s glue.
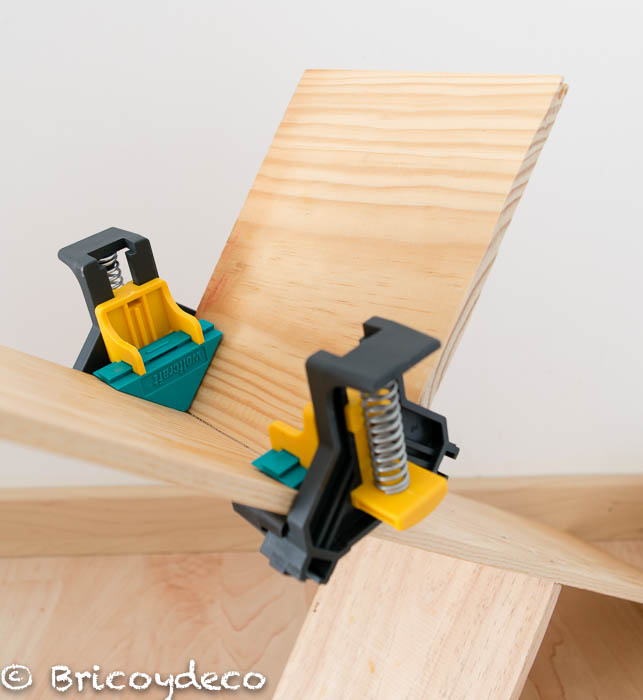
It is convenient to nail the nails on the untreated wood since in this way they are practically hidden after painting.

I joined the two roof boards in the same way and I nailed it to the wooden box with more nails, reinforcing the joints with carpenter’s glue.
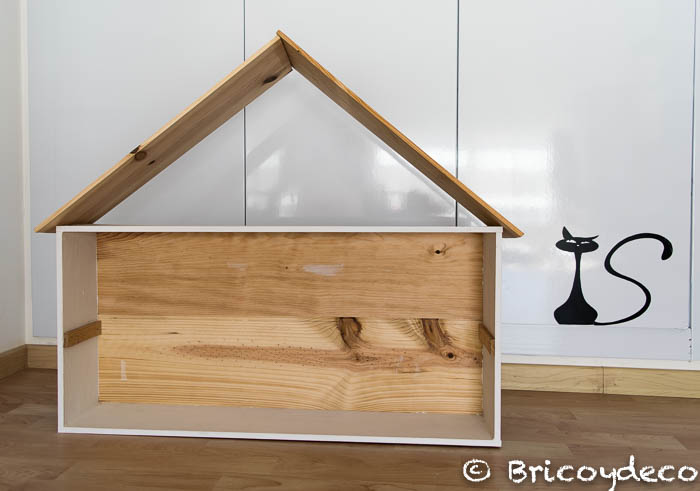
Next I painted the roof and the internal divisions of the bookstore/house with homemade chalk paint.
After two coats of paint and once it had dried, I applied a coat of Mod Podge (it can be purchased at this link for protect finish. Normally I like to wax over chalkboard paint, but for a children’s room I thought a product that provided a resistant finish like Mod Podge would be more suitable, since it works equally well as an adhesive and as a surface sealer.
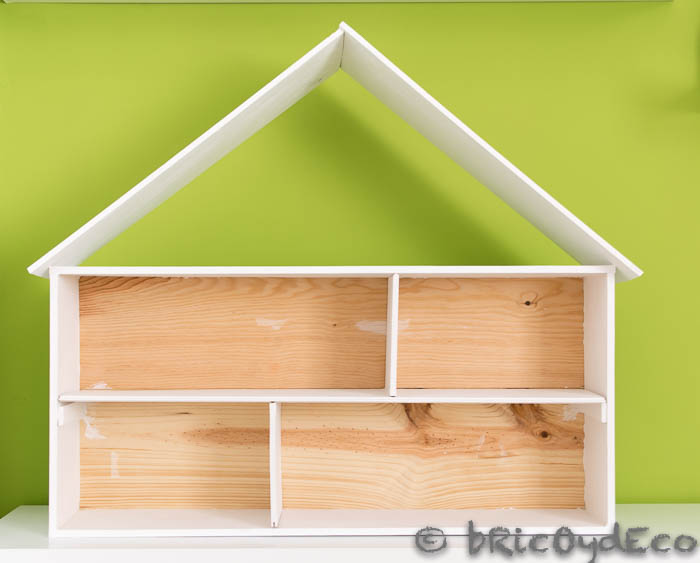
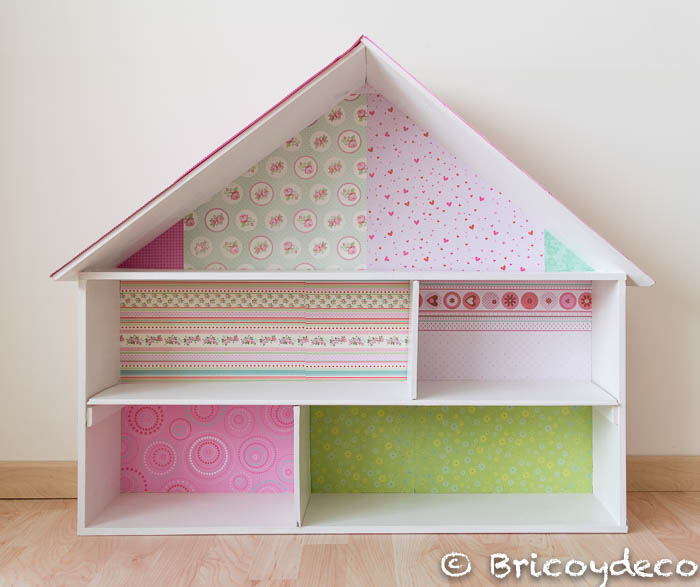
Dollhouse made from a wooden box: interior decoration
The next step was do the rear of the roof, for this I took advantage of a back of another bookcase that I did not use and with the help of a cutter I cut the excess part. With stamped cardboard that I adhered with Mod Podge I lined the inner part and later I joined the back to the bookcase with some nails.
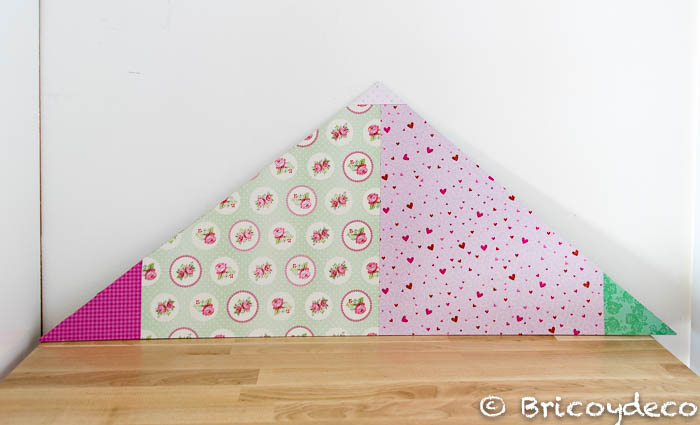
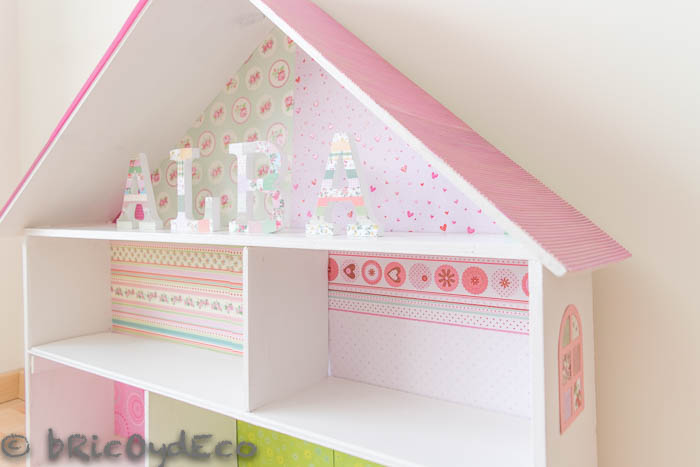
I also attached the Mod Podge-patterned cardstock to the bottom of the box, placing a different one in each “room” of the house or apartment in the bookstore.
Dollhouse made from a wooden box: exterior decoration
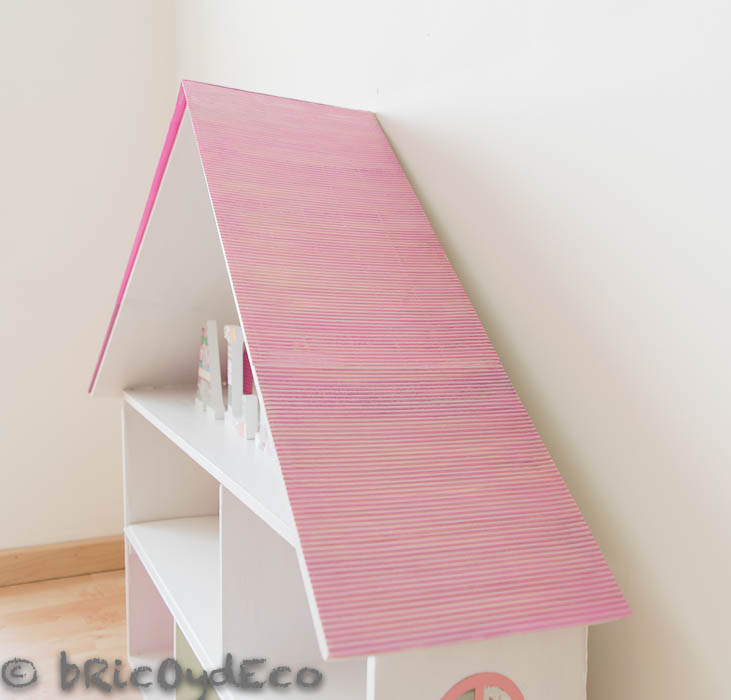
For decorate roof top I used corrugated cardboard which I also glued down with Mod Podge. Then I gave it a coat of pink slate paint and another of mother-of-pearl acrylic paint, in this way I managed to soften the original color and give it a pearly shine.
On the sides I placed a fence and some windows with cardboardwhich I stuck with double-sided tape and varnished with Mod Podge.

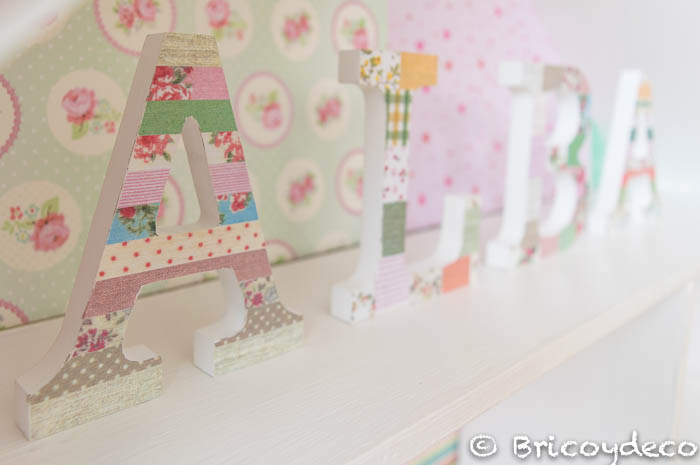
To customize the result I decorated some letters with washi tape with the girl’s name.
In the following video you can see a summary of the step by step:
For my part, I am happy since I have achieved revalue a wooden box that was going to be thrown away using recycled elements or that I already had at home.
In addition, my friend’s surprised face filled me with satisfaction, both she and her little one loved the final result.
Sometimes we are afraid to do certain DIY projects because we believe that we will not be able to carry them out, but we must try because we can get a pleasant surprise. This experience has helped me become familiar with the saw and the hammer, tools that until now gave me respect. I’m not going to tell you that it was cutting/nailing and singing because I’d be lying, in fact I’ve had some puncture wounds and bruises, but you know that you learn from mistakes (although in this case I recommend having a bag of ice and some known ointment for possible bruises).
What did you think of this children’s bookcase and dollhouse made with a wooden box? In particular, I consider it to be a good example that with a little creativity you can achieve a practical and low-cost decoration for the bedroom of our little ones, it is just a matter of proposing it.
If you liked this post, you can see many more tutorials and DIY ideas at .


