
Has mold invaded your home and would you like to get rid of it once and for all? To do this, it is not enough to clean the area, it is also necessary to apply a series of products that prevent it from reproducing again. For this reason, don’t miss this tutorial to remove condensation mold and prevent it from reappearing.
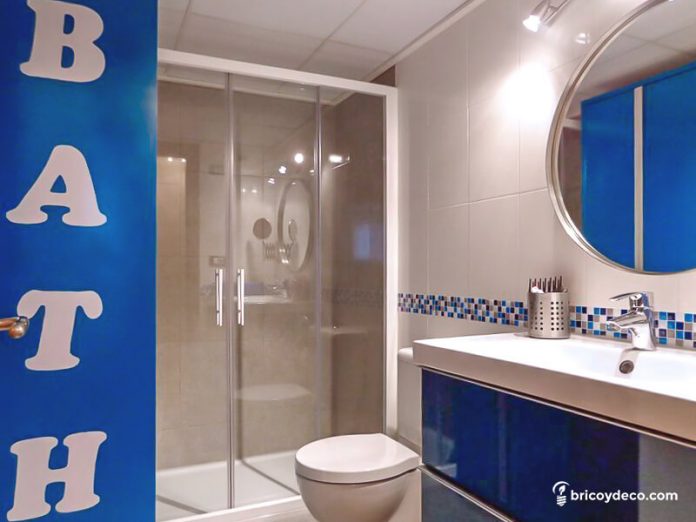
For several months mold condensation has become a problem for my bathroom. Specifically in the plaster molding that finishes off the tile and ceiling. Although I have tried to remove it with anti-mold products, it always reappears within a few weeks. For this reason, when Beissier offered me the opportunity to test their Anti-Mold Kit, I did not hesitate for a minute to test its effectiveness.
What is mold condensation?
Dampness due to condensation originates when the interior temperature of a home is higher than that of the exterior. They are also generated when the water vapor from the shower comes into contact with the wall or ceiling, which is usually cooler (regardless of the outside).
An excess of humidity favors the proliferation of mold and bacteria. In addition to being an aesthetic problem, these microorganisms spread through the air, aggravating diseases such as asthma and respiratory allergies.
The best way to avoid mold due to condensation is to keep the rooms of our home well ventilated, but it is not always possible. In fact, many bathrooms do not have a window to the outside, so they are an excellent breeding ground for mold and damp.
In these cases, you can use a Anti-mold kit like Beissier’s It contains the products you need to fix this problem and prevent it from happening again.
What do you need to remove mold?
To permanently eliminate condensation mold you will need the following products and tools:
- Beissier Mold Remover Cleaner
- Beissier Gasket Cleaner
- fungistop
- Aguaplast Anti-Condensation
- Lisomat Anti-Condensation Paint
- rag and sponge
- Spatula or trowel
- fine grit sandpaper
- roller or brush
- Gloves

How to get rid of mold condensation
The best way to kill mold condensation and prevent it from forming again is solving the root problem. To do this, it will be necessary to combine several products that eradicate it, along with others that prevent it from reproducing again. The steps to follow are listed below.
1º.- Eliminate mold
In the first place, to eliminate the existing mold, the plaster molding will be sprayed with the mold remover cleaner and left to act for about 10 or 15 minutes. After that time, it will be rinsed with a moistened sponge.
Contrary to other anti-mold cleaners that I had previously used, this one has the advantage that it does not give off a strong smell of chlorine and is not irritating during its application.

In the event that mold has also settled in the tile joints, a joint cleaner should be applied with a sponge or scouring pad. After letting it act for 2 or 3 minutes, it will be rinsed off with water.

2º.- Prevent the appearance of mold
Once the area affected by mold has been cleaned up, a product that destroys fungi and spores will be applied so that they do not reproduce again. For this I have used the Fungistop gel. Its application is very comfortable since the tube contains a sponge that makes it easier for the product to penetrate the affected area.
Contrary to the two products used previously, Fungistop should not be rinsed off with water. You just have to wait until it dries.
In any case, it is advisable to renew the joints over the years for better maintenance and conservation of them.

On the other hand, for prevent condensation and to prevent the formation of mold and damp due to this problem, the plaster or plaster will be puttyed with Aguaplast Anti-Condensation. Its application is similar to that of other plastes:
- Mix one part of powder with half of water until you get a homogeneous paste. For example, for 500 grams of powder, you will need 250 ml of water.
- Apply with a spatula or trowel depending on the size of the surface to be covered.
- Wait between 12 and 24 hours for it to dry. The time will depend on the thickness of the layer and the environmental conditions.
When dry, the entire surface will be sanded smooth and ready for paint application.

3º.- Paint the surface
The last step will be paint the surface with a special paint for walls where condensation moisture is generated. In this sense, Lisomat Anti-condensation has the following advantages:
- It is a matt acrylic paint with anti-condensation, thermal insulation and noise dampening properties.
- It resists water and ambient humidity, protecting against the appearance of bacteria, molds and fungi. It is also breathable to water vapour.
- It is water-based and can be used both indoors and outdoors.
For its application, you can use a brush or roller and dilute it with 5% water to achieve greater penetration. The touch dry time is one hour and the repainting time is 24 hours. In my case, I applied two coats of paint.

After following all these steps, the result is as if you have never had mold in your life. My shower finally looks like new again, plus I can now breathe healthier air.

I hope that this step-by-step guide will definitely help you to remove mold condensation from your home. If you liked this post, you can find many more DIY guides at .


