Part I: Making the lampshade
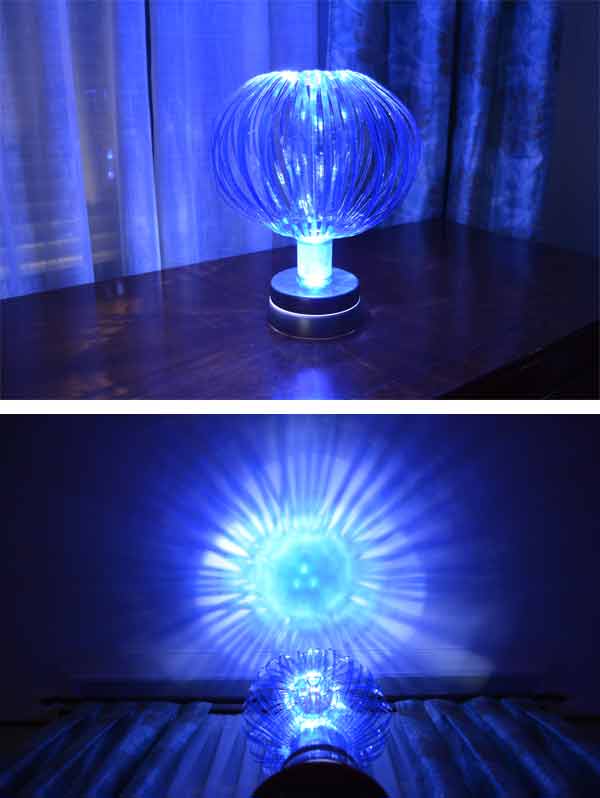
an original globe lamp It is the project that we are going to carry out on this occasion, activated by means of a “push” mechanism, and made practically entirely with recycled materials.
We have been receiving for some time, from many of you, repeated requests regarding our video “1000 creative ideas to recycle plastic bottles”, in which you request the instructions to make one of the crafts included in it. Specifically, it is the one that appears on its cover: a decorative balloon made by recycling a bottle.
Although it is true that we had other projects in the production queue, including some already started, given so many requests for this craft, we decided to do it before any other.
If you like creative crafts made with plastic bottles, you can see these articles, in which we have compiled a lot of ideas:
VOLUME I VOLUME II
On the other hand, and to be as respectful as possible with the environment, the lighting system that will be installed in this globe lampwill be made up of 3 leds.
Due to its complexity, we have found it necessary to do it in two parts.
A first tutorial in which we are going to make the lampshade, transforming a plastic bottle into an original decorative balloon.
And a second tutorial in which we will adapt this balloon turning it into an original globe lamp desktop push.
VIDEO
Materials we will need
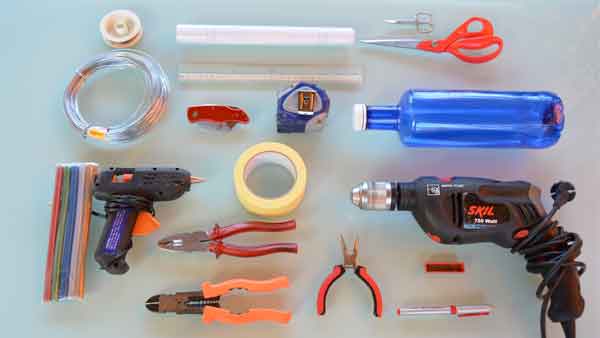
For this first part we will need the following materials:
- A liter and a half or two liter plastic bottle. We must choose it of some color that later shines.
- Masking tape.
- Adhesive plastic sheet (the kind used to cover books).
- ruler and meter
- Fine tip permanent marker.
- Cutter.
- Scissors.
- Drill and drill bit for small diameter metal.
- Nylon thread (line).
- A piece of finite wire.
- Pliers
- Hot glue gun.
Process
Well let’s go there…
Step 1: First of all we have to remove any type of label that may be attached to the bottle, as well as the seal.
Then as, when pressing, it sinks inwards, to be able to handle it more comfortably, we will fill it completely with water.
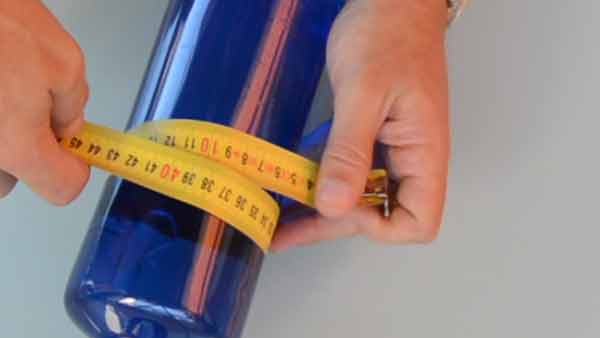
Step 2: Once this is done, we start by measuring the area that we are going to cut out of the bottle.
We will measure both its height and its circumference.
Step 3: Once we have the measurements, we will make the cutting guide, which consists of the following:
We transport these measurements on the adhesive plastic sheet, tracing a square or rectangle, depending on the measurements we have.
Before drawing the lines, we have to divide the length of the circumference, which in this case is 28 cm, by the number of strips we want to draw.
The narrower they are, the greater the number of strips.
We should try to square them so that they all come out the same size.
I will make them 5mm, so I will have to cut 56 strips.
Once we have this clear, we measure and trace all the lines on the plastic. And we cut it by its 4 edges.
Step 4: As the adhesive that this plastic has is very strong, we will first cover the bottle all around it with masking tape, which has a much softer adhesive.
Also, as the latter is light in color, it will make it easier for us to see the lines where we are going to cut.
Once this is done, that is when we stick the adhesive plastic.
We must do it carefully and placing it completely straight. To do this, we will draw a completely vertical line that will serve as a reference for its placement.
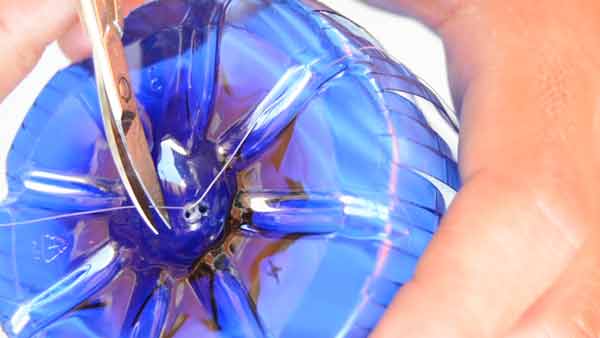
Step 5: Now we empty the water, and before continuing, we are going to make two very small holes in the center of the bottom of the bottle. I am going to use a 2mm diameter metal drill bit.
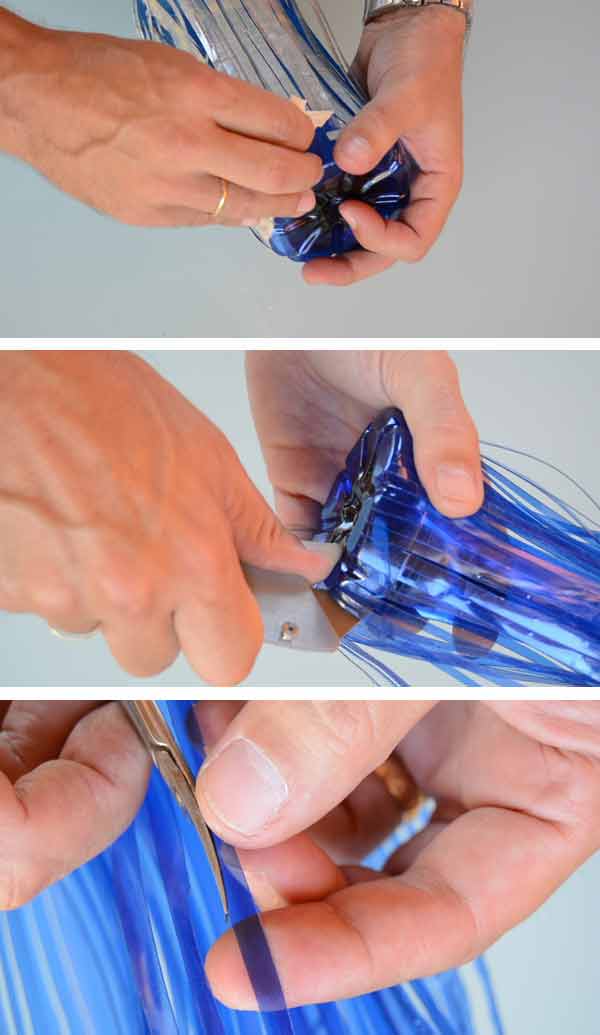
Step 6: And now is when we start with the cuts.
We are going to make the first cut completely with the cutter. The rest we are going to start all the cuts with the cutter, approximately 4 or 5cm and, from here, we will continue and finish them with the scissors.
We’ll have to do it slowly and carefully.
If we use small scissors, but they are straight, instead of curved as it appears in the video, it will be easier and we will reduce the risk of breaking any of the strips.
This process takes time. Don’t rush and be patient.
As you cut, part of the plastic glue will adhere to the cutter blade. Therefore, when you have made some cuts, you will notice that it does not cut well. From time to time clean the blade with a little solvent or alcohol. But be very careful. Keep in mind that a cutter cuts like a straight razor.
The last cut is the most difficult to start, since the plastic is totally inert.
You may very well have to improvise. Be imaginative!!
Step 7: Once all the cuts have been made, carefully remove the plastic and bodybuilder’s tape.
We review all the beginnings and endings of each cut to match them and leave them at the same level.
We also go over with the scissors any defect that we can find.
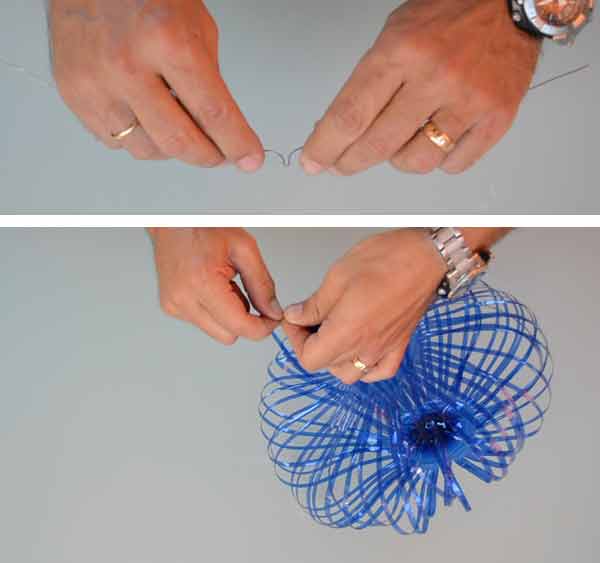
Step 8: Now we have to manage to introduce the nylon thread through the two holes in the ass, tie a knot, and pass the end of the thread into the bottle, pulling it out through its mouth.
As seen in the video, both the drills and the thread are completely invisible.
Step 9: Now we tighten the thread and tie the end that we have taken out through the mouth of the bottle, to some small object. It doesn’t matter, one you have on hand. This step is temporary.
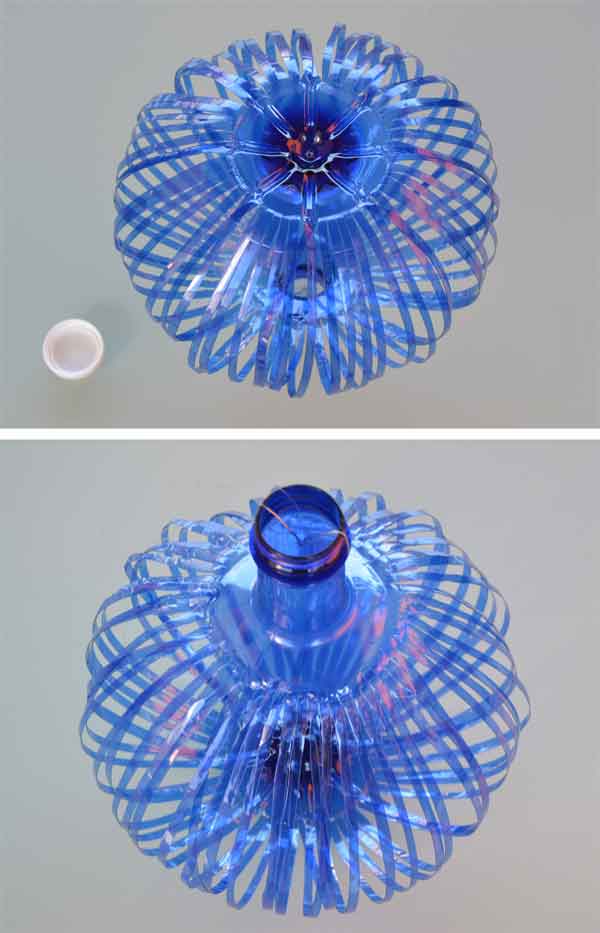
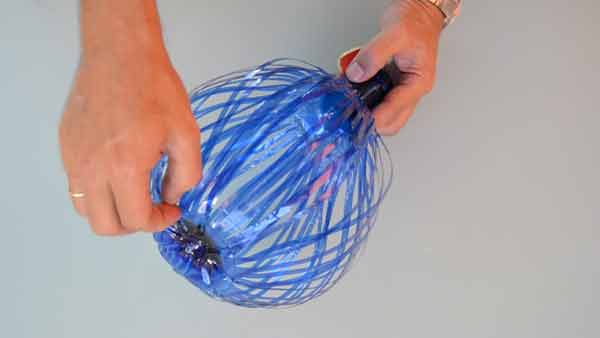
Step 10: In the previous step, we have left the bottle with a somewhat strange shape. Therefore, now we have to mold it and give it the desired shape.
We must dedicate the necessary time to this step.
We will fold the strips, both at the top and at the bottom, outwards to give the shape of a balloon. Doing it very carefully.
Then we will repair the strips that may have been broken.
Step 11: With the cutter, we will make two small notches in the neck of the bottle that are facing each other. Here we will anchor the hook that we will see in the next step, so that it is flush.
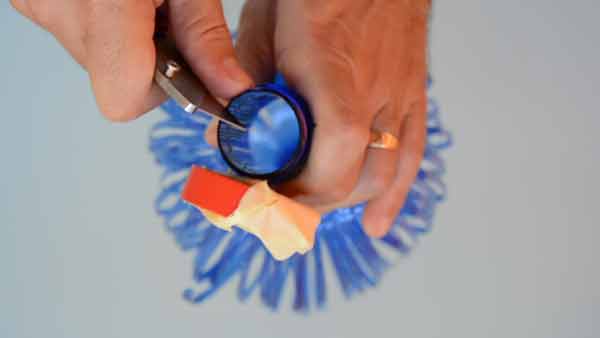
Step 12: With a piece of wire, we must make a tiny hook to catch it inside the neck of the bottle.
Therefore, we remove the provisional fastening from the thread, we tighten the line and, once in the desired position, we tie it to the hook and place it in the two notches from the previous step.
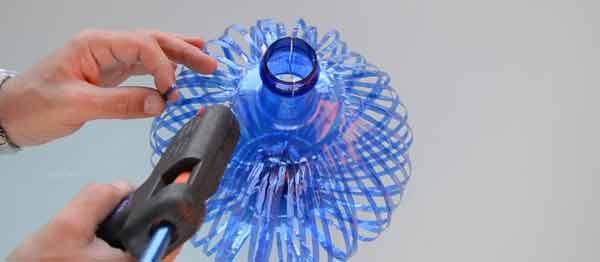
Step 13: In the event that a strip has broken, as is the case, we will have to use the glue gun to weld the loose strips. Otherwise, we would skip this step.
As the thermo-adhesive comes out at a high temperature, at the same time that we apply a droplet, we have to go blowing, and sticking the end of the strip.
We will continue blowing for several seconds.
If we didn’t do it this way, the end of the plastic strip would melt and not stick.
Well, we have finished the lampshade for our globe lamp.
Don’t forget to save the plug, we will need it in the 2nd part of this tutorial.