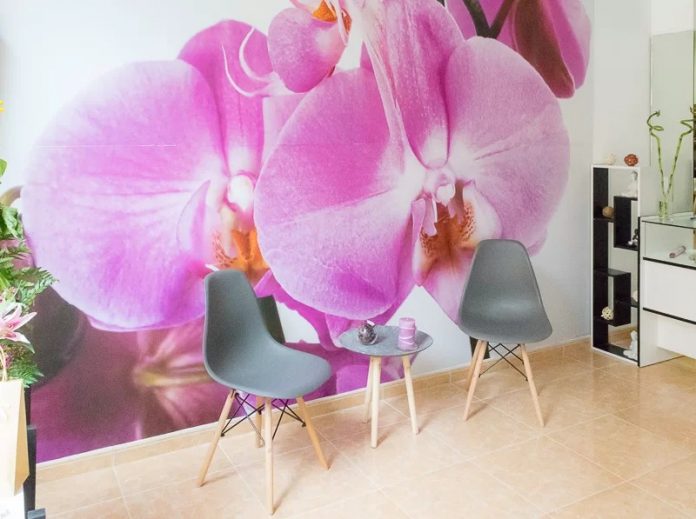
Do you want to highlight any of the walls of your home with an original and different decoration? With a wall mural you will get it quickly and cheaply. To know how to do it, do not miss this tutorial with all the keys to install a mural on the wall and get a professional result.
Wall murals are large-format photographic reproductions that represent motifs or landscapes. Although they are very similar to wallpaper, they differ in that the photomural is based on a single image, while the wallpaper repeats the same pattern.
Although its installation is very similar to that of wallpaper, there are a series of factors that you must take into account so that they are perfect. For this reason, do not miss this guide to install a mural based on my own experience.
Materials to place a mural
Have everything ready and at hand tools and accessories necessary for the installation of a wall mural will save you time and will make your work much easier.
Ladders
Due to the dimensions of a standard wall mural -normally 2.6 meters high and 3.6 meters wide-, stairs are essential for its installation. The aluminum step ladders They are the most suitable for carrying out this type of work, since they are light and easy to move and transport.
On the other hand, it is essential to feel safe on the ladder since a fall can have serious consequences. In the guide on Falls during the work of the Secretary of Occupational Health and Environment of the Community of Aragonsome rules for the use of stairs are recommended in order to avoid accidents:
- Fully extend the ladder turnbuckle before climbing on the ladder.
- Always climb facing the ladder, holding on to the rungs and not to the crossbars.
- Do not upload more than one person at the same time, or move it if there is someone on top.
- Use tool bags or belts to keep them close at hand and avoid going up and down more than necessary, or forcing movements to reach them.
- Choose a suitable ladder size to have a good working height.

Level, meter and pencil
The mural is usually divided into several parts or panels to facilitate placement. For everything to fit perfectly, it is convenient previously mark the size of the pieces on the wall with the help of the level, a ruler and a pencil.
A trick that will help us to have a little margin is to place bodybuilder or painter’s tape on the mark made. In this way, it will be easier for us to see the delimited area.

Putty knife, putty and sandpaper
Before placing the photomural, all holes, cracks and imperfections that the wall may have should be putty and covered. To do this, you will need both wall putty, such as a putty knife for its application, as well as sandpaper to smooth the surface once it has hardened.
brush and roller
In order to adhere the photomural to the wall, you will need a brush to impregnate the paper with the glue and a roller to pass it pressing on the photomural. In this way, we will ensure good adhesion, while minimizing air bubbles.
When choosing the brush, it is convenient that it be wide to glue in the shortest possible time. On the other hand, a short-haired roller that is stiff enough to exert pressure, but without damaging the paper, is recommended.

Scissors, cutter and needle
Nail sharp scissors They will come in handy to cut the excess part of the wall mural if necessary. Also, we will need a cutter to cut the paper on light platelets and plugyes, as well as a needle to puncture any air bubbles that can be formed.
How to install a mural step by step
When installing a wall mural you should also take into account this guide with 7 mistakes to avoid when putting up wallpaper.

In addition, there are a number of peculiarities in the installation of photomurals that differentiate them from wallpaper:
- With wallpaper you can square the motif or pattern on the fly. In the case of photomurals, it is necessary to be very clear in advance about the order and placement of the panels in order to glue them one by one.
- If the mural is large, you will need another person to help you raise and square the upper panels. In this case, each panel was 1.80 meters wide, so I needed another pair of hands to help me hold one end so it wouldn’t bend.
- In general, the handling and placement of the panels of a photomural is superior to that of the sheets of wallpaper due to their size.
Taking these differences into account, the steps I followed to install the wall mural were the following.
1º.- Prepare the wall
The wall on which the mural is to be placed must be clean, dry and smooth. For this, it will be necessary to putty and sand holes, cracks and irregularities. Once the wall is uniform, the size of each panel will be marked with the help of the level, ruler and pencil to facilitate its subsequent placement.
On the other hand, in the event that the wall paint is a synthetic enamel, for better adhesion of the photomural it can be primed with the same glue that is used to fix the paper.
2º.- Prepare the glue
The photomurals usually carry the glue for placement. This comes in powder form and has to be mixed with water for preparation. You have to be careful with the preparation instructions and amounts of water, since otherwise the glue will be very liquid and will moisten the paper too much.
In this case, the water got out of hand and the glue didn’t adhere properly, so I replaced it with ready-made vinyl glue. Whether using the glue that incorporates the photomural, or one already prepared, the steps to follow are as follows:
- Apply a thin, even layer of glue to the back of the paper with the brush
- Wait between 3 and 5 minutes for the paper to absorb it before placing it on the wall
3º.- Install the mural
For install the different panels of the mural It will start with the one on the lower left. Once it has been aligned on the mark previously made on the wall, the paper will be smoothed with the roller. To do this, always make movements from the center to the edges in order to avoid air bubbles.
Next, place the lower right panel without overlapping it with the previous one and continue with the upper left and right, respectively. In general, regardless of the number of panels that make up the mural, they must be installed from left to right, and from bottom to top.
Once the wall mural has been placed, remove with a damp cloth any excess glue that may have dirty the drawing part of the wall mural.

4º.- Touch-ups and removal of air bubbles
It is recommended to wait about 24 hours for the photomural to dry completely before trim the excess part and eliminate air bubbles. This is because some of the bubbles are reabsorbed during the drying process.
To remove bubbles, click on them and wipe with a dry cloth. If the paper does not adhere because the glue has already dried completely, a trick is to infiltrate a little glue through a syringe.
Finally, after following the steps indicated above, this is how the wall mural is installed and which you can find here.

I hope this guide with the keys to install a mural on the wall help you when creating your own personalized wall decoration. If you liked this post, you can find many more DIY guides at .


