

lacquer the doors, whether from a closet or passing through, it is a quick and cheap way to radically change their appearance, update them and make them integrate with the decoration of our home. It is not a very complicated job but a series of guidelines must be followed to obtain a good result. Read on to know how to lacquer the doors step by step.
UPDATE: How to strip and lacquer doors
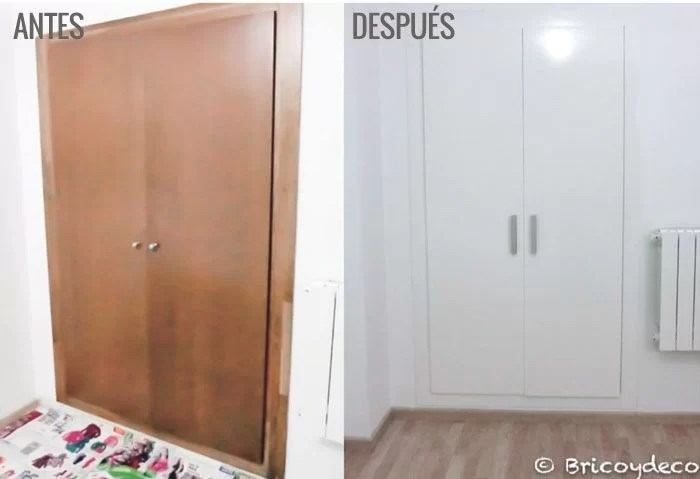
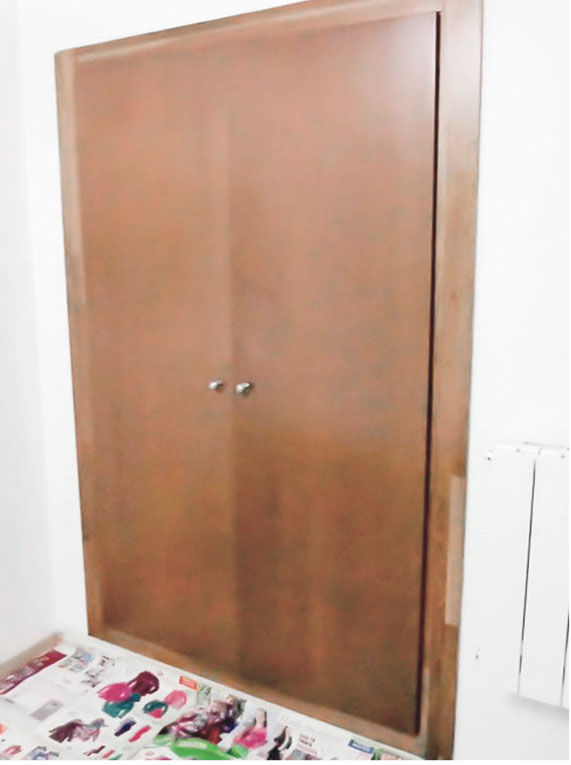
In my particular case, I wanted to renovate the doors of the built-in wardrobe in one of the rooms because I didn’t like the original color, it seemed outdated and it also didn’t match the rest of the furniture in the room (white). Ordering new doors was out of my budget, so for just over €30 I changed their look.
Materials
These are the materials we will need:
- medium grit sandpaper. If we are going to sand by hand, it is better to use a sandpaper block to avoid burning with friction.
- Varnishing rollers of various sizes. If the roller is made of virgin wool, the shorter the hair, we will obtain a more uniform surface, and if it is made of foam, it is better to choose those with less porosity.
- Brush for corners where the roller does not reach. It is important that it is of quality and does not lose hair.
- paint tray.
- Sealing primer for wood. Although there are several colors on the market, if we paint the final color on a white base we will obtain a brighter tone.
- acrylic enamel. I consider it very important that it be a quality enamel, resistant to bumps and scratches (frequent on doors), that does not degrade and yellow over time.
- Masking tape and floor protectors. It is better to cover than to clean…. by experience.
How to lacquer doors step by step
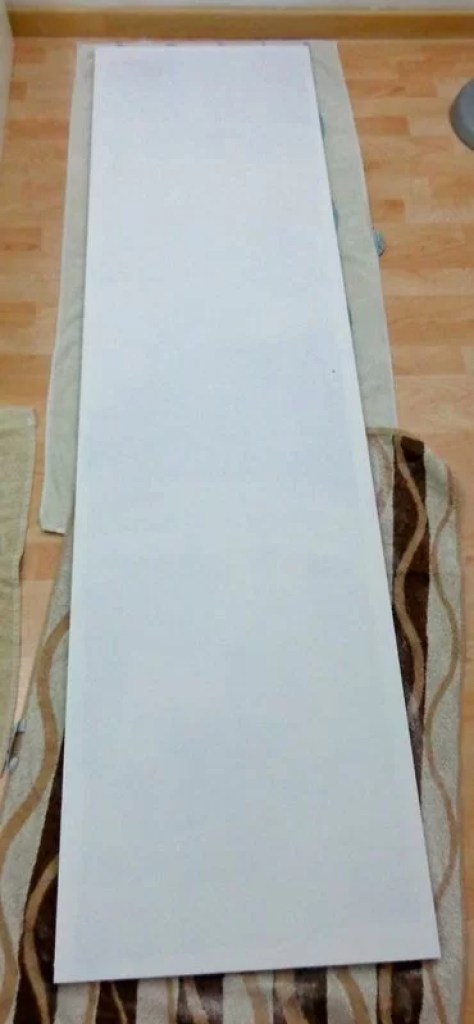
STEP 1: Cover
Must cover well with masking tape the edges of the frames so as not to dirty the wall, as well as to cover the floor. It is a laborious and boring job but essential for a good finish. It is also convenient unscrew hardware and handles to be able to better access all the corners when we paint.
STEP 2: Sand
Sand following the direction of the wood grain and insist on the areas where there is some friction or chipping, applying putty if necessary.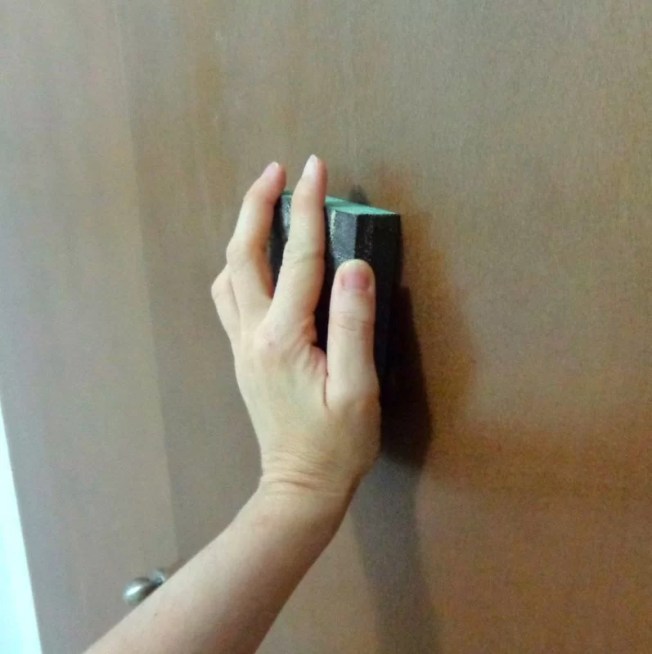
Step 3: Clean
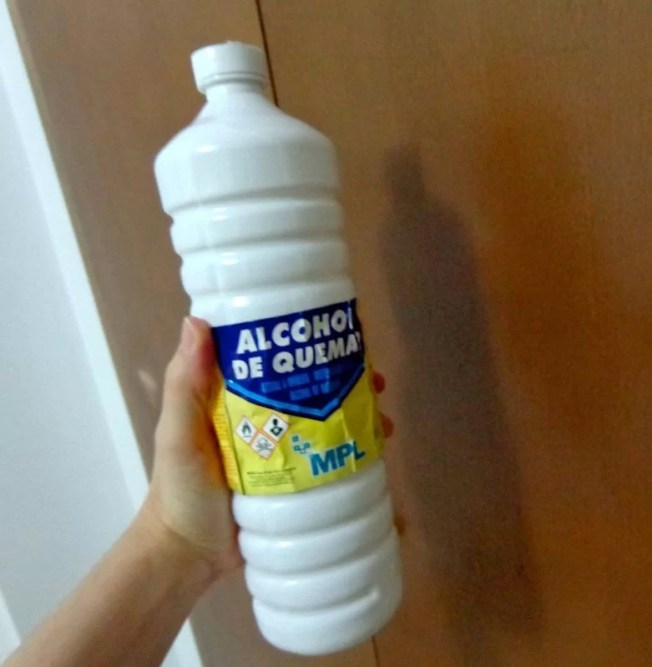
So that Adhere primer well It is very important that the surface is clean of products and waxes. Also it is very important that we clean the dust that is made when sandingFor this, it is very effective to wipe with a damp cloth after sanding and even the vacuum cleaner with the carpet accessory so as not to damage the surface of the door.
In my case, to clean the door after the first sanding, I used methylated spirits.
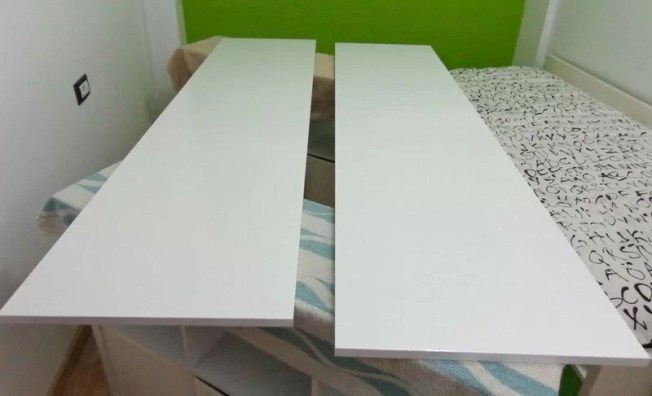
STEP 4: Apply the primer
Once we have the door perfectly clean and dry, we will apply the first layer of primer. In principle, it is as simple as rolling the roller, but I recommend that it be of quality since, the more uniform the primer layer, the less sanding will be necessary and the better the base for the final painting will be.
I particularly recommend always giving two coats of primer since, as happens when building a house, it is very important to have a good foundation to obtain a better result. Respect the waiting times recommended by the manufacturer for sanding and applying a second coat. It is also very important that we do not forget that After sanding, the surface must be cleaned. with a well-wrung cloth or by vacuuming carefully, so as not to leave any trace of dust on the surface to be painted.
Step 5: Apply the polish
The enamel must be applied evenly, trying to impregnate the entire surface in the first roller pass and trying to cover well in the following ones. You do not have to press hard on the roller so as not to drag the paint with the passes, but rather slide it gently.
As with the primer, the times recommended by the manufacturer for the application of the second layer must be respected.
It is very important that we choose a quality paint since, in the long run, it is cheaper to spend a little more now than stripping and repainting the door every few years.
STEP 6: Place handles, fittings, moldings…
Once everything is dry, we can go back to place the doors, change the handles, apply moldings, vinyl, etc.., In my case I have changed the handles for more modern ones.
As you see the process is not excessively complicated but it is laborious and requires patience. It is not like in DIY programs that have everything painted and placed in one day, you have to respect the drying times, which depending on the sealant and paint used can be 24 hours.
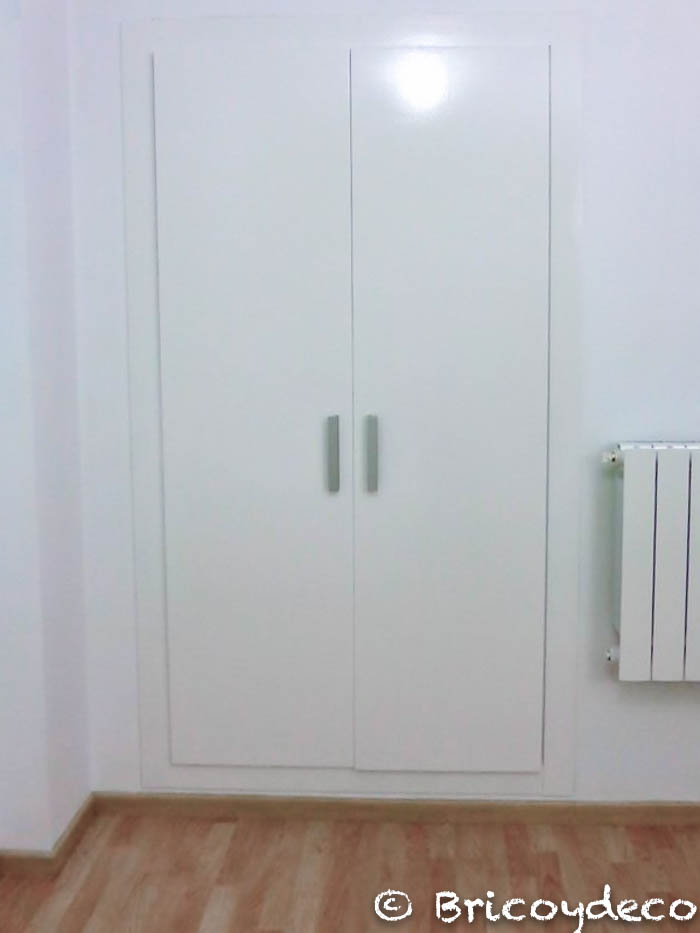
I hope that with these tips you will be as satisfied with the final result as I have been. Now the wardrobe goes practically unnoticed, the room even seems larger, before it was the discordant note, it seemed like a goop that was not in tune with the decorative style of the room, nor with the color palette of white and green tones. What do you think about it? I hope this tutorial has been useful for you. how to lacquer the doors step by step and encourage you to try.


