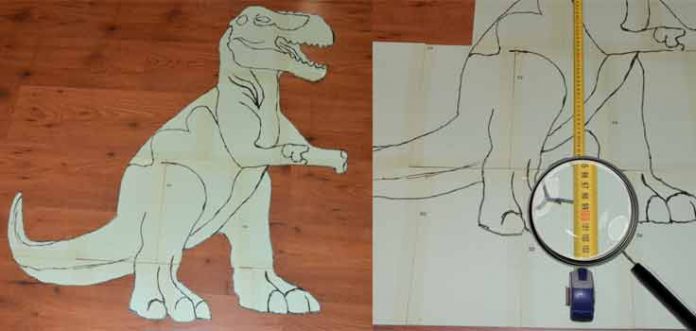
Today we bring you an article that, in addition to being a craft in itself, will help you make many other crafts and even DIY.
This is the procedure for templates for crafts of great dimensions, enlarging images of smaller size.
We have been receiving queries for some time, in some tutorials in which we have used large templates, about the way in which we make this type of templates.
This has made us reflect and stop to make a tutorial about it. So that anyone who wants to can use our method, which is just one of the many ways he can do it.
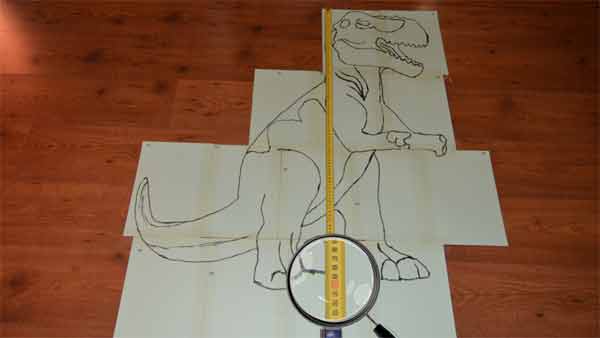
However, we have taken the opportunity to, as they say, “kill two birds with one stone”. Since the template that we will make in this tutorial, we will use it soon to make a children’s decoration craft.
Although it is true, you always have the option of having it printed in a digital print shop with practically no limitation, since the rolls they use are approximately 1m or 1.20m wide, by many meters long.
But if you want to work on it, in addition to saving a few euros, don’t miss this tutorial.
The making of our template for large-scale crafts is made up of several processes.
Go for it.
FULL VIDEO TUTORIAL
.
Image Selection
The first thing is to get the image that we will use as a base. Therefore, we will have to select the object from which we want to remove it.
In this case, it is a nice looking tyrannosaurus rex.
Whenever we are going to edit the photo later, it is convenient that we put the object on a base of a different color and a material that absorbs light, so that it avoids glare and reflections.
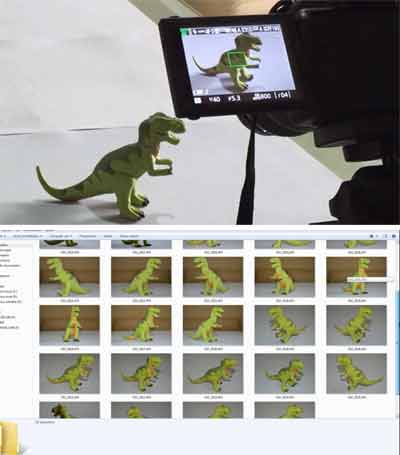
This area should occupy the entire photo frame, or at least most of it.
In this way, later we can more easily eliminate everything that surrounds the object, leaving only the outline.
This is the moment of the photo session. With the help of a tripod, so that they don’t come out blurred, we take quite a few photos.
With more light, with less light… With flash, without flash… From one angle, from another… Closer, further…
Do not cut yourself. Shoot photos to bore you. Keep in mind that the more photos you take, the greater the chance that there will be at least one that you like.
Once all the photos have been taken, we download the card to the computer and choose the one we like best. This will be the one we will edit now.
.
Editing the selected photo
We open the chosen photo with Photoshop, in our case. But you can use some other photo editing app.
Surely, the explanation of photo editing is much easier to follow if you see the video that you have a little above. However, I will try to explain it below as clearly as possible.
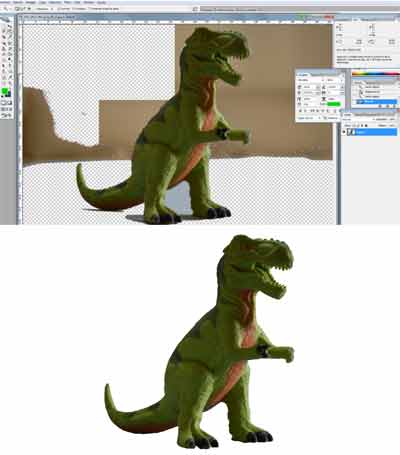 Well… we unlock the layer, by double clicking on the padlock.
We select the “magic eraser” tool.
And we are selecting the areas to delete, clicking and pressing the delete key.
The sensitivity of the magic eraser can be adjusted from 0 to 100.
If when clicking, the selection enters the image that we are cleaning, we must undo the selection, giving a new click, and decrease the sensitivity value.
We must also have the “edge smoothing” checked. With this, what we will achieve is that the edges of the areas that we are cutting are not pixelated.
From time to time we save the changes.
Once the image is completely clean, we adjust it to the edges by removing dead areas.
We print it in color on A4.
And we save it in image or Photoshop format.
.
Outline and main features of the template
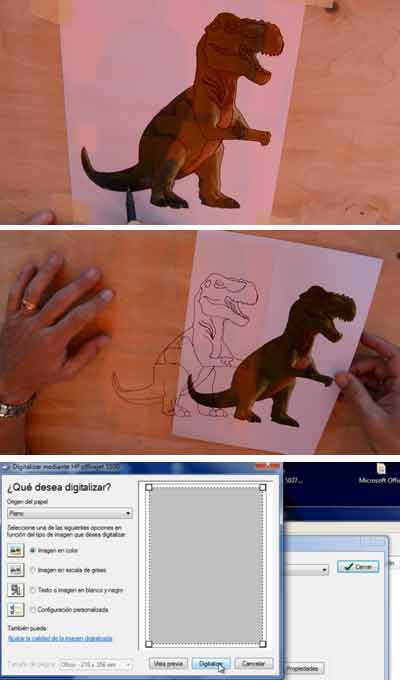
Now we are going to make the template.
To do this we are going to put a sheet of rigid transparent vinyl on the printed image. These are the covers that are used in offices as pastes for folders.
We hold them with a bit of adhesive tape so that they do not move, and we trace the outline and the main lines with an indelible marker.
Once the tracing is complete, we scan it.
Do not throw away the color image, since we will need it when painting the dinosaur.
We select jpg format, that is, image; we give it the maximum resolution, since later we will enlarge the image; we scan; and save the file.
.
Carrying out the extension
Now we will use Photoshop again. We open the new image that we have scanned, and resize it. In our case, we will give it a height of one meter with the width that comes out respecting the proportions.
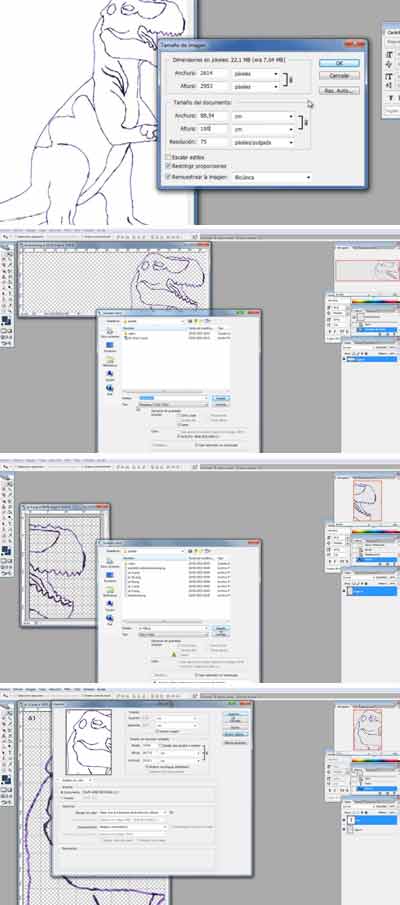 We remove the background with the magic eraser. This time it is much easier than before.
Now we resize the CANVAS, not the image.
We will give it a height of 28.7cm, corresponding to the height of an A4 sheet of paper, minus 1cm corresponding to the margins that are included when printing.
The width, for the moment, we will not touch.
In this way, the new images that we save will only be of the visible part.
We save as a new image… we select the visible part… we delete it… and we move the hidden part up, making it visible.
And we do the same procedure. We save as… We select… We delete… and we go up.
We already have the rows, now we are going to make the columns; as if it were a chessboard.
To do this, we retrieve the first of these last four images that we have created and, without touching the height, we resize the width of the canvas, setting it to 20cm. And we proceed exactly as before.
In order not to get confused when joining the different pieces, we are going to identify them with a letter per row, and a number per column.
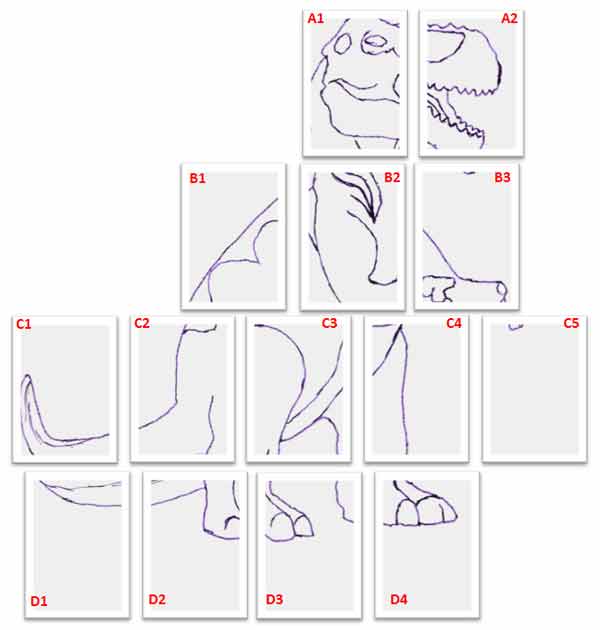
Once we have all the images, we will proceed to print them.
We click on “print with preview”, we check that the orientation of the paper is correct, and we print.
We are going to print directly on cardboard, since when handling the template, the more rigid it is, the better.
.
Making the composition
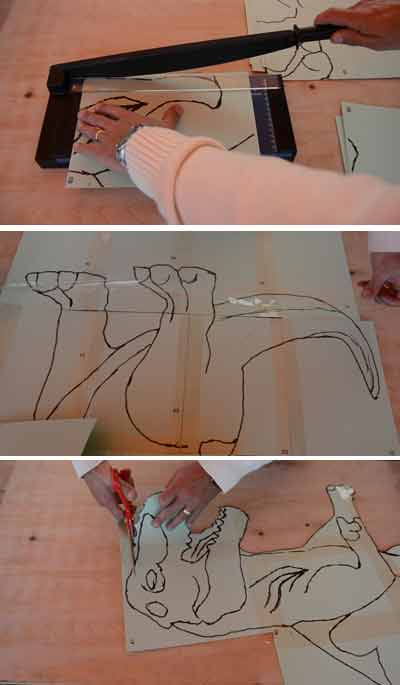
The easiest is missing. It remains only to trim the margins. To do this, we can use a guillotine, a ruler and a cutter or simply scissors.
Now we put all the pieces in their place, guided by the numbering that we have included previously, and we join them with adhesive tape.
And finally, we cut out the silhouette of the image. We already have our template ready to use it!!
With this system you can make templates for large-scale crafts, whatever the size.
As we said at the beginning of this article, we will soon publish a tutorial in which we will show, step by step, how to make a very cool children’s decoration craft, for which we will use this template. Subscribe and don’t miss it.
If you want you can download the template of this dinosaur. Here are the two links. The first corresponds to the template in one piece. The second is a file with the 14 images that make up the dino.

Download actual size template

Download the 14 parts of the template


