

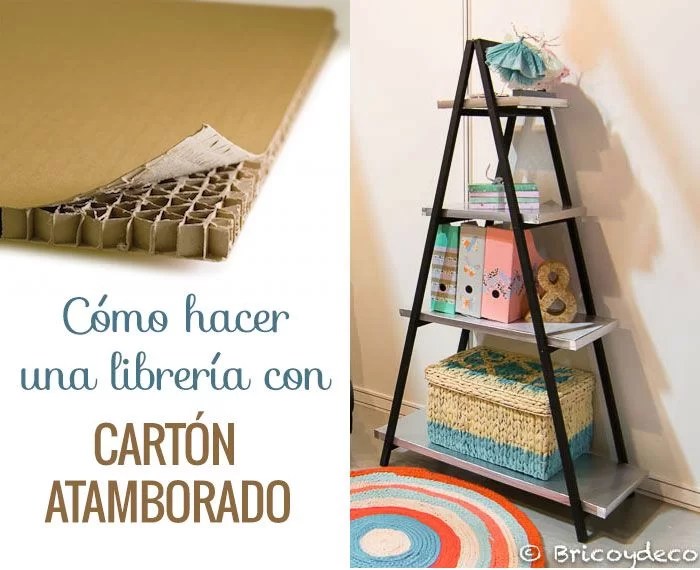
A few weeks ago I bought some tables that were protected with corrugated cardboard of different thicknesses. Instead of taking it to the paper container, I decided to bet on creative recycling and after considering several options, I thought I could take the opportunity to make a bookcase with cardboard.
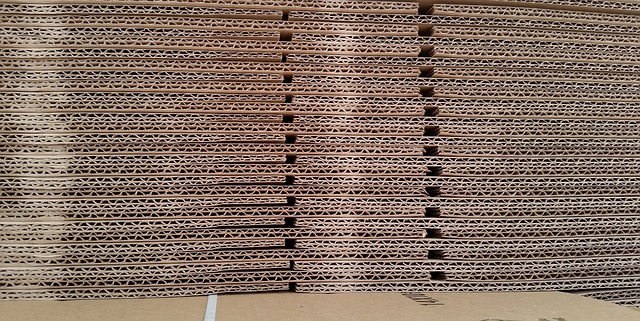
The corrugated or honeycomb cardboard is usually used as a filler in the manufacture of doors and furniture, since in this way less wood is needed in its construction and costs are lower. Despite its lightness, its hexagonal alveolar structure (honeycomb) provides it with great resistance, and the fact that the raw material is paper makes it 100% recycled and recyclable.
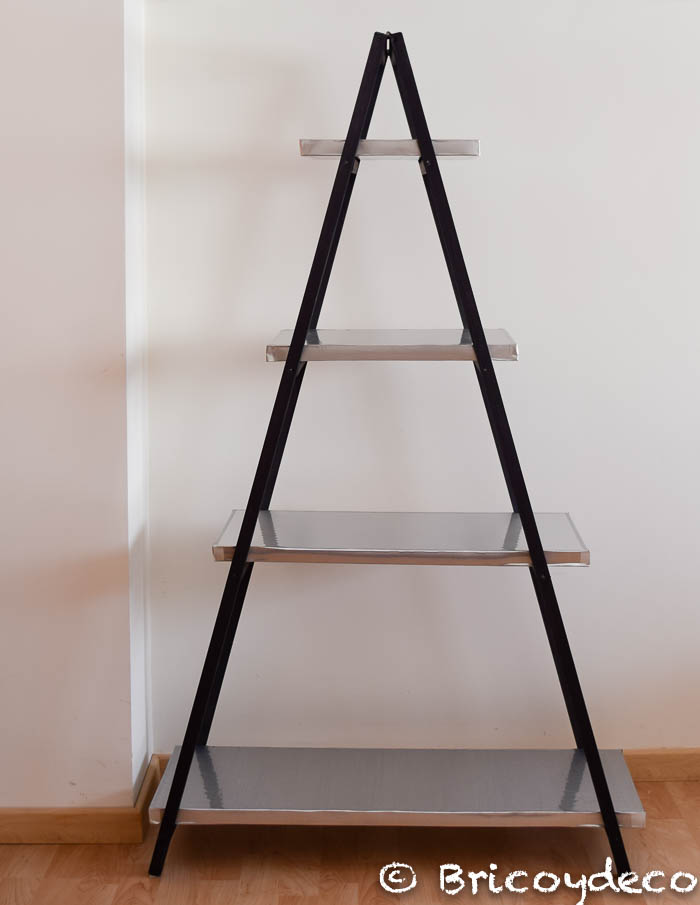
After checking the resistance of the cardboard that came as protection for some tables that I had recently bought (I even sat on it), I decided that I was going to take advantage of it as shelves for a bookstore. The first thing I did was buy some pine wood slats (sold in DIY centers) and build a kind of ladder with them, you just have to make two rectangular structures with several slats placed horizontally (crossbars), like if they were the train tracks.
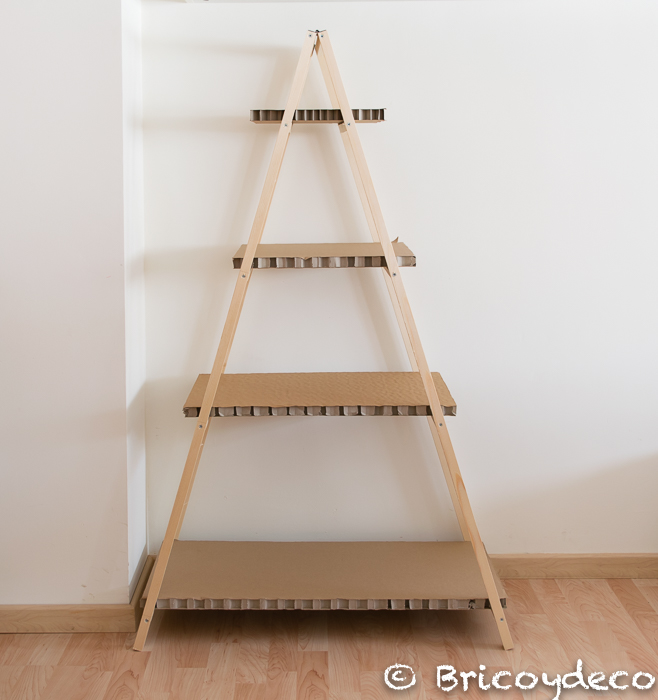
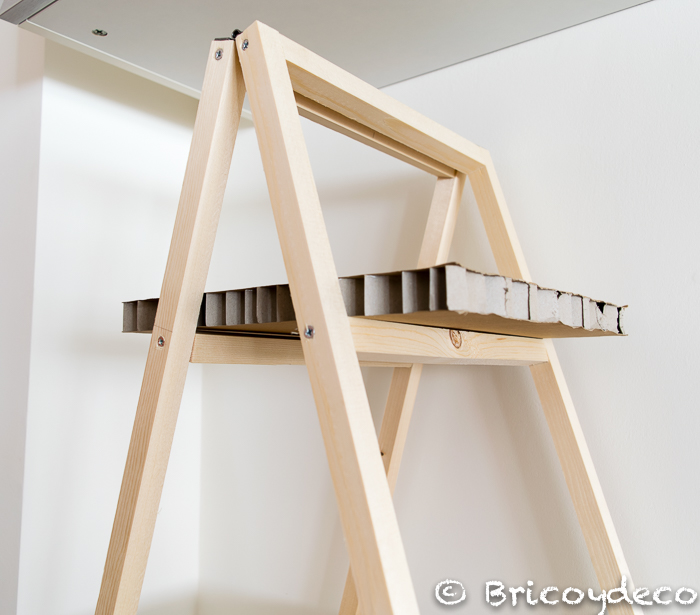
crossbars they were fixed to the side slats with several elongated screws or lag screws and the two rectangular structures joined at the top with a pair of hingesin this way the ladder could be opened or kept folded.
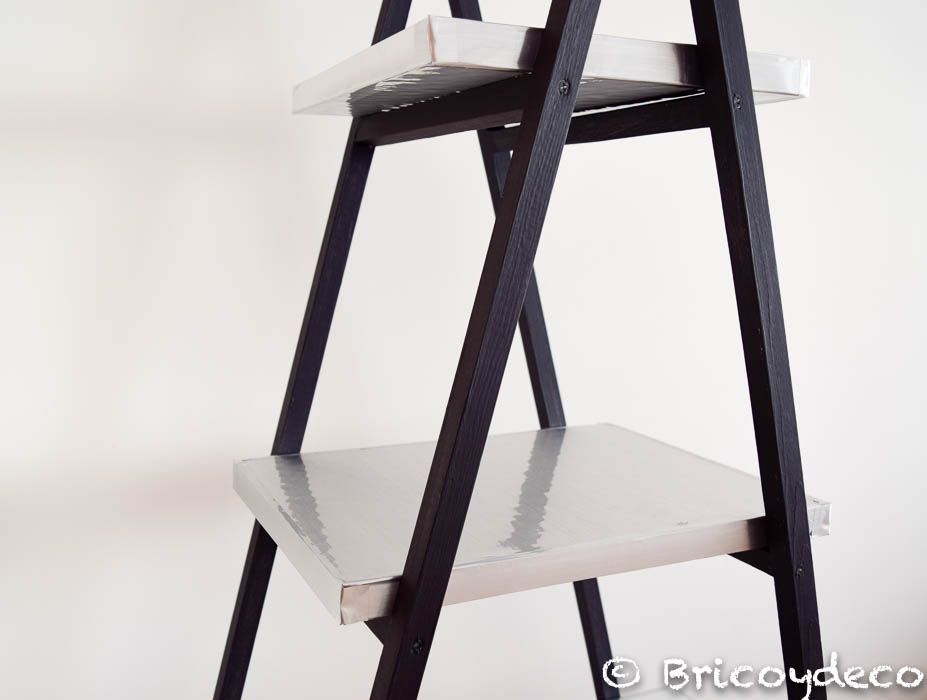
The next step was to decorate the bookcase, to do this I first sanded the slats to remove roughness, then I gave it a homemade primer (in this link you have the recipe) and, once it had dried, I applied a layer of colored acrylic enamel. Matt black. To apply the enamel I used a round brush since I was interested in the brushstrokes not being uniform and obtaining a slightly stripped appearance.
Next I cut the cardboard shelves to adjust the width and length to the wooden structure. Cutting this type of cardboard is extremely easy, you only need a cutter. First, a cut is made on the upper layer of cardboard, then the cutter blade is plunged to continue cutting the internal alveolar structure until reaching the bottom of the cardboard.
Once I adjusted the size of the shelves, the next step was to trim the sides. This part was a little more complicated due to the number of gaps that make up the honeycomb structure and that make it difficult for the edging strip to adhere, so what I did was put it on with adhesive tape that was wider than the edging tape and gluing it to the top and bottom of the shelf.
Finally I covered all the cardboard (including the edges) with aluminum effect vinyl, in this way the shelves looked metallic and gave the bookcase an industrial look. The aluminum or stainless steel effect vinyl is usually used to cover appliances but as you can see it is great to place on other types of surfaces such as cardboard in this case (you can find it at this link).
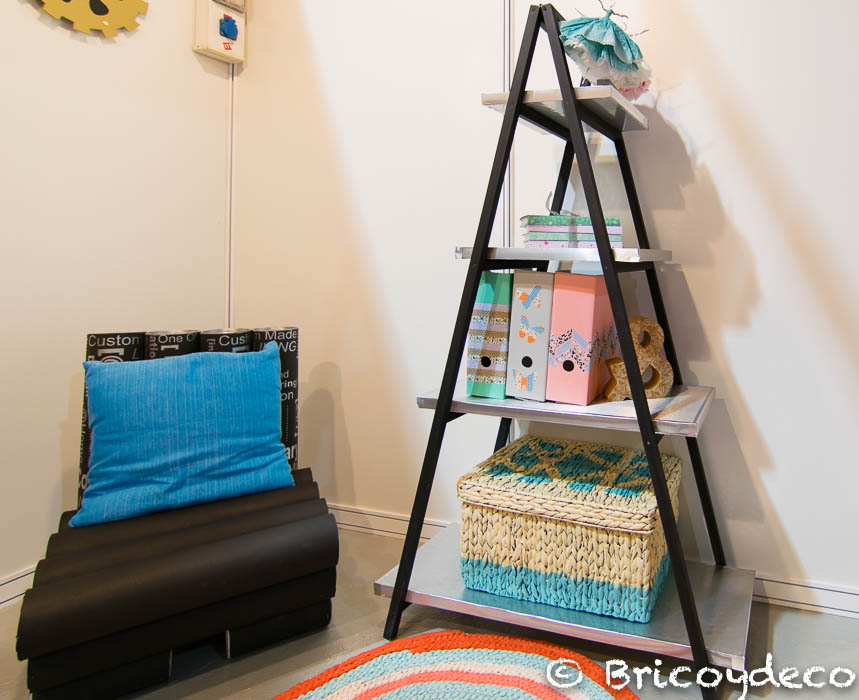
Now all that remains is to place the objects that we are going to store in the bookcase on the shelves and that’s it.
You have already seen how in a few hours you can have a practical and functional bookcase using mostly recycled or recyclable elements. Its lightweight and foldable structure makes it easily transportable and ready to set up and take down in no time (ideal for parties and events). Do not be afraid to add weight to it because the corrugated or honeycomb cardboard is more resistant than it seems, in addition to having been lined with aluminum effect vinyl we have managed to waterproof the surface and make it more resistant to wear.
What did you think of this boarded cardboard bookcase? Personally, I think that it is a clear example that cardboard furniture does not have to look coarse or “shabby”, but can be given a finish so that, in addition to being practical and functional, it is decorative.
If you liked this post, you can see much more creative recycling and DIY ideas at .


