

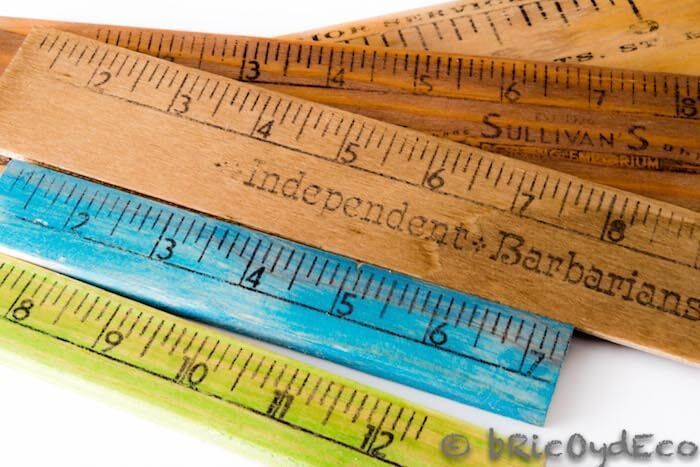
The other day I showed you 11 ideas to recycle wooden rulers and some of you liked it so much that you asked me where you could get these types of rulers. Although they can still be found in haberdashery, tailor or fabric stores, they are not easy to get, so I decided to make my own. DIY vintage wooden ruler.
You know my motto is “search, compare and if you can’t find it, do it yourself!«, since there is no better way to get exactly what you want and surely for a cheaper price. In this particular case it is much easier make our own vintage wooden ruler to bother looking for it.
The materials that we will need they are very easy to find, at first it may seem that many materials are needed but if we are fans of DIY and crafts, the vast majority of them we already have at home and some can even be recycled.
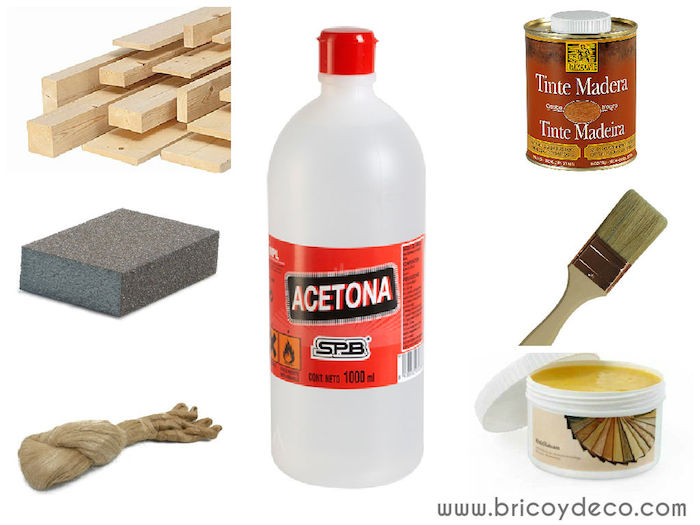
– Wood Ribbons. In my case I have used wooden slats that I have left over from other DIY projects but they are very easy to find in any DIY center, as well as cheap since they can be bought from 1 euro.
– Acetone. This commonly used solvent can be easily found at drugstores and DIY centers. We only need a small amount so with a small container we will have more than enough. Be careful not to confuse acetone with nail polish remover, as some nail polish removers contain acetone and others do not.
– A small metal spoon (stainless steel for example), the important thing is that it is resistant and does not bend.
– A printing or photocopying made with a laser printerthose made with ink jet printers are not valid.
– A cotton rag. I usually use old t-shirts to make rags.
– A sandpaper or sandpaper block.
– A brush or brush
– Wood stain or acrylic paint. I remind you that acrylic paint and acrylic enamel are not the sameAcrylic paints are the ones used to paint pictures and small objects and they go in tubes.
– wax for wood. It can be natural or colored wax, if it is colored you can do without the wood stain.
– Tow to polish the wax. This material is optional since you can also polish the wax with a cotton cloth, although I particularly like how the wax looks after polishing it with bast.
Once we have all the materials we will get down to work. The steps we will take to make a vintage wooden ruler will be next.
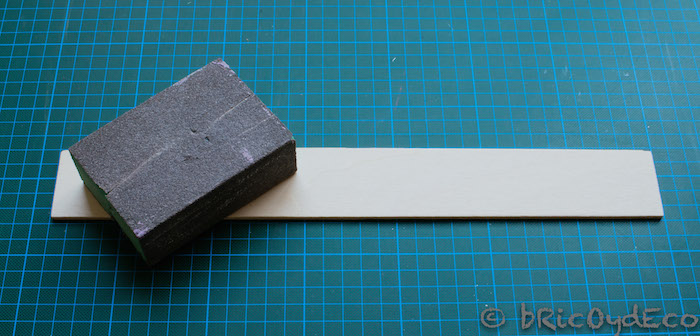
1º.- Sand and prepare the wood. always have to sand and prepare the wood before treating it since in this way we open the pore and eliminate imperfections. It is also important that we clean the dust that is produced after sanding.
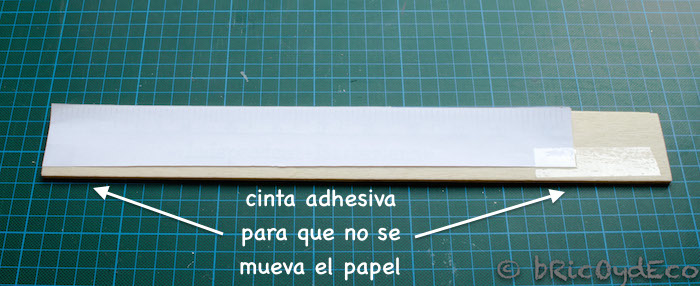
2º.- Carry out the transfer of the image. To do this we will have previously printed the image of the ruler on a laser printer. Keep in mind that the image must be inverted or mirror image, as seen in the photo. From this link you can download the vintage ruler templates that I have used to make this tutorial.
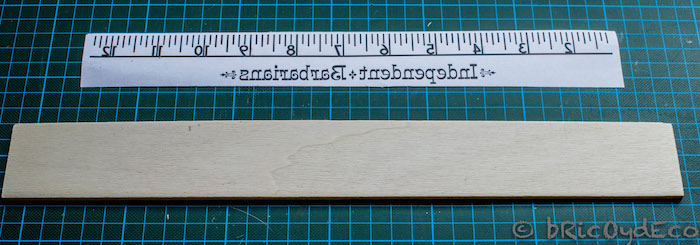
To transfer the image to the wood we will place the sheet of paper on the strip with the print in contact with the wood. So that it does not move it is convenient secure the sheet of paper with tape or tape so it doesn’t move. EYE! It is very important that when putting the tape we do it on a part of the paper that is blank, without any printing, since otherwise the transfer will not be carried out correctly.
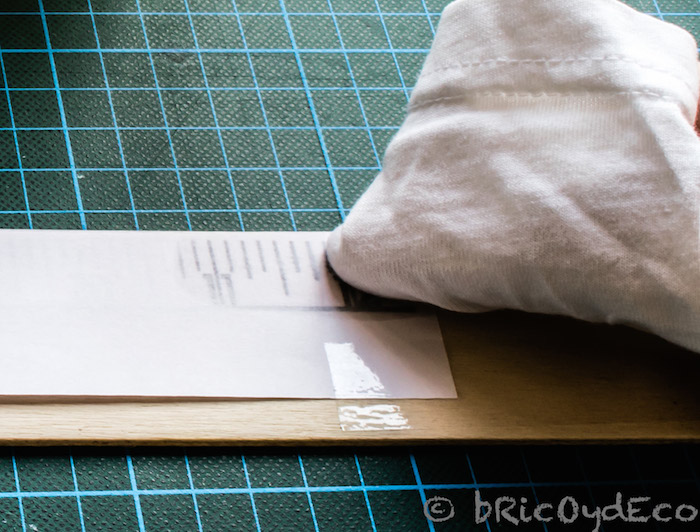
Next we will wet the cotton cloth in the acetone, with the help of the finger and pressing firmly we will moisten the paper so that we can see what is printed appear. If we had covered any printed part with adhesive tape, it would not be soaked with acetone, which is why it is so important that the tape is placed only in a blank area.
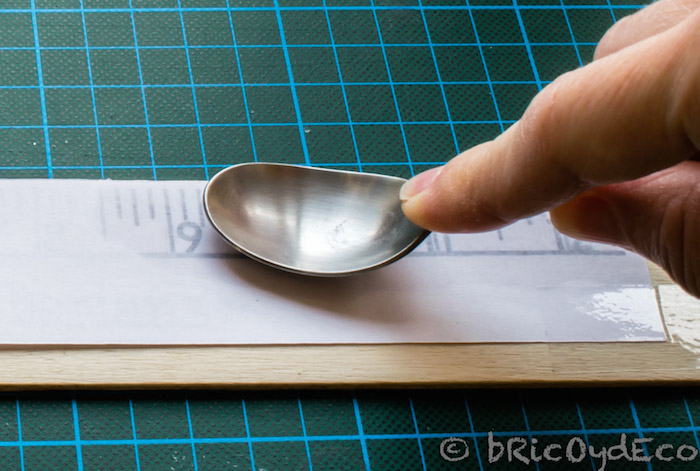
Finally We will help ourselves with the spoon to review the impression and better fix the ink on the wood.
Once these steps have been carried out, we will only have to remove the sheet of paper to verify that the transfer has been carried out correctly.
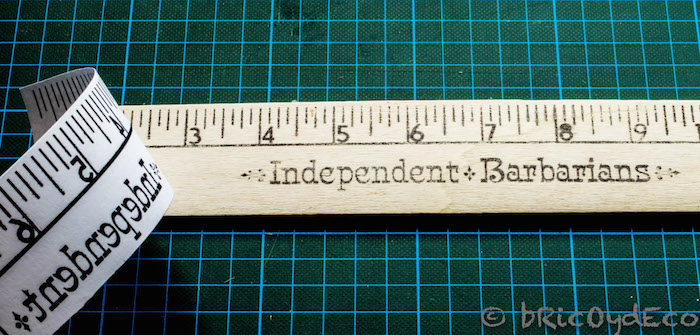
In the image above you can see that the transfer looks worn, this effect is perfect for giving the wooden ruler that vintage look, but if you want the transfer to stand out more, you just have to go over it with a pen or permanent marker.
3º.- Stain and protect the wood. To stain the wood you can use wood stain or acrylic paint if we want to give it color, in both cases it is very important to dilute both the dye and the acrylic paint and apply several layers until the desired tone is achieved.
In the case of wood, we have already seen how decorative it is to combine rulers with different tones. To dilute the dye we must check if it is a water-based or solvent-based dye, if it is water-based it is diluted with water and if it is solvent-based it is diluted with solvent (acetone, white spirit, etc.), that simple. In this link you can see more tips for staining wood.
Once we have applied the dye and it has dried, we will apply the wax to protect the final result. If the wax you are going to apply is colored, you can do without staining the wood beforehand. In this link you can see how wax wood step by step.

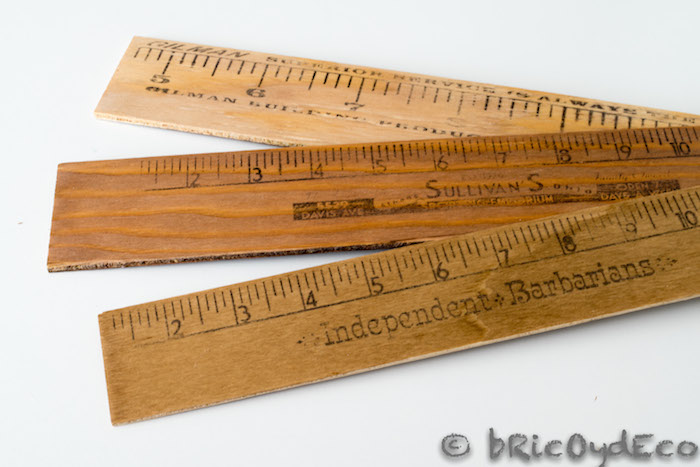
My advice is that you do not apply more than two coats of wax so that the wood is not too shiny, since the more matte it looks, the more its vintage appearance will be accentuated. In the following image you can see how the rulers to which I have applied stain for the wood have turned out. I have given each one of them from one to several layers of dye so that the shades are different.
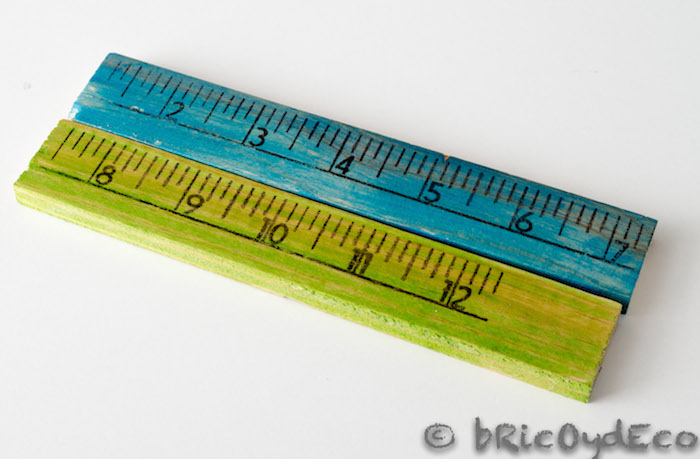
On the other hand, if you want to add a touch of color, you must first dilute the acrylic paint in water so as not to hide the transfer, then apply the wax in the same way as if you had used wood stain. In the following image you can see how the two rulers that I have dyed with acrylic paints have turned out.
What do you think of the final result? You cannot deny me that it is not easy to make your own vintage wooden ruler. You have already seen that with them you can decorate furniture, make coat racks, note boards, etc. In addition, with this tutorial it will no longer be a problem to find them because you will be able to create your personalized wooden rulers in the color and size you need for your DIY project.
If you liked this post, I would appreciate it if you shared it on your social networks.


