

Today we are going to share with you an essential project for any fan of DIY and crafts.
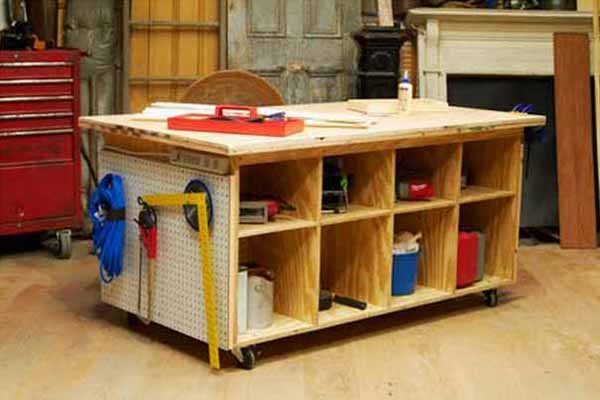
It is a complete workbench with which to work properly and comfortably, as well as where to store and organize a large part of our tools and materials. In this way, we can always have the tools we need at all times at hand.
It is a project that, at first glance, may seem complex and beyond our possibilities, but nothing is further from reality.
This article contemplates the cutting of all the pieces by ourselves, however, if you do not feel too confident or if for any other reason you prefer not to do it yourself, you can buy all the pieces that make up the cutting list that we include already cut. next. The choice is yours.
However, for the construction of this workbench No professional tools have been used.
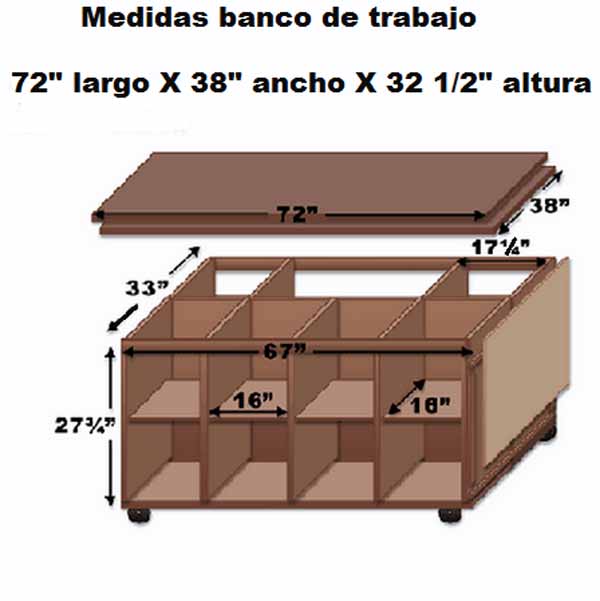
Exploded view and work plan:
We are going to use plywood. It is a material that is not excessively heavy, that works quite comfortably, and is quite resistant.
Below we detail each and every one of the pieces that we will need to carry out this project, as well as a plan for its construction.
 1) 2 Top plywood boards 19mm thick X 96.5cm wide X 183cm long.
two) 9 Plywood boards for the sides or sides of the frame of the
3) 1 Plywood board for the back of the workbench boxes 13mm thick X 70.5cm wide X 170cm long.
4) 1 Workbench bottom plywood board 16mm thick X 40.5cm wide X 170cm long.
5) 2 Plywood boards on the back of the small boxes 13mm thick X 44cm wide X 70.5cm long.
6) 2 Plywood boards for the bottom of the small boxes 16mm thick X 40.5cm wide X 44cm long.
7) 6 Plywood boards for the workbench shelves 40.5cm wide X 42cm long.
Note: If you do not want to make the slots for the boards and instead use a support or fixing angle for the shelves, we would have to cut the boards to 40.5cm x 40.5cm.
8) 4 Wooden ties for horizontal reinforcement 2.5cm thick X 5cm wide X 84cm long.
9) 4 padding loops 2.5cm X 5cm X 56cm long.
10) 4 Wooden ties for horizontal tying 2.5cm X 5cm X 170cm long.
Process:
Step 1: Cut all the pieces of the workbench.
With the cutting list in front, and with a saw portable circular with a guide system, we can cut the pieces of plywood, sides, bottoms and shelves to the measurements indicated in our plan.
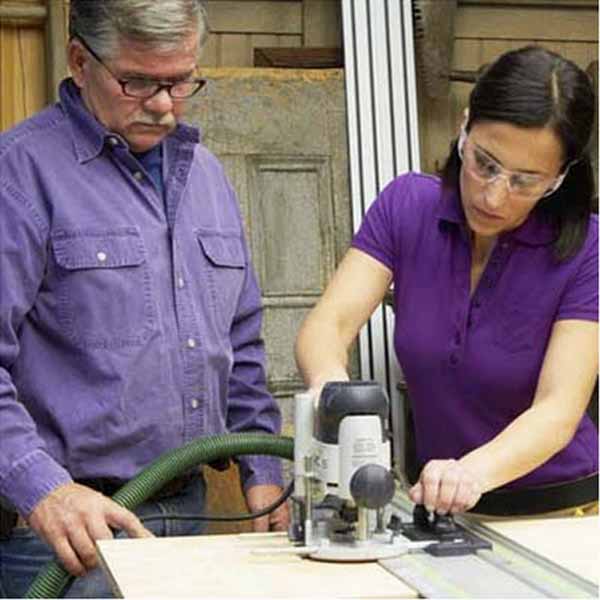
We will also need to use a router to make the 13mm slots in the interior walls where we will put the sliding shelves.
If we did not want to make the slots because we did not have the milling machine, we would only hold the shelves with angles or some type of fixing support. As we have indicated before, the shelves would be 40.5 x 40.5 cm.
Another option to avoid having to make the slots is to screw 2.5cm x 5cm strips to the internal sides of the boxes and place the shelves on them.
Step 2: Assembly of workbench boxes.
What we will have to do first is to build the wooden boxes. To do this, we will use mounting adhesive or vinyl glue, which is commonly known as white glue or carpenter’s glue.
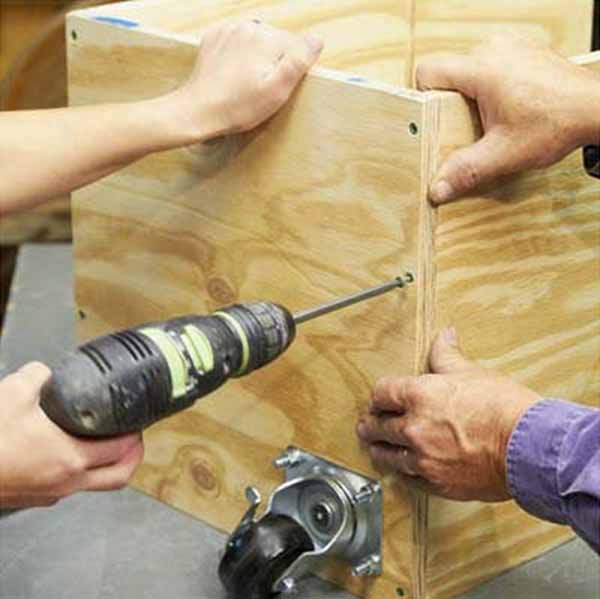
In order to make the element more solid, in addition to being able to manipulate it immediately without having to wait for the adhesive to set, we are also going to join the pieces with some lag screws. With 3 or 4 lag screws per joint, these drawers will be very compact.
To put the lag screws, we will have to drill the cross piece with a drill of the same diameter as the screw.
The lag screws that we will use in this project will be 4x50mm.
Step 3: Installation of the reinforcing strip.
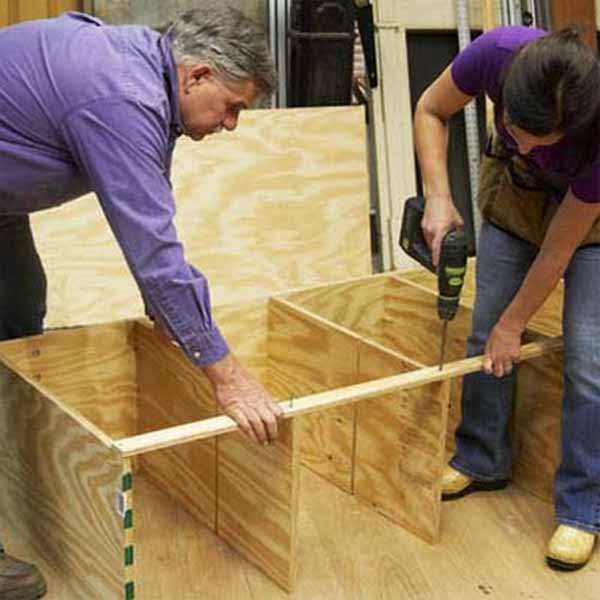
We will use one of the pieces number 10 of the exploded view indicated above.
We must take special care that the four drawers that make up the bench, as well as the bench as a whole, are square.
This check can be done using a square at 90 degrees, but the margin of error increases as the pieces become larger.
There is a woodworking trick to avoid this. It is about measuring, with a flexometer (meter), the two diagonals of the box. When the two measurements are exact, the element is squared at exactly 90 degrees.
Once this is done, we screw the slat to all the vertical pieces of the bench.
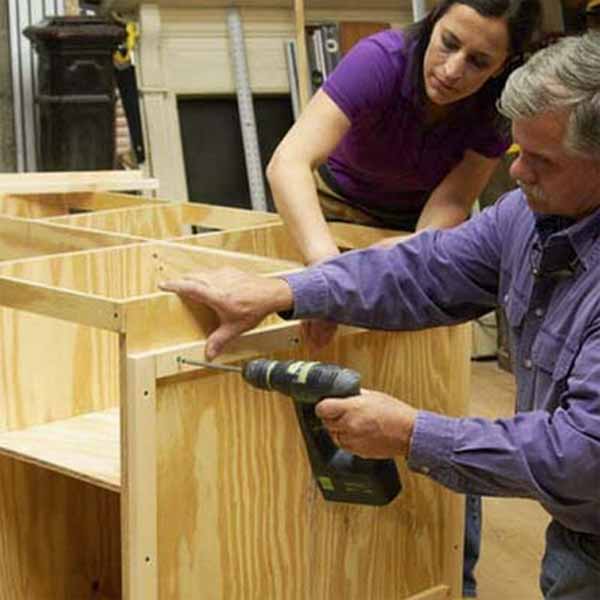
Step 4: Assembly of the rear of the workbench.
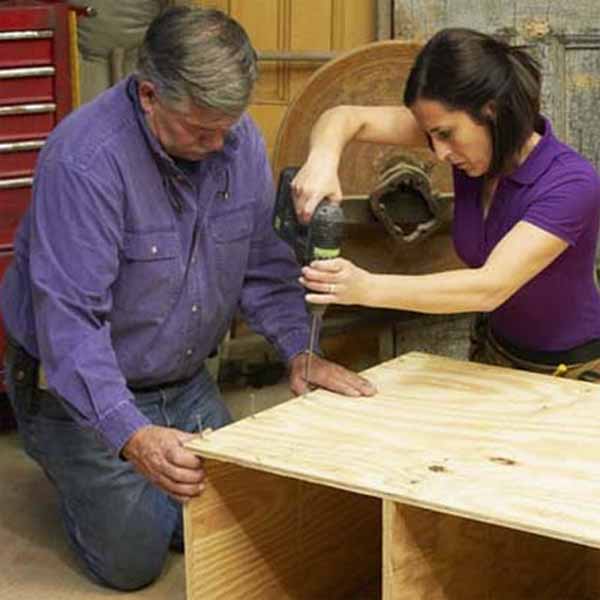
We drill the back piece to screw it to the rest of the structure. A distance between screws of about 10 or 15cm will be sufficient.
Once all the holes have been made, we apply the adhesive and screw the lag screws.
Step 5: Installing the wheels.
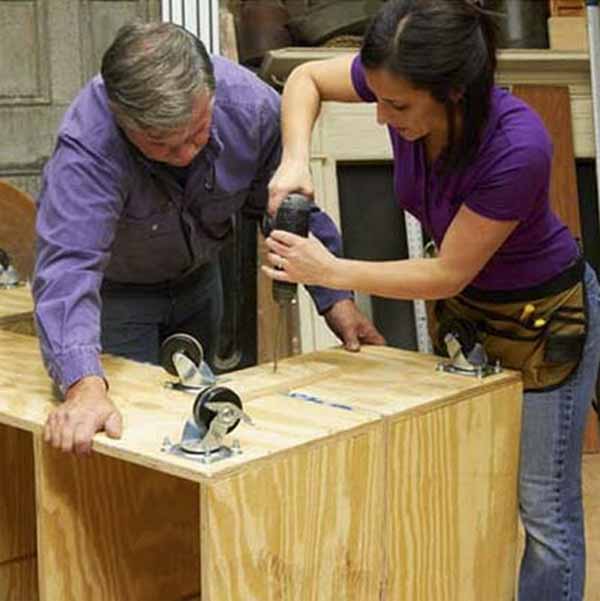
Now we will have to install some wheels to be able to move the bench, if necessary, without difficulty.
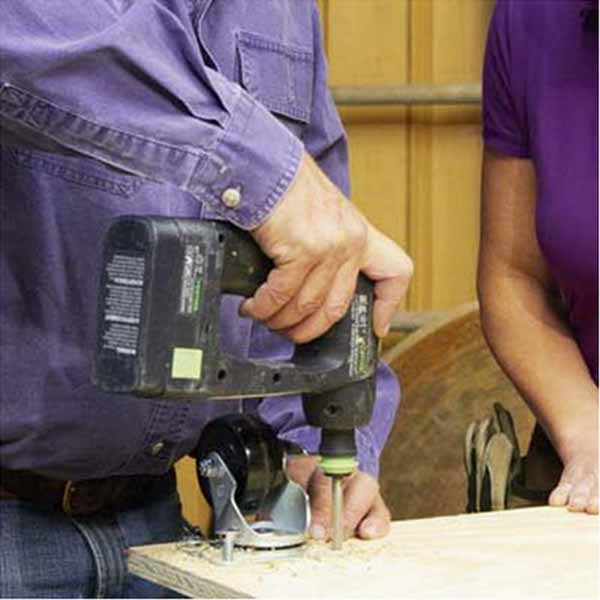
Its installation is very easy. The wheel is placed, the four holes are marked, the holes are made in the board and the wheel is anchored by means of four threaded through screws.
VERY IMPORTANT: Be careful when buying wheels. These types of wheels are manufactured to support different weight loads. Calculate more or less the weight of the bench you are making and increase the weight you think it will support corresponding to tools, etc, etc. In this way the wheels will not suffer premature wear.
We will install them about 4cm from the edge of the board.
In total, we will place 6 wheels, which will support the total weight of the workbench.
Step 6: Workbench base assembly.
Here we will proceed exactly the same way as in previous steps. We will drill, apply adhesive, and mount with the lag screws.
Step 7: Installation of intermediate shelves.
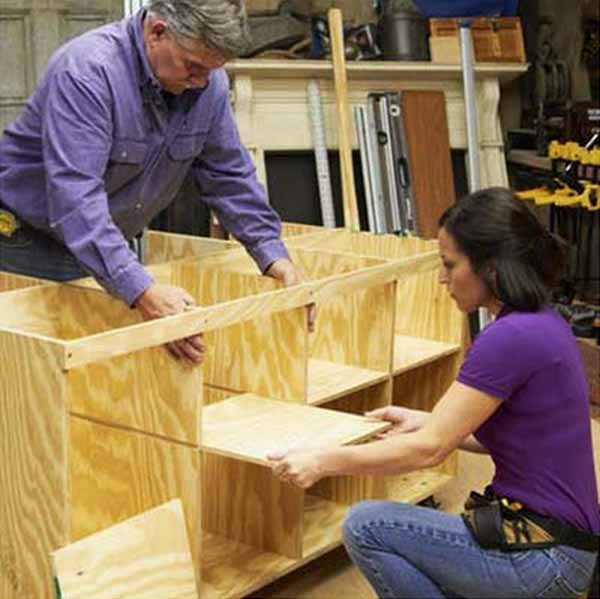
The structure of the workbench is already done. Now we are going to place the intermediate shelves.
As we already made the slots that will house these shelves in step 1, all we have to do is insert them into their location by sliding them inwards.
Step 8: Perforated panel installation.
You will have seen that there is workshop furniture that incorporates perforated panels, very versatile for organizing and keeping a multitude of tools and small machinery in view.
We are going to install it on one of the sides. However, you could install it on both. The procediment will be the same.
We have to leave a margin or distance between the perforated panel and the side of the workbench, in this way we can later insert the hooks to hold the tools. For this, we first have to screw four strips as a frame and, on top of these, screw the panel.
These types of panels are sold already perforated.
Step 9: We mount the multiple socket outlet.
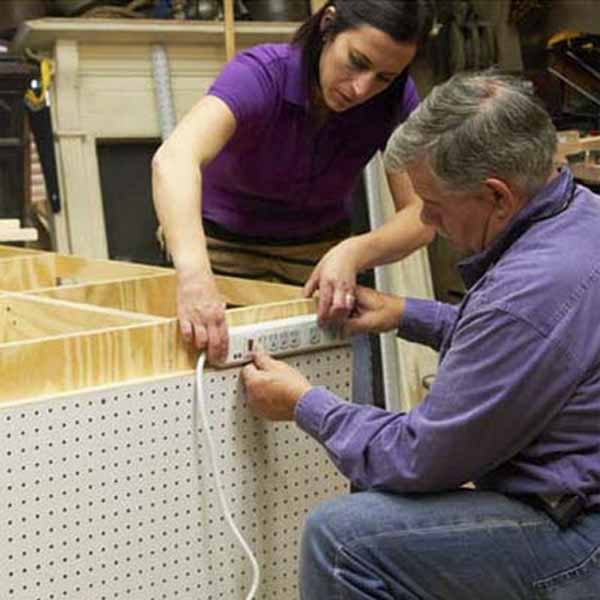
On the panel that we have just installed in the previous step, we will anchor a multiple socket outlet.
This type of base is very useful in DIY since, on many occasions, we will have to use several electrical devices simultaneously. A milling machine and a vacuum cleaner, for example.
Install a suitable base, both on the connectors and on the section of hose. To do this, calculate more or less the maximum power that you may need, and buy it based on this power.
Its installation on the workbench is very simple. Stick it with mounting adhesive. Apply the adhesive on the side of the bench and on the edge of the strip that held the perforated panel, and follow the manufacturer’s instructions for perfect anchoring.
Step 10: Installation of the upper board.
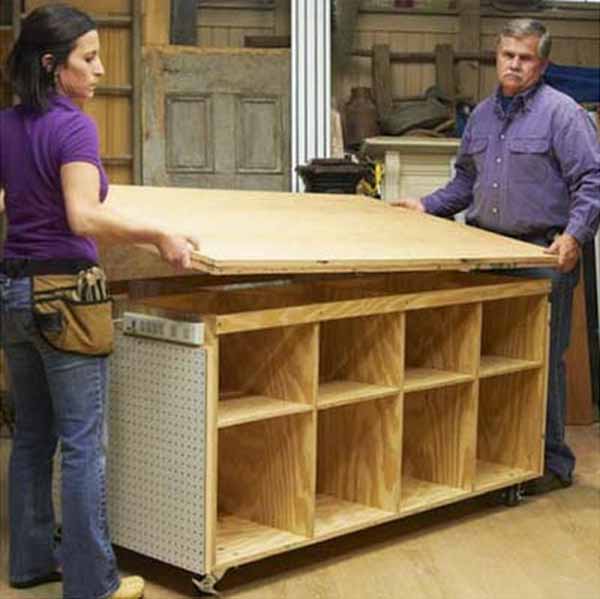
Top cap installation will be the same as the rest of the workbench assembly. We will apply the mounting adhesive and anchor with lag screws.
now you have a workbench where you can organize all your tools, and in which you can carry out, in a comfortable way, any project of diy Y Crafts all types.
You may be interested in seeing these other related articles:

Planning and construction of a pergola |
Domestic electrical installation |
How to install a sink |

Construction of walls with glass bottles |

Repair of a round blade hinge |
bricoblog
.


