

.
Last week we saw a very simple way to cut bottlesthrough which we could give, in a very creative way, a second life to glass bottles.
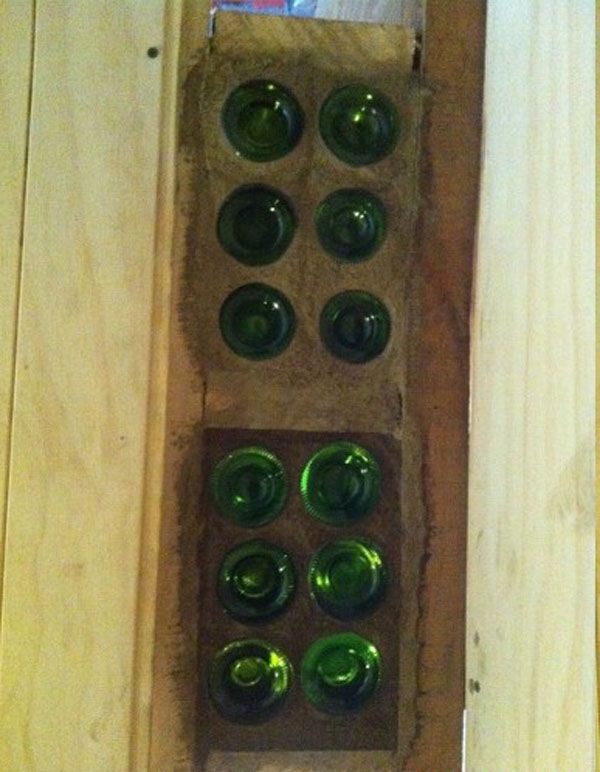
On this occasion we are going to use the technique that we shared last week, to make “glass bricks” or “homemade pavés”. We will achieve this by cutting the bottom of two bottles and joining them together; obtaining a kind of cylindrical paves.
Well, we are going to use our “homemade pavés” to make walls with glass bottles, providing light and originality.
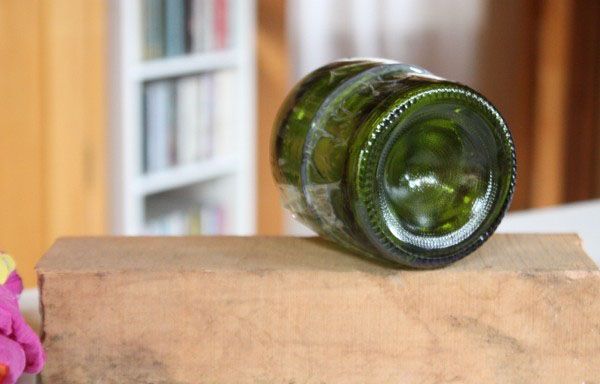
To make the brick, the bottom of two bottles is used, they are cut so that when they are joined they are the width of the wall, they are joined with a little adhesive tape.
The idea of these bricks with bottles, in addition to being beautiful and representing a form of home recycling, is that they provide an exchange of light between two environments, at this moment, I am using them in a corridor, so that it can receive a little light from the surrounding environment.
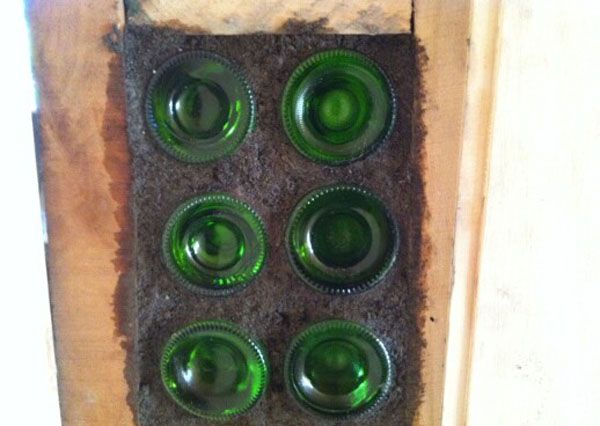
Use the bottles in two ways, simply whole, washed and without the labels and with the bricks made with the bottom of the bottles, for which the bottom of two bottles is cut, in such a way that when joined, it gives us the width from the wall, and we join them with a bit of adhesive tape, once we have all the bricks we can dedicate ourselves to putting them on the wall.
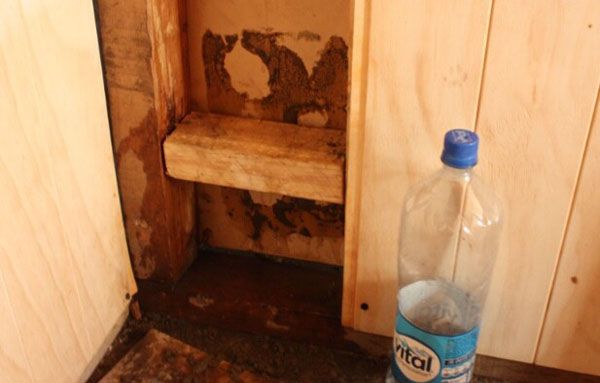
A temporary piece of wood was placed on the wall, to facilitate the work, then the wall is moistened to be able to apply the adhesive material
The material to make the wall can be a simple mortar made with cement, a lime mortar, or a mixture of clay and earth or sand, all are binding materials, which by adding water allows us to form a plastic mass with which to work. , my recommendation is to use what we have madly, it doesn’t make much sense to do it with clay, if we have to bring it from a thousand kilometers away, we’ll deal with this next week, I’ll talk about something called stabilized earth.
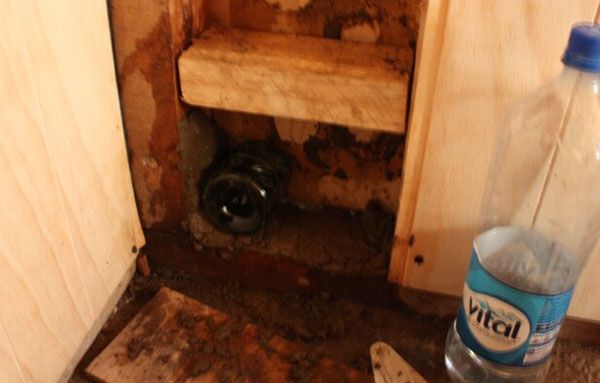
The rest is relatively simple, in this case I chose to make a thin wall, for which I made a wooden structure with many divisions, since otherwise I would have had to put more structures so that the mixture adheres to the wood, the brick remains simply as embedded in the material, it is worked as if it were clay, with the hands and molding the desired shapes.
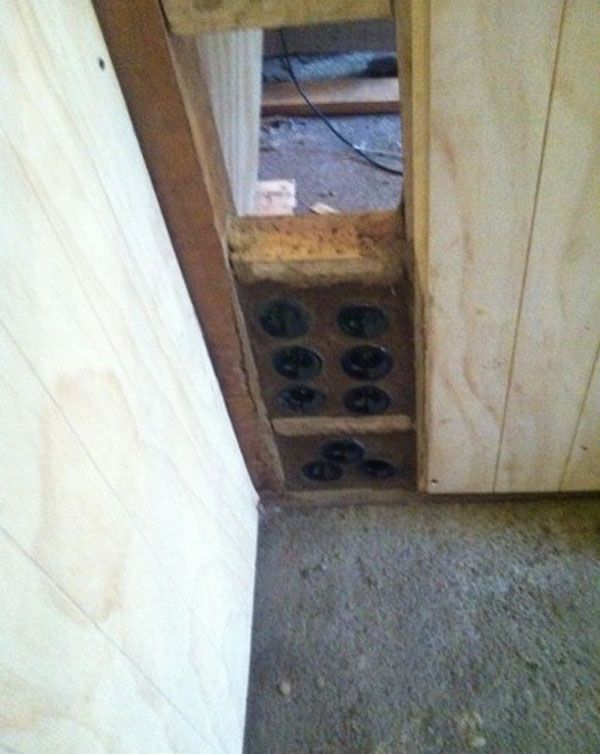
The idea is to play with shapes, colors of bottles, etc. The finish will depend on the material, but we can give several, leave it as it is, paint it with lime or others, once we shaped the wall and placed the bricks, we have to keep it moist for a couple of days, wetting it with a cloth or splashing it. I always use a plastic bottle, with a hole in the lid, for this task.
Test of different materials, for the task
Test made with cement mortar.
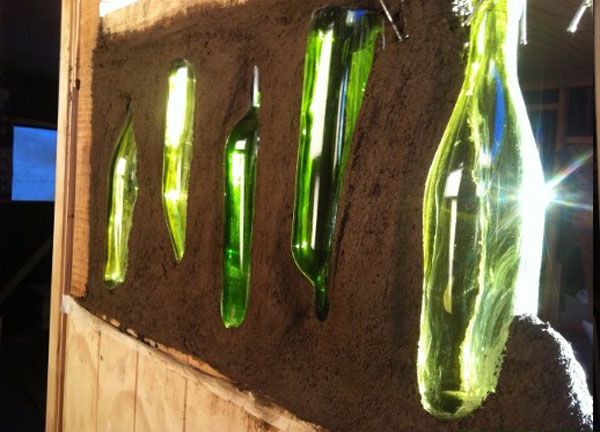
The other type of wall is in principle simpler, as it is made with the entire bottle. But we must provide more structural support, what I did was create a frame with wood to place the bottles, to this wood I nail a large number of nails in various directions so that the material has something to hold on to, this is known as the technique of porcupine, as you can see in the photo below, and then between bottles I put different materials, pieces of wood, plastic plus nails, it’s a good opportunity to use old or bent nails, I couldn’t do it because I didn’t have any left, but I’ll have another chance.
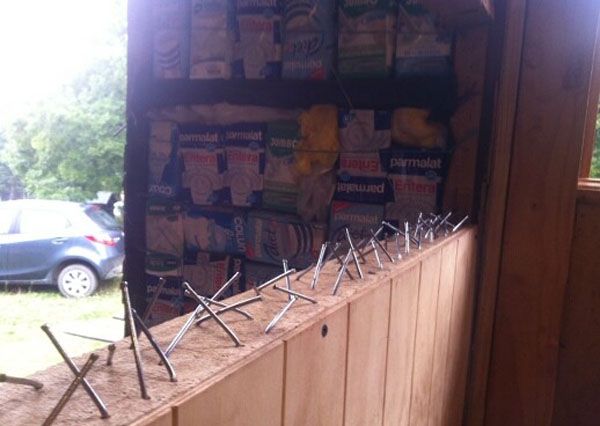
Porcupine technique, so that the material is attached to the wood.
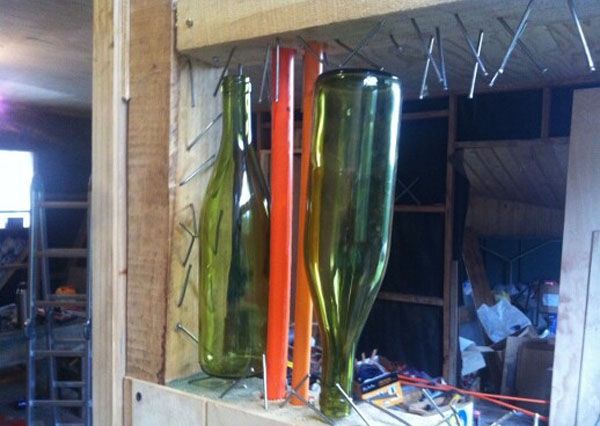
Projecting the placement of the bottles
Then, as in the previous one, wet everything, and begin to mold and place the material little by little, put the bottle and cover everything with the mixture, finally keep it moist for two days while it dries.
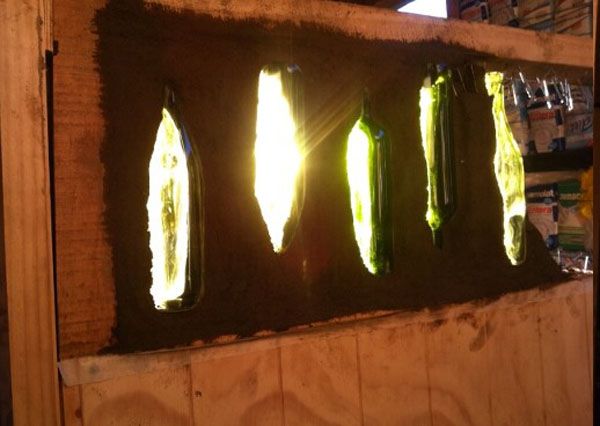
Notes on this technique, first I thought of covering the top of the bottles with tape, to prevent material from entering, then I concluded that it was not necessary; the wall is very irregular, but well, that’s how I like it, I suppose that if you want, with a little work with the spoon you can make it smooth and straight, I left it rough and the work of the hand could be noticed.
Later when I have the more advanced work I will put more photos, I hope you like it and find it useful.
Source: ecothings
You may be interested in seeing these other related articles:
cut glass bottles |

Liquid Light |
vase-bulb |

solar bulb |

Tile technique |


