

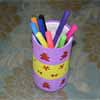
Today we bring you a job included in our “special crafts”. We show you step by step how to make a pencil holder with recycled canwith EVA rubber finish.
Practically every day, we throw away all kinds of cans, for example, canned food. Well, we are going to completely transform a can of olives that was about to go in the trash, into a beautiful, useful and very original object.

To give it an impeccable and super fun look, we are going to help ourselves with the ethylene vinyl acetate.
Don’t make that face, when I explain what it is, you’ll see that you’ve used it on occasion.
It is a thermoplastic polymer made up of repeating units of Ethylene and Vinyl Acetate. Hence its name, it is designated as EVA
In other words, what we all know as eva rubber.
Let’s see how it’s done.
VIDEO
.
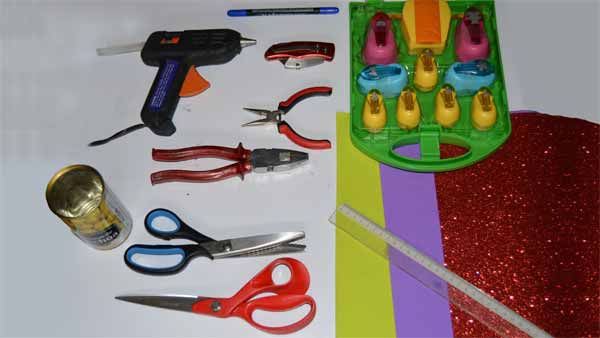
MATERIALS AND SUPPLIES WE WILL NEED
- A can that no longer serves you. We have used a can of olives.
- Normal scissors and, if you have, pinking scissors. If you don’t have the latter, don’t worry, you can do it anyway.
- Pliers.
- Cutter.
- Rule.
- Marker pen.
- Hot glue gun.
- dies. If you have different reasons, better. If not, you can use the same motif for the entire decoration.
- Eva rubber of different colors and textures.
.
VERY GOOD… LET’S BEGIN WITH THE PROCEDURE
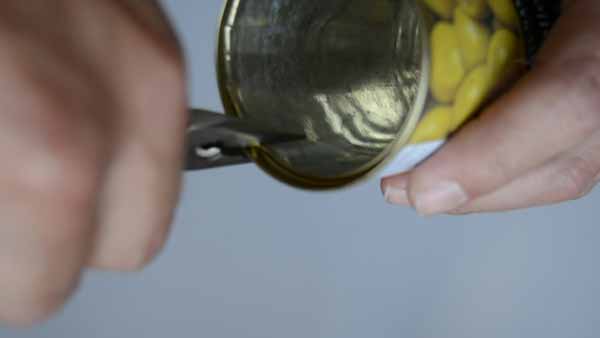
Step 1: The first thing we have to do is eliminate the sharp and dangerous edge that these types of containers have on their edge.
For this we will use pliers. The narrower these are, the less the rim of the can will warp.
We are gradually bending the edge towards the side of the can.
Now there is no danger of cutting yourself.
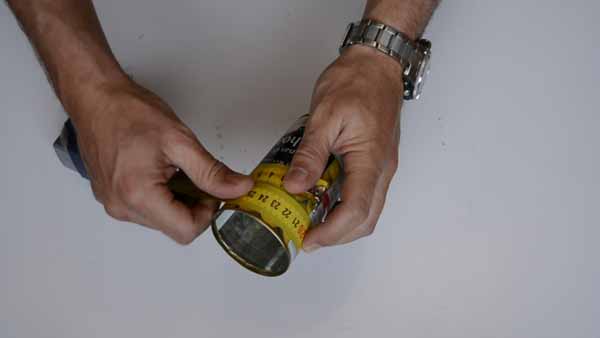
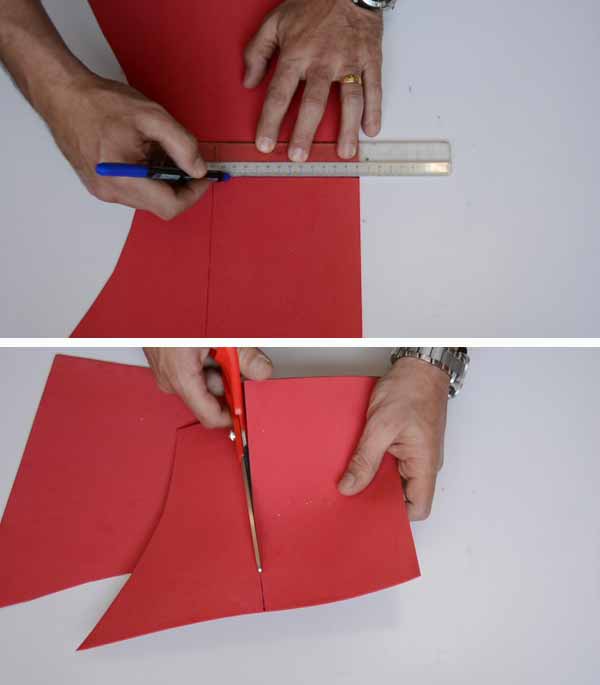
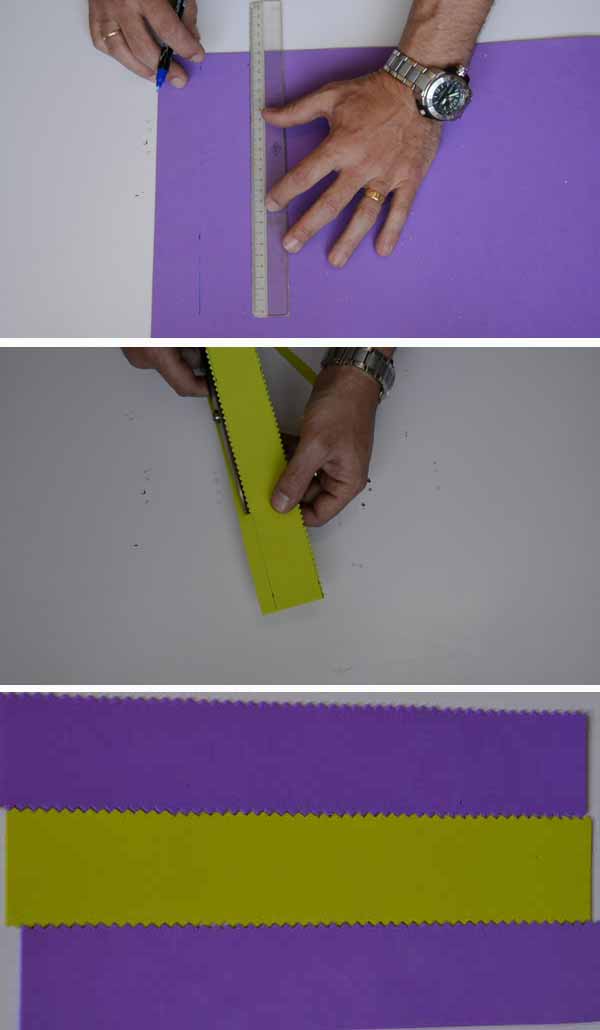
Step 2: Then we have to measure the height and the perimeter of the can. In this case we have almost 12 cm, and 20.5 cm respectively.
Step 3: Now we transport the stockings on the eva rubber. We are going to put a first layer in glitter finish to give a more cheerful appearance. Therefore, we will give 13 cm of height to be able to turn the edge towards the inside of the can.
We trace the lines and cut with normal scissors.
Step 4: Now we begin to stick the layer of EVA rubber that we just cut on the can. For this we will use the thermo-adhesive gun.
As this type of adhesive is very fast drying, we will apply vertical lines and immediately we will join.
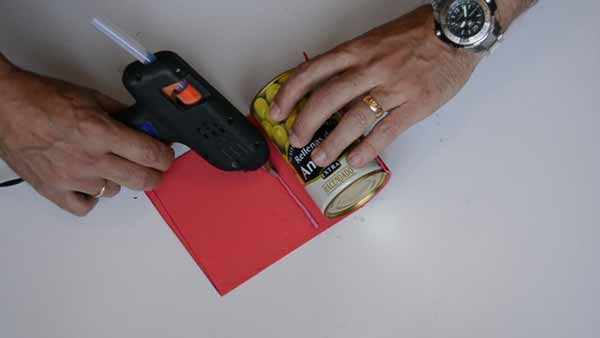
Step 5: For the union to be perfect, we must have cut the piece a little longer than the perimeter of the can.
Once the whole piece is joined, with the cutter we will cut and eliminate the excess, so that one side does not overlap the other.
In this part you do not need to take too much care, since it will be hidden later.
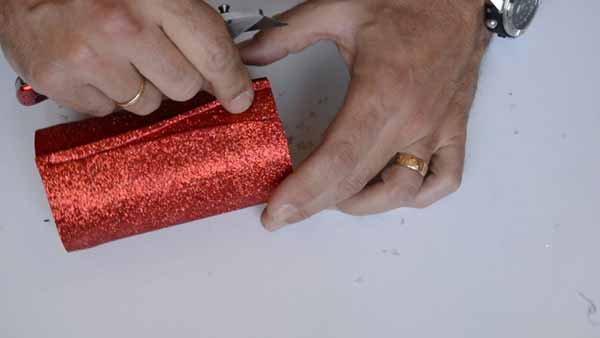
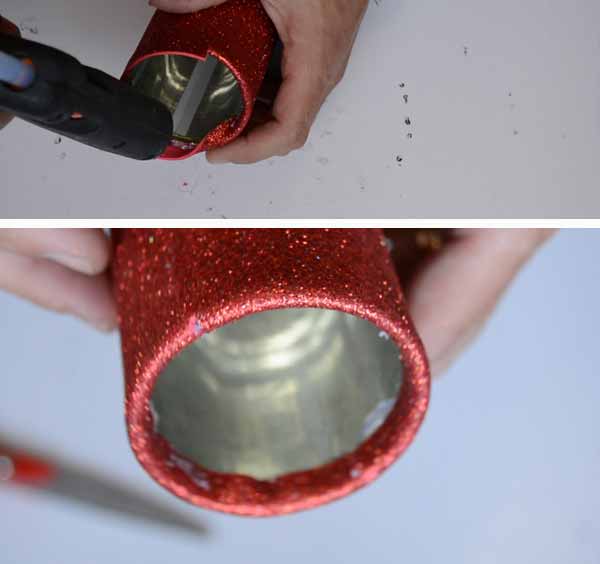
Step 6: Now we will make a couple of cuts in the part of the foam that stands out from the top. And we will stick it on the inside of the can.
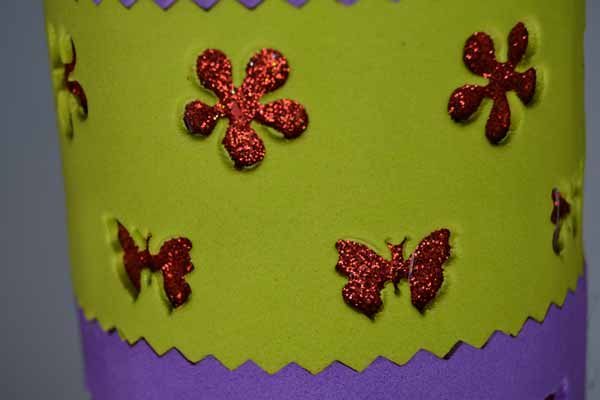
Step 7: The next step is to measure, mark and cut the three pieces that will be superimposed on the one we just glued. We will use bright and fun colors.
The longest parts, we will cut them with the pinking scissors to give a more decorative appearance. But if you don’t have any, you can make the cuts with normal scissors.
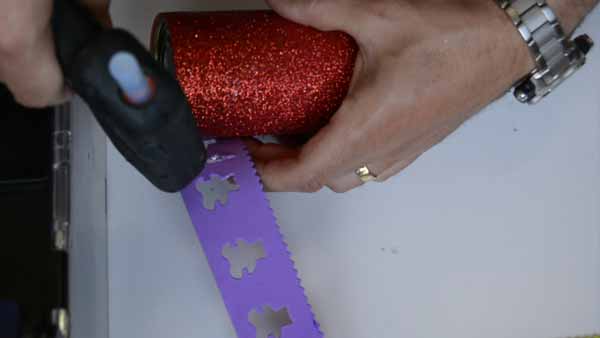
Step 8: Once the three strips have been cut, we will proceed to punch them. For this we will use three different dies.
You can use more or less variety. It depends on how you want to do it.
These dies are intended to cut paper or cardboard, but they also cut foam very well, since it is a soft material.
Well, nothing, we began to die. I’m doing it by eye, but if you spend a few minutes measuring and calculating where each pattern should go, it will be perfect.
Cut the three strips.
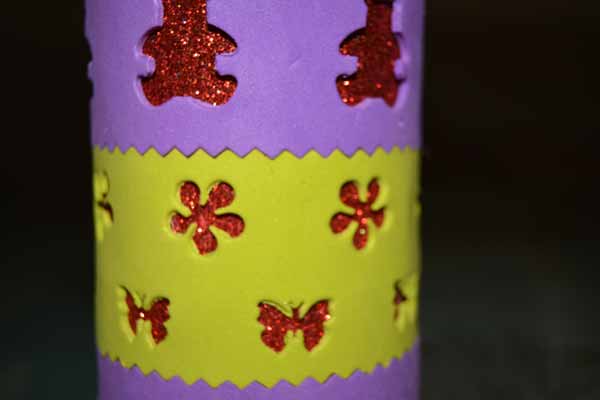
For the upper and lower strip, we have used the same motif, a teddy bear.
The remaining part of the motifs that we are making, we will save them to use them in some other craft that we do later.
In the central strip, we will make two rows of decorative motifs.

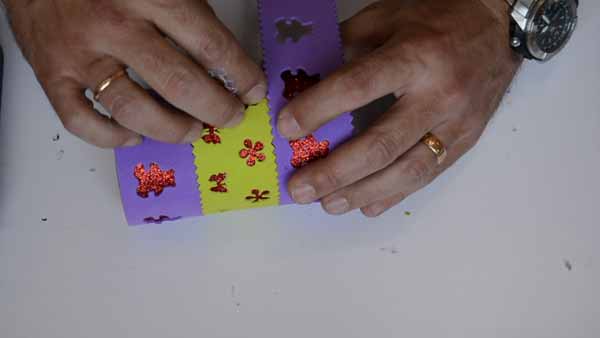
Step 9: It’s time to stick them. We’ll start at the bottom. Keep in mind that this part must be completely flush with the bottom of the can. You can do this simply by supporting it on the work table. For it to look good in the video, I had to improvise a side.
Remember, go pasting little by little so that the adhesive does not dry before time.
Step 10: Once glued to everything around the can, we mark with the cutter, where to cut the excess. And we cut with the scissors.
As you can see, the union is perfect.
We finish gluing the piece, joining both ends.

Step 11: With the other two strips, we proceed exactly the same way but, this time, matching the jagged cuts.
If in any area, they do not fit well, make them match exactly by contracting or stretching the foam a little. This material is very malleable and easy to work with.
Don’t worry about the remaining threads of the adhesive, once dry, they are removed without any problem.
Step 12: As you can see, we have measured so that the upper part protrudes approximately 5mm.
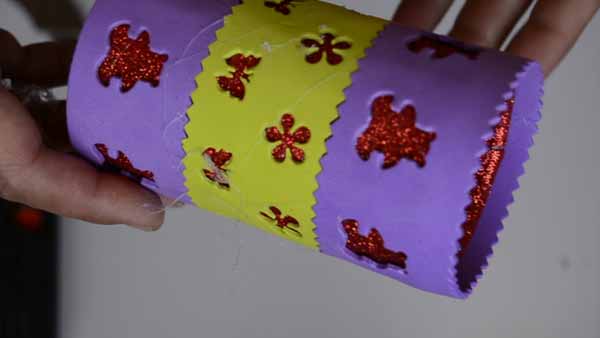
Step 13: We remove the threads that I mentioned before, and we have finished our pencil holder with recycled can.
However, you can give it an impeccable finish on the inside, simply by inserting a plastic cup.
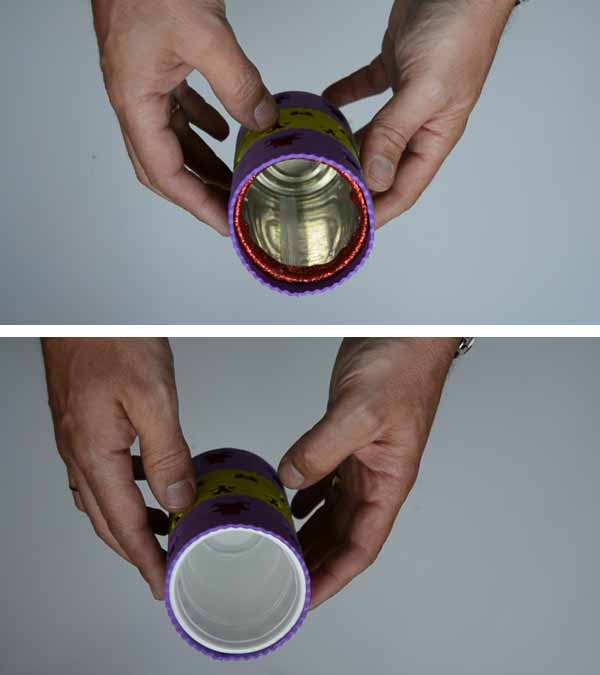
If it fits just right, as is the case, you just have to enter it. But in case there is a little slack left, you would have to put 3 or 4 dots of adhesive and insert the glass.

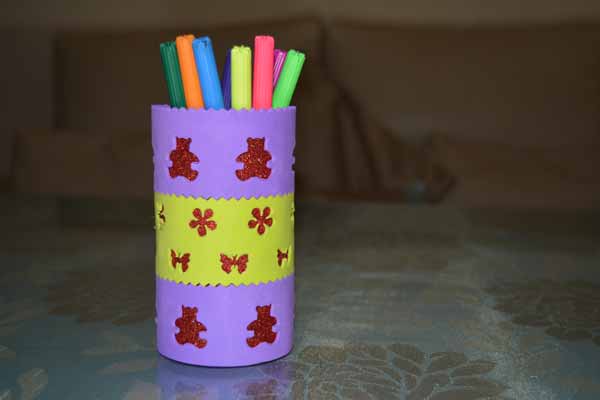
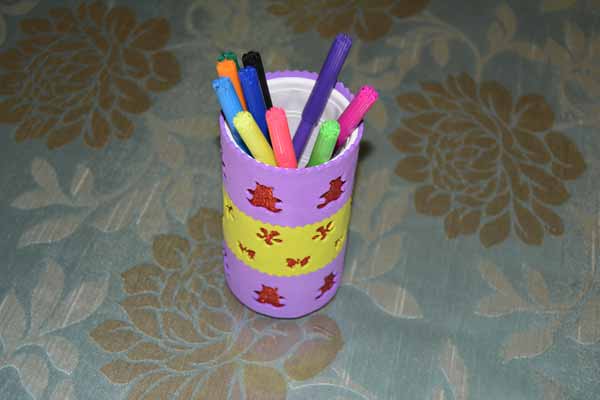
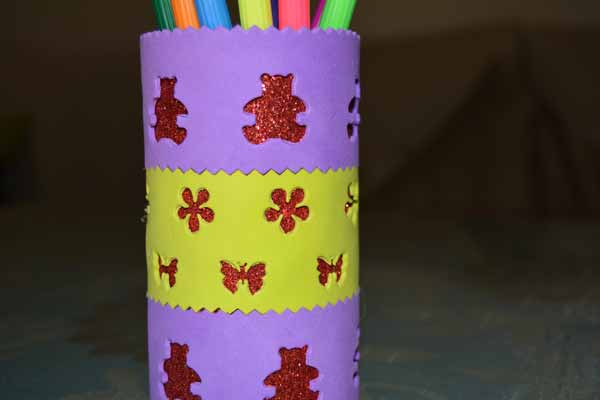
You can use it, in addition to pencil holder, as a vase for example.
How about? Cool, right?
If you liked it, share it with your family and friends.
You may be interested in seeing these other related articles:
making silicone molds |

Globe Wax Luminaries |

make gel stickers |

How to make a dream catcher |
Stamp to stamp roses |
.
To see all the videos we have on YouTube, click this link BricoBlog Channel
.


