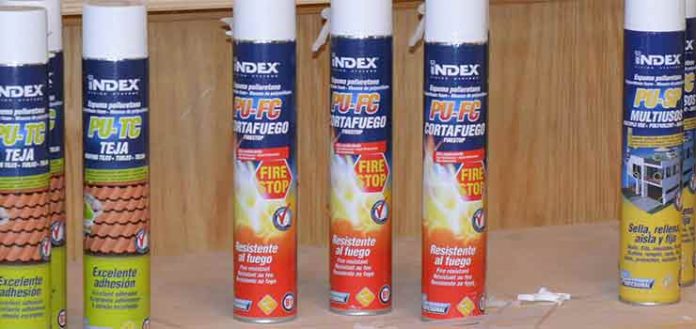
In this article we will get to know polyurethane foams in depth, talking about their characteristics and properties, different uses and how they are applied. In addition, we will expand information on three different types of polyurethane foams.
In this second article dedicated to chemical sealants and anchors we will see, as I was saying, another very interesting product due to its great versatility for many DIY projects. It’s about the polyurethane foams.
If you want to know more about polyurethane foams, here is a link to another of our articles, which has even been echoed by IPUR, Association of the Rigid Polyurethane Industry, polyurethane foam.
Well, this product for eminently professional use is opening up to DIY use. Its versatility ranges from the highest level DIY, to some simple home DIY applications.
We can find from multipurpose or generic foams, to specific ones for very specific uses.
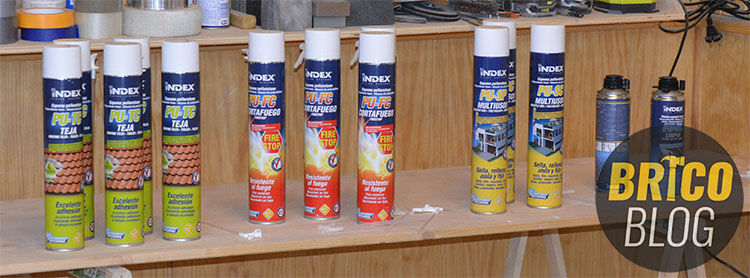
Well, today I bring you, of course, from the hand of INDEX a Perfect Fixing, three very different foams. We will see the special foam for fixing tiles, the fire resistant foam and the multipurpose foam.
And we will see them in action. But first, let’s get to know them in depth.
Characteristic
We will start with the technical characteristics:
- They are high density, unlike many other similar foams. Therefore, its porosity practically disappears.
- Suitable for interior and exterior use.
- Great stability due to its controlled expansion.
- They are of superior quality. In fact they are for professional use.
- They are high performance, strong adhesion and long lasting.
- Maximum adherence.
- Provides thermal and acoustic insulation.
- There are specific polyurethane foams for each type of application.
Examined polyurethane foams
Well, next we will put three of these Index foams to the test.
The polyurethane foam for fixing PU-TC tiles is indicated for a very specific use. It is special for fixing all types of tiles.
The PU-SP foam, the multipurpose one, which we will use to fill a drainage pipe, so that you can see how it is applied and how it looks.
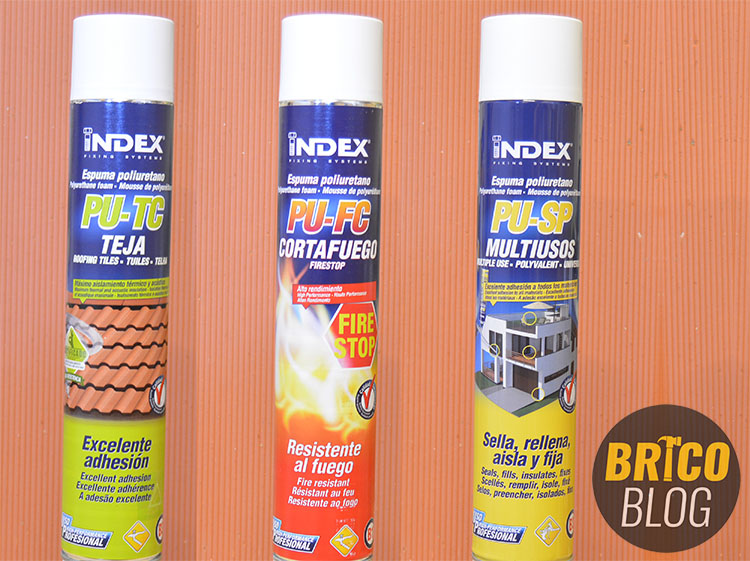
And finally, we will use the PU-FC, which is the fire resistant foam. Its fire resistance, CERTIFIED, is B1, the maximum.
The latter is indicated for more delicate applications such as, for example, fixing and filling electrical register boxes, and fixing fire doors, among others.
We will use it for the installation of an electrical register.
Well, now that we know the main properties and applications of these polyurethane foams, we are going to examine them in a practical way.
Didactic analysis of polyurethane foams
As a picture is worth a thousand words, we include below the video that accompanies this article in which, in addition to telling you about these foams, we show you how they should be applied and which foam to use for each specific use.
1º Foam for tile installation
We will start with the installation of ceramic tiles, for which we have used a 1m2 model of the roof of a single-family home.
Each of the tiles has a weight of 3kg. To prevent it from slipping during the curing of the foam, due to the sum of the weight plus the slope, a retaining element is normally placed, which, in our case, has been a metal profile.

However, to prevent these displacements from occurring, an anti-slip layer is also usually placed on the tiles, which acts at the same time as a waterproofing agent.
Aspects prior to the application
Well, we will start the installation with several aspects to take into account:
- Surfaces must be clean of dust and dirt.
- We must moisten the porous surfaces with water.
- The bottle should be shaken vigorously about 20 times with the valve down.
- We remove the cap, screw the applicator cannula, hold the bottle upside down and press the valve.
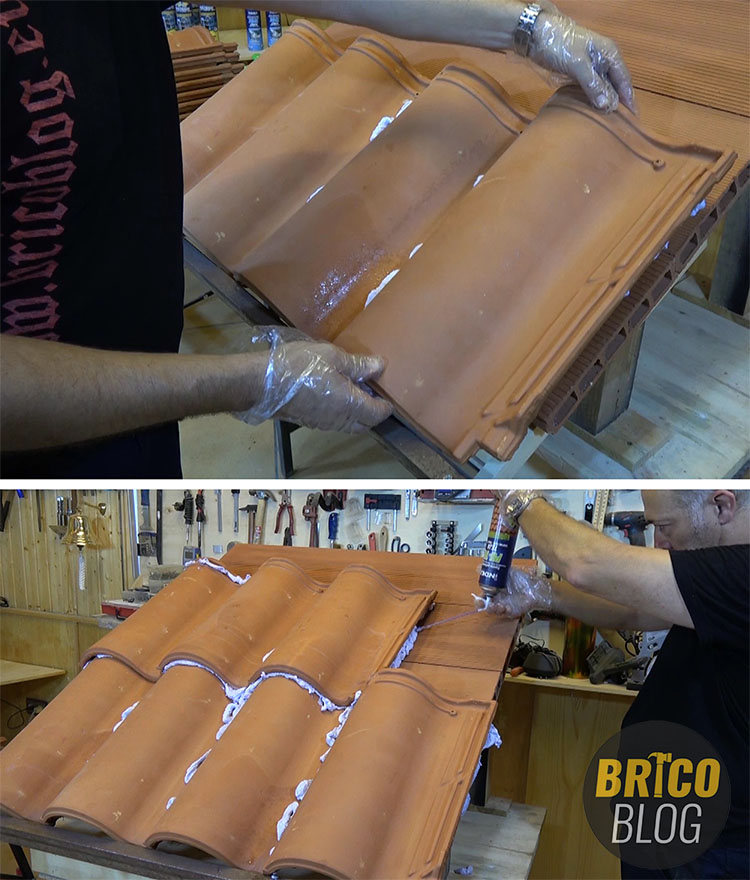
- We project the foam on the lower face of the tile, only in the areas that will come into contact with the roof, as well as with the tile on which it mounts.
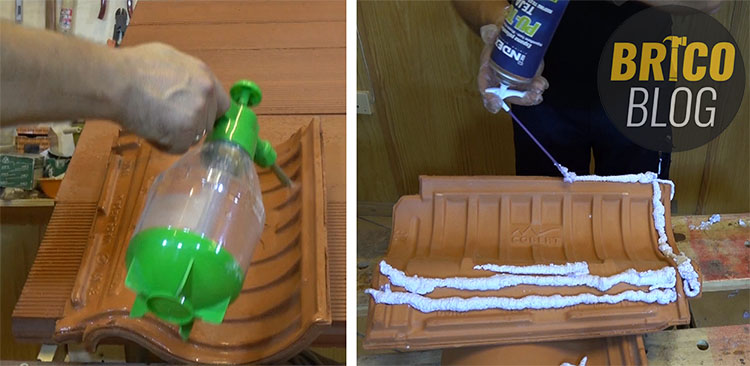
And we place it, supporting it on the temporary retainer that we have installed.
The laying of the tiles always goes from the bottom up. Only in this way can we ensure that the water runs through the roof without causing leaks.
In this way we are placing all the tiles one by one.
The application of the foam can be done both with a cannula, as we have done, and with an applicator gun.
Technical aspects
Although this foam can be applied at very low temperatures, down to -5ºC, the optimal working temperature of the can is between 20ºC and 25ºC.
Therefore, in case the ambient temperature is lower, we must place the pot in hot water for about 20 minutes.
It is important that you know that the INDEX PU-TC foam is tested by Tecnalia to determine the resistance to lifting of the installed tiles, according to the UNE-EN 14437:307 standard, guaranteeing the product used by the end customer.
Well, as can be seen, this foam allows the fixing of tiles in an exact, fast and efficient way, compared to the traditional method.
The curing time is between 1.5 and 5 hours, depending on the temperature and humidity of the environment.
If the bottle is not finished, we put it in the normal position and let out a little gas to clean the inner cannula. We unscrew the applicator cannula, and clean it with the polyurethane foam cleaner.
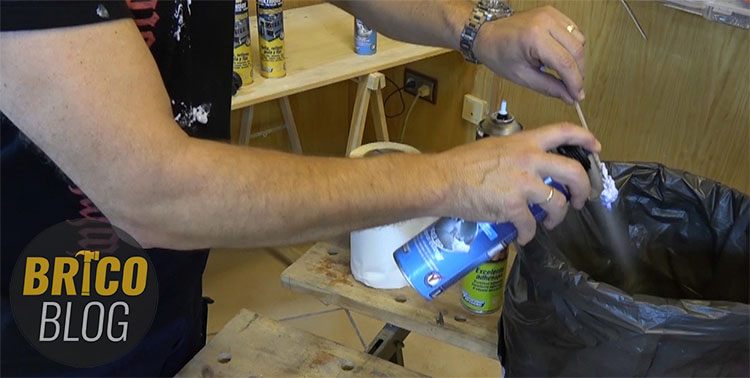
The applicator cannula, which is included with the foam, is reusable; As long as we clean it, of course.
We have 18 months from the date of manufacture, to finish the boat, as long as we store it in optimal conditions.
Completing the installation
Once the foam has cured, we proceed to remove the metal profile that we had placed as a temporary retainer.
The installation of the tiles is turning out to be luxurious, and it is also very well anchored.
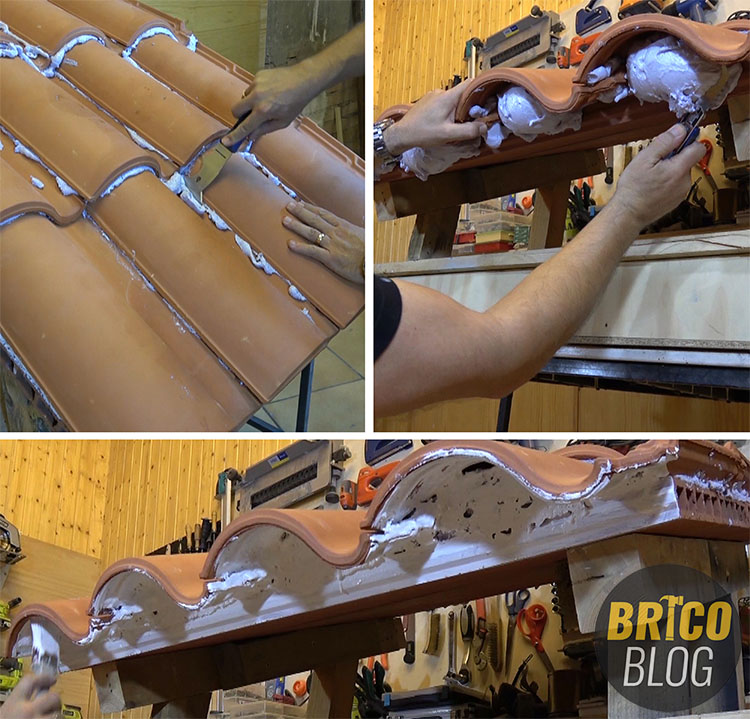
Only the aesthetic part would remain, which consists of covering the first row of tiles to prevent birds and insects such as wasps from nesting, trimming the excess foam and painting the eaves.
BEWARE, the paint cannot be solvent-based, as it would damage the foam structure. So we must use water-based or acrylic paint.
It can be done with a brush, roller or spray.
2º The multipurpose foam
For this demonstration we have filled and sealed a drain pipe. But we have done it without works and without dirt, thanks to the multipurpose polyurethane foam, PU-SP.
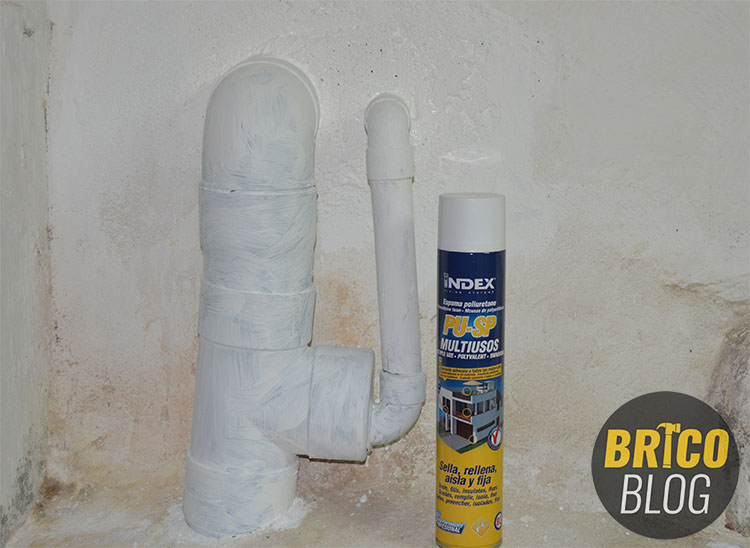
The first steps are the same that we have followed before, but this time we have used an applicator gun instead of a cannula, so you can see the two ways in which polyurethane foams can be applied.
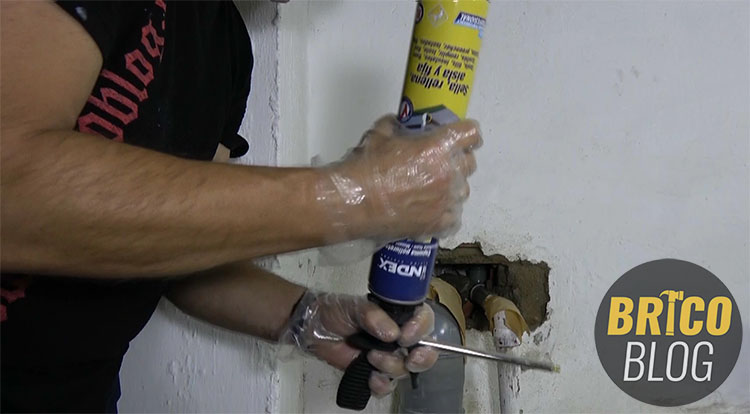
We have lined the outside of the pipe with painter’s paper so that it is easier to remove the excess foam later.
Polyurethane foams can expand between 30% and 50% in size, which we will have to take into account when applying it.
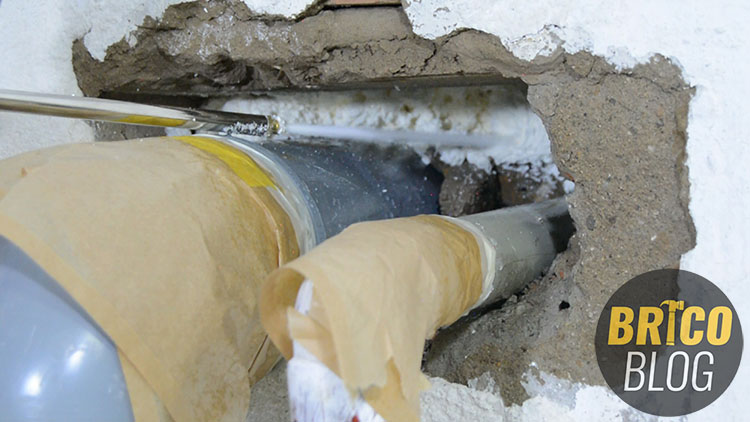
Moistening the foam once applied can speed up the hardening process.
As we have indicated previously, the curing of the foam takes place between an hour and a half and five hours, depending on the temperature and humidity of the environment.
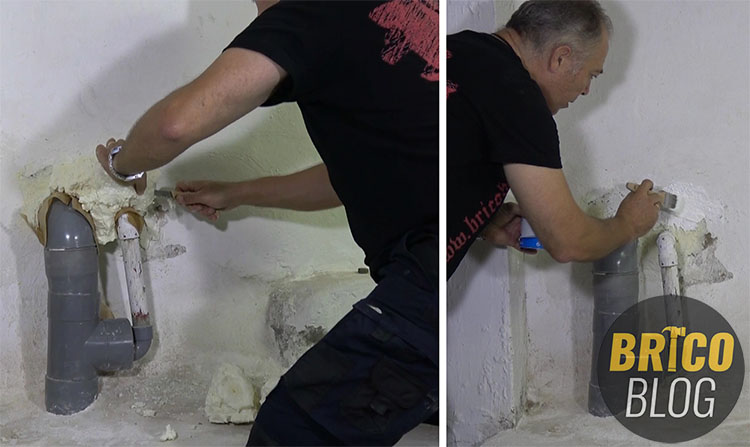
Well, once the foam has cured, the excess must be removed by cutting it with any cutting tool such as a cutter, saw, knife, etc.
And finally we paint it, with a water-based or acrylic paint, as we have indicated before, which is suitable for painting areas where we apply polyurethane foams.
Test completed, and without a speck of dust.
3º Fire resistant foam
Finally we have tried another very, very interesting foam. PU-FC polyurethane foam, fire-resistant foam.
For the test we have installed an electrical register to embed in the wall.
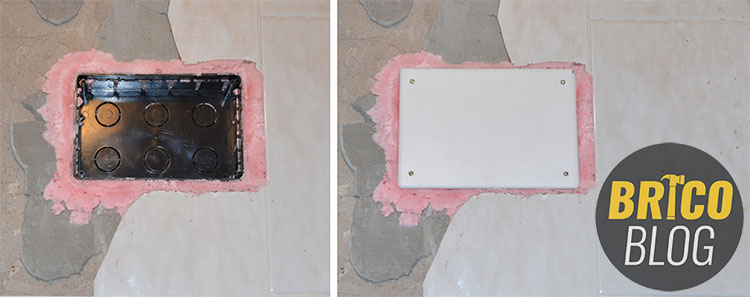
Once the hole is made, it’s time to install the box.
Fuel foam + Short circuit = Fire
The first steps are exactly the same that we have followed in the two previous applications:
Moisten, shake at least 20 times and screw on the cannula.
For its installation, we have placed the box in the desired position, we have secured it so that it does not move during the curing process and we have applied the foam.
It would be reckless to make this type of installation with foam that is not fire resistant, since the sum of combustible foam plus short circuit could equal fire.
That is why it is important to choose the right product, such as the PU-FC foam that has the B1 fire resistance certificate, which, as we have said before, is the highest certification against fire.
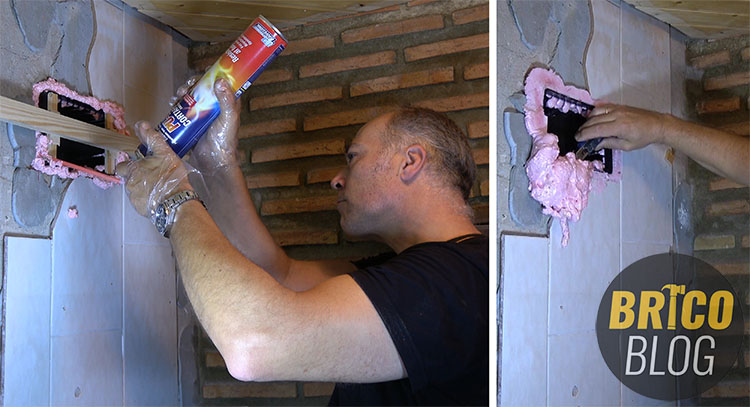
Once the foam is cured, we must cut the excess that, on this occasion, we have done with a cutter.
In this way, the electrical register has been prepared to receive all the wiring.
Conclusions
In BricoBlog we are very fond of Spanish proverbs, since it is very rich and wise and we learn a lot from it. There is a saying, which you may know, that “the mean money goes twice the way.”
Many times to save a couple of euros after a short time the problems begin and we have to do the entire installation again. So remember, always use approved and certified products.
INDEX products offer guaranteed quality thanks to their certified products.
If you are interested in the subject of DIY fixings, we advise you to see this other article but, on this occasion, about DIY mechanical fixings: DIY fixings – Part 1.
Well, this article has enough useful information on polyurethane foams to leave it here for now. In the next post dedicated to chemical anchors, we will see two other products that, we are sure, will not leave you indifferent.
Subscribe, and do not miss it!
.


