

Protecting the wood and also giving it back all its beauty and vitality, was what I was looking for when I decided renew a table with lasur. To treat wood with lasur and achieve a good result, you just have to follow a series of recommendations and steps that I explain below.
My table in the living room was dingy again. About a year and a half ago I had restored it by repairing various scratches and giving it a wax finish (you can see the whole step by step at this link). However, wax is not the most suitable protection for a table since it does not completely insulate the wood. It is essential to immediately clean the liquids that are poured on it to prevent them from leaking and ending up staining the furniture.
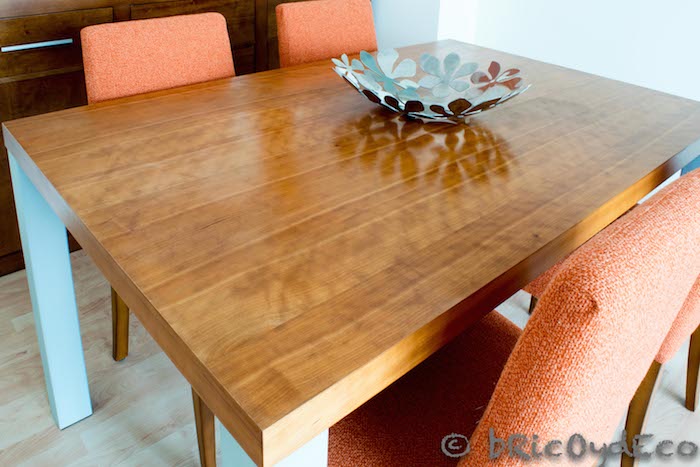
Over the months the table had lost its luster and new scratches and stains had also appeared. For this reason I decided to eliminate the waxing and renew the table with lasur.
What is lasur?
Lasur is an acrylic resin fine particle that gives the wood an open pore finish. This means that it does not form a layer, allowing transpire its internal humidity and conserving its natural balanceso it does not crack or crack.
It is recommended for all types of wood (coniferous, hardwood and tropical), as well as for interior and exterior. Among its main properties are:
- Very fast drying, to the touch in just a few minutes.
- The water stain is completely odourless.
- Weather resistant.
- Protects from solar rays.
- Its very simple maintenance.
In this link you can find many more details about lasur and how it can help you renew and protect your wooden furniture.
Renovate a wooden table with lasur step by step
First of all you have to remove any wood finish (varnish, wax, shellac…) so that the lasur can penetrate inside it. In my case the table was waxed, so the first thing I did was use a wax remover product (in this link you will find the step by step to remove the wax from a piece of furniture).
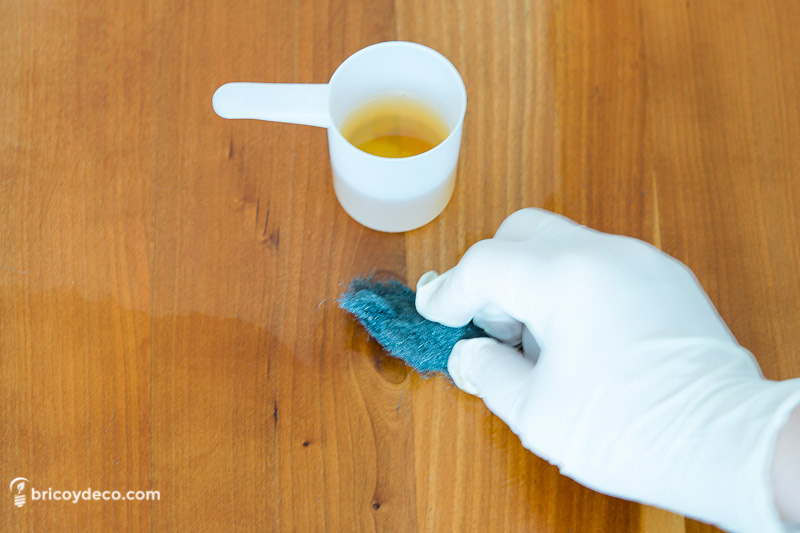
You must bear in mind that, after applying any stripping or wax-removing product, you must clean surface with methylated spirit and allow 24 hours to elapse before refinishing. In this way we give the wood time to dry completely, avoiding absorption problems.
Once I removed the wax finish, the stains that had formed on the surface became more visible. to remove them I sanded the entire table with medium grit sandpaper..
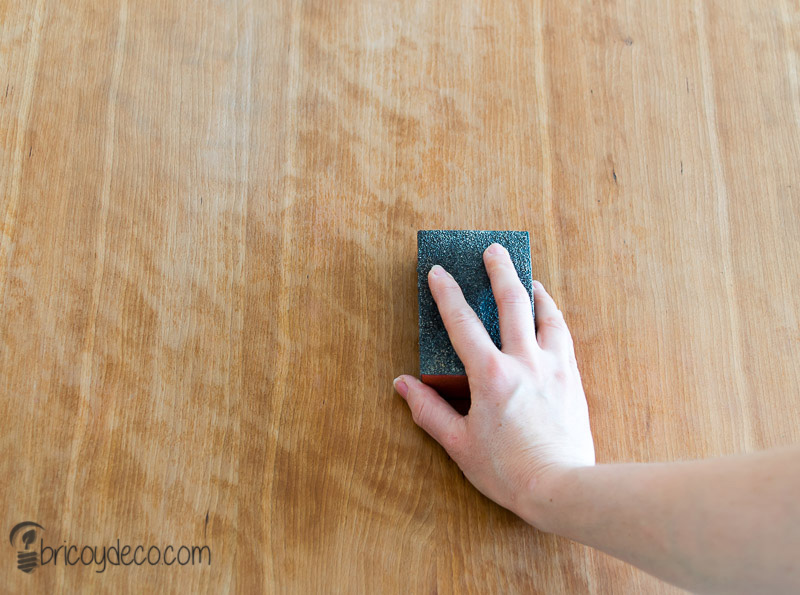
On delicate surfaces it is recommended that the sanding be done manually since with an electric sander grooves can form, especially if we are not experts in handling them.
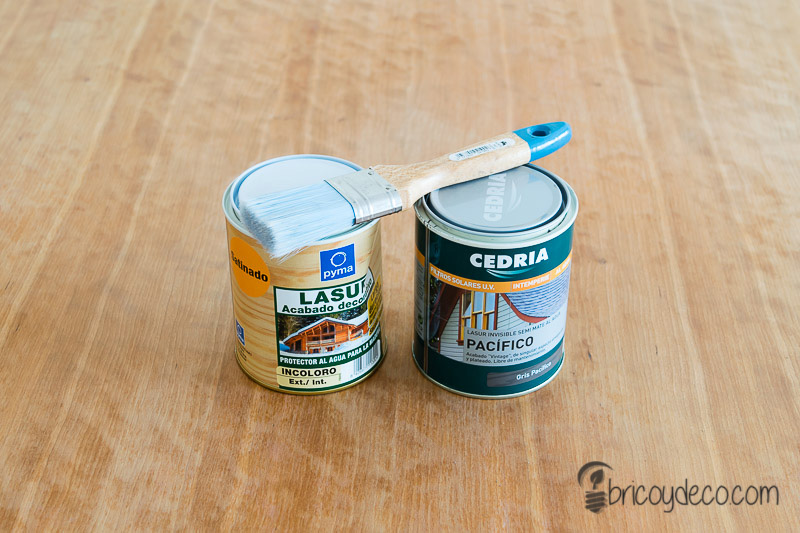
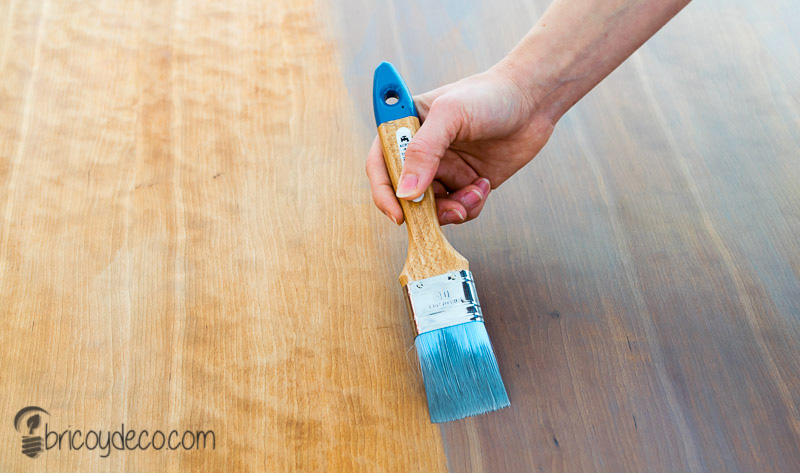
After removing the sanding dust, it was time to apply the final finish. For this I used water stain. On the one hand, I had a pot of Cedria Lasur Pacífico with a vintage finish that I love, as it provides a grayish glaze so characteristic of wood worn and aged by the passage of time. It also had a pot of colorless Pyma lasur that, in addition to preserving the wood from UV rays and humidity, gives it a beautiful satin shine.
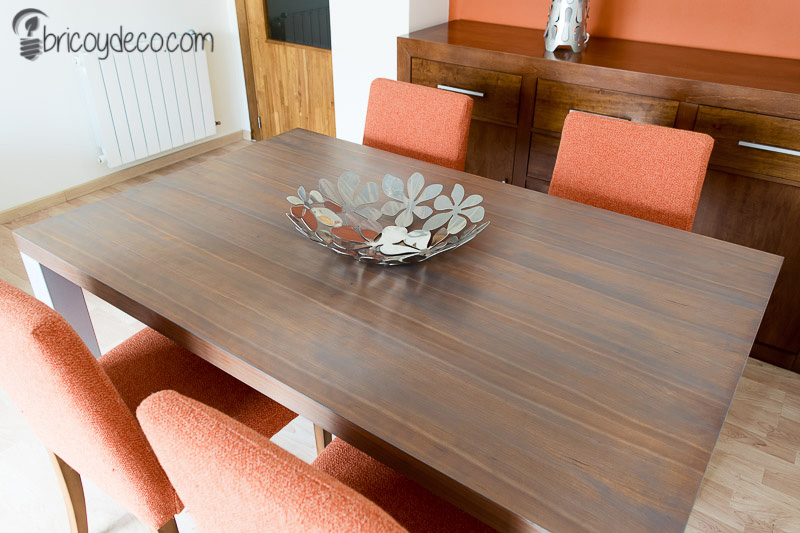
The first thing I did was apply a coat of pacific gray lasur with a synthetic fiber brush. In the following image, the grayish and matt tone of the lasur can be perfectly distinguished, as well as its translucent finish that reveals the grain of the wood.
Despite knowing that lasur is odourless, I am still surprised to see that it does not smell at all. In addition, the drying to the touch is very fast since when I finished painting the table, the side I had started with was completely dry. Even so, I waited the hour recommended by the manufacturer to give a second coat, although before applying it I sanded the entire surface with a very fine grit sandpaper.
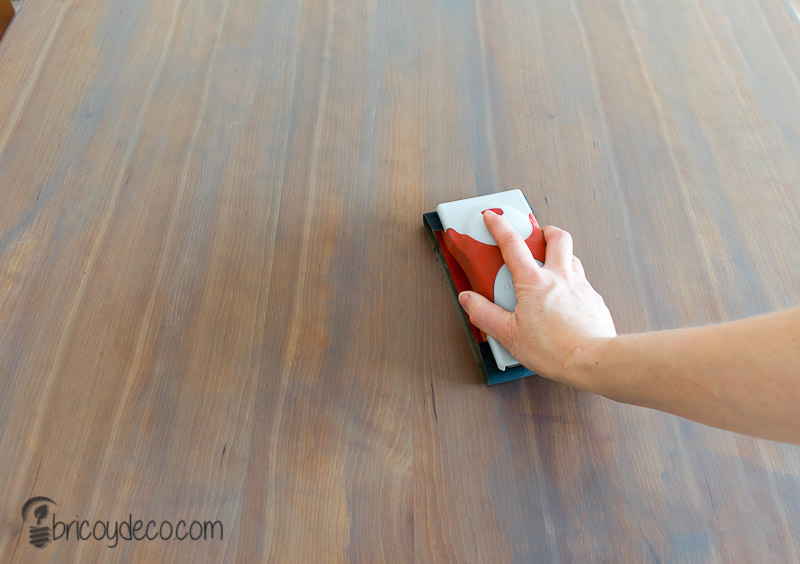
When the wood is protected with lasur it is not necessary to sand between layers, however I wanted to do it to highlight the worn effect of the wood. As a curious fact, I will tell you that when the lasur is sanded, dust is not created, but a residue similar to that produced when you use an eraser.
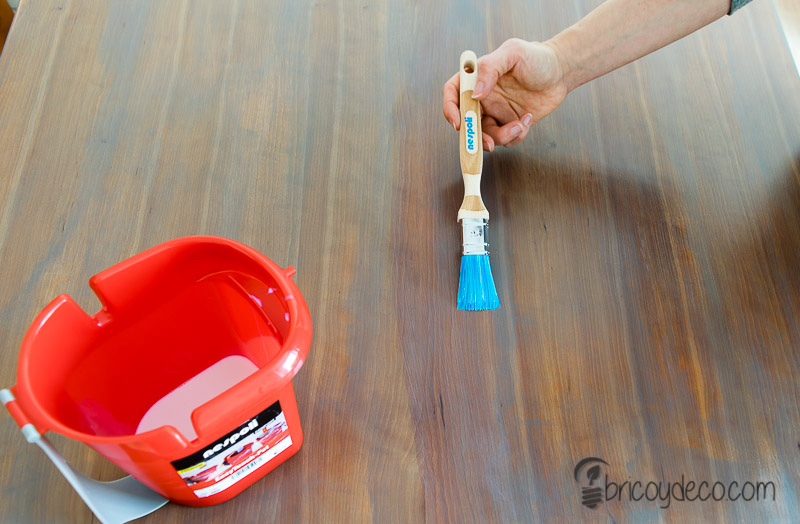
The next step was to give a second hand lasur although this time I used the colorless. This type of lasur has a milky and whitish color but once dry it forms a completely transparent film.
In the following image you can see in detail how the wood has turned out before and after renewing the table with lasur.
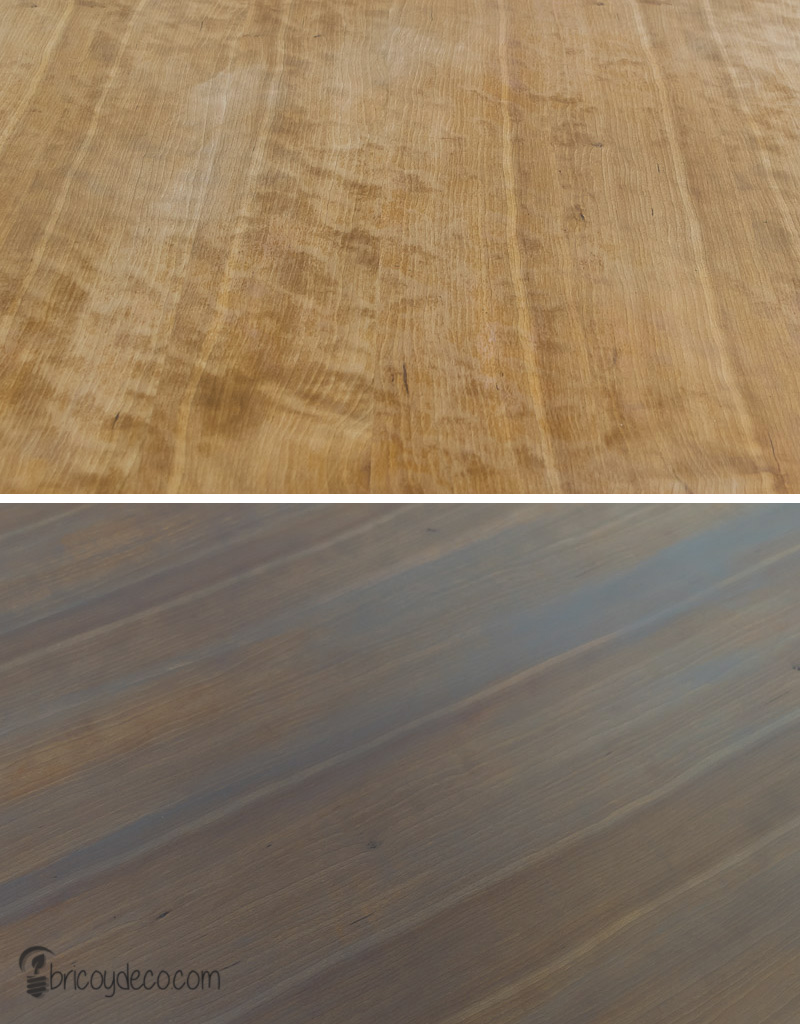
Finally I can only say that I love the result. The lasur has provided a glaze that has managed to hide the cherry tone of the table that I no longer liked.
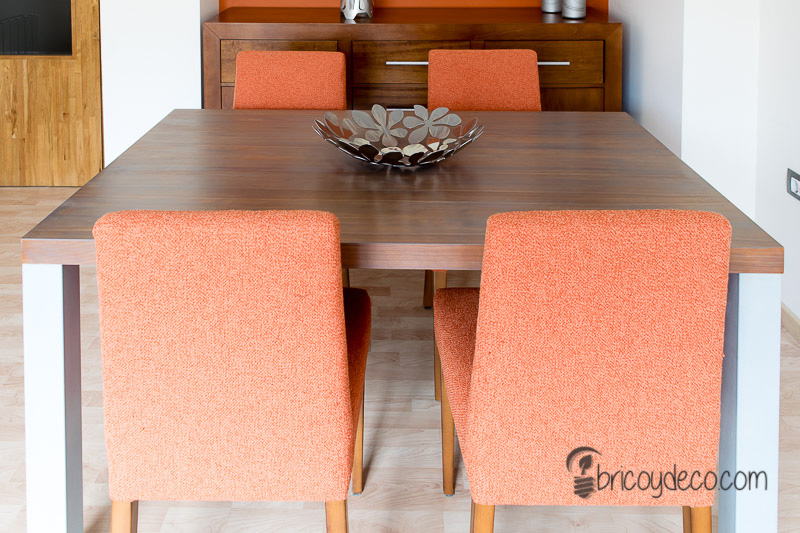
In addition, the grayish veins in combination with the other lighter ones give the table an appearance of old and very vivid wood, but at the same time natural and well-cared for.
Summarizing…
If you want to protect the wood and also restore all its beauty and vitality with an open pore finish, these are the steps you must follow:
- Remove any previous finish from the wood
- Wait 24 hours before applying the lasur if a stripping product has been used
- Apply two layers of lasur, respecting the drying time between layers
To finish, I would like to make a series of recommendations that I have not put into practice because they were not applicable in my case:
- In new woods it is recommended to apply a protective background before lasur. In this way, in addition to providing a fungicidal treatment, it is possible to equalize the absorption level of the wood.
- It is not advisable to apply more than four layers of lasur.
- Lasur can be applied both with a spray gun, as well as with a roller and a brush/palette. Although in woods with little absorption such as tropical ones, it is better not to use a roller or a spray gun.
- Although lasur is water-repellent, it is not recommended for surfaces that are in permanent contact with water.
What do you think of the before and after? renew a table with lasur? Not only did I particularly like the final result, but I was also surprised by how easy and fast it is to apply the lasur, as well as the soft and natural finish it provides.
If you liked this post, you can find more tutorials and DIY projects at . Thank you very much for commenting and sharing!


