

For decoupage you can use practically any type of paper and on a multitude of supports. However, using paper napkins is one of my favorite techniques. With this trick you will learn how to make your own decoupage napkins.
I personally consider myself a “paper napkin addict”, every time I see a model that I like I can’t resist buying it. However, sometimes it is difficult to find the design you are looking for. Or it may also happen that you see an illustration that you love but that there is no version for a paper napkin.
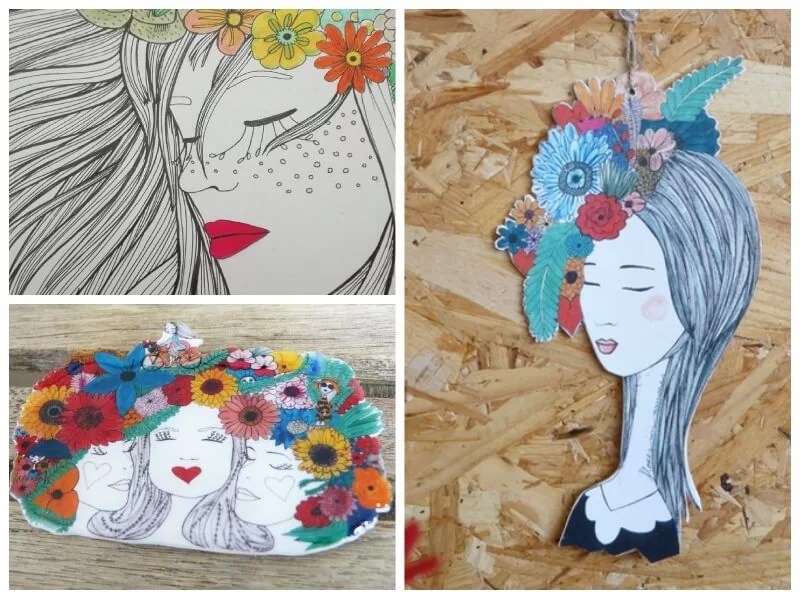
The latter is what happened to me with the creations of veronica maraver. I consider myself a fan of both her illustrations about women to color, as well as her already colored sheets and prints. In this link you will find information about her next project.
For this reason, I proposed a collaboration between both: use the decoupage technique to decorate a triptych with your drawings. She loved the idea and provided me with three beautiful illustrations for her to use.
How to make your napkins for decoupage
With this trick you can print a design on a paper napkin and decorate any support with it.
Materials for printing napkins
- white paper napkins. The advantage of paper napkins is that they are so thin that they adapt like a second support skin on which we want to fix it. In addition, they are very cheap. An alternative is to use rice paper.
- The drawing or illustration that we want to print. It is very important that it is a copyright-free drawing (you can find them for example on Pixabay), that you have purchased its downloadable version, or that you have the permission of its author, as is my case.
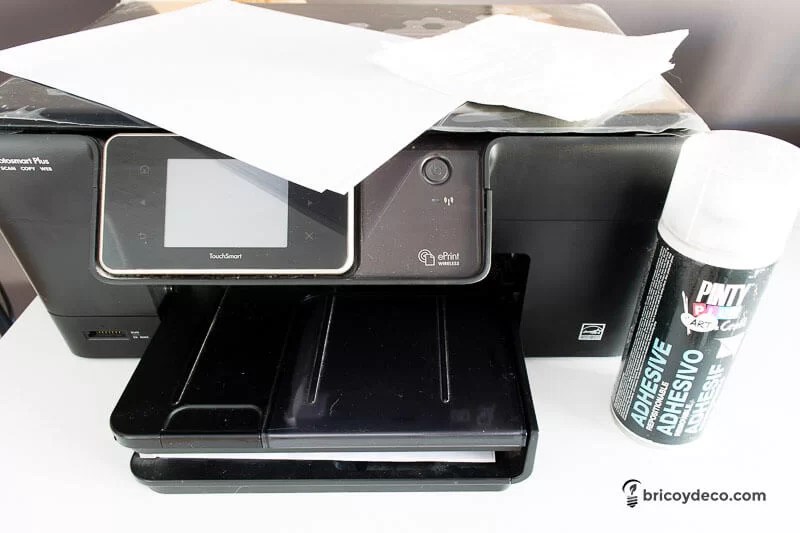
- A printing machine. It does not matter if it is toner or ink cartridges, with both you can print on the napkins.
- folios of the appropriate size for the printer that we are using (normally A3 or A4).
- Repositionable or removable spray. It will help us fix the napkin to the folio (it can be purchased at this link).
Step by step to print paper napkins
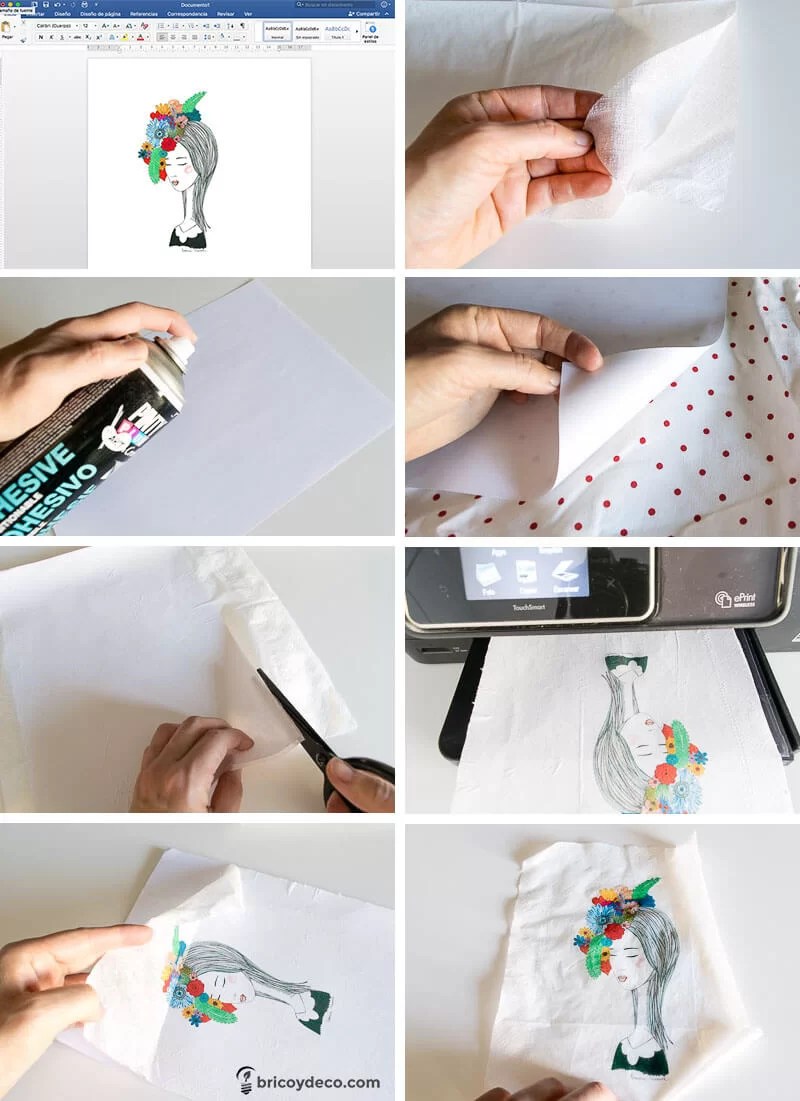
- Once you have the drawing or illustration you want to print, you must adjust it to a print size allowed by your printer. To do this, open a document with the text editor you normally use (in my case it’s Microsoft Word) and insert the image.
- Next, separate the layers of the paper napkin Until you only have one of them. With the same paper napkin you can make as many prints as there are layers when you separate them.
- Spray the folio with removable spray. It is very important that once you have done it, you wear the adhesive a little. To do this, you can stick and peel the sheet of paper several times on a piece of cloth, for example.
- Next, fix the layer of the napkin on the adhesive part of the foil until it is well stretched. Trim the excess part to fit the size of the sheet.
- Place the sheet in the printerso that it can be printed on the side where the napkin is attached.
- Once the print is done, peel off the napkin little by little and very carefully so it doesn’t break.
Following all these steps you will be able to make your own personalized paper napkin, both for decoupage and for any other use you want to give it. The removable spray trick will help you print without wrinkles, as if it were a napkin that you had bought already printed.
How to decorate a wooden table with paper napkins
The main advantage of decorating wood with paper napkins is that, being translucent, it allows you to appreciate the grain of the wood. Thus an effect similar to that of stained wood is achieved or a print directly on it.
To make this triptych I used the lid of a pine wood box. The wood was untreated and several knots could be seen, so the first thing I did was whiten it by painting it with white water-based enamel and quite diluted. In this way it reduced the color of the knots but without covering the grain of the wood.
Then I printed Verónica Maraver’s illustrations on different paper napkins, as well as a quote from those that circulate on the internet. I subdivided the phrase into different fonts.

Below I followed the steps to decoupage with paper napkins on untreated wood. You can see it in detail in this video tutorial.
The final result can be seen in the following images.
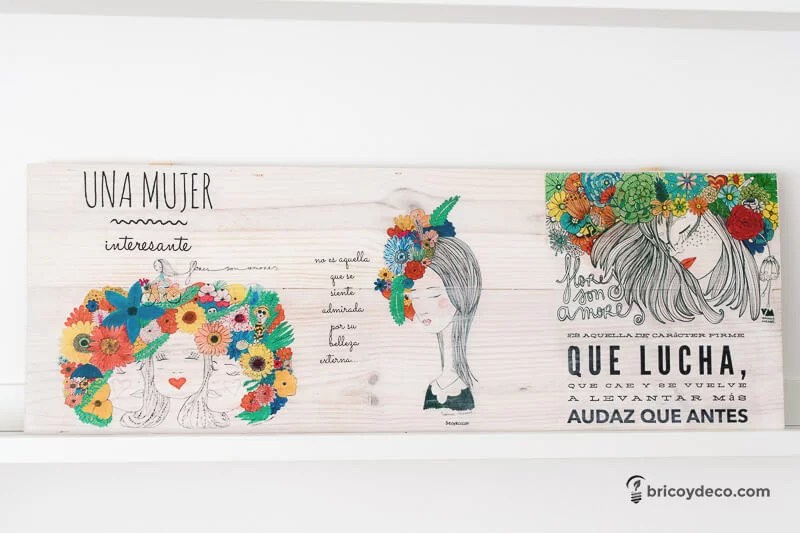
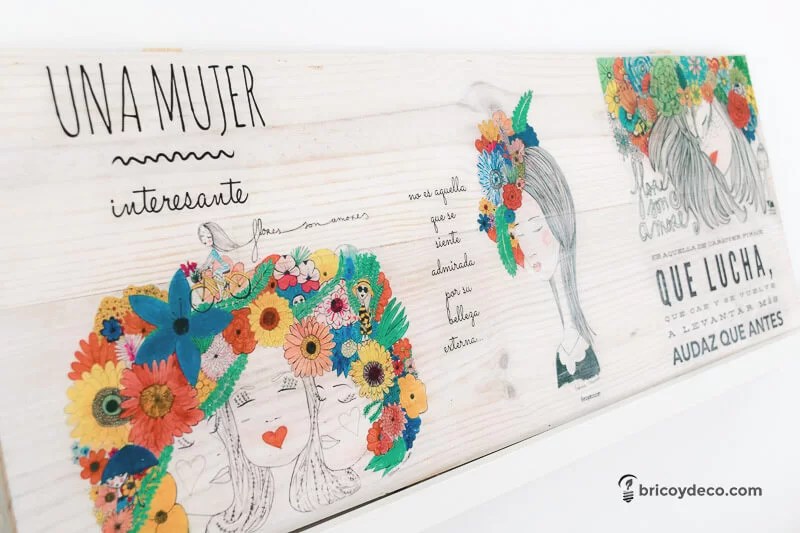
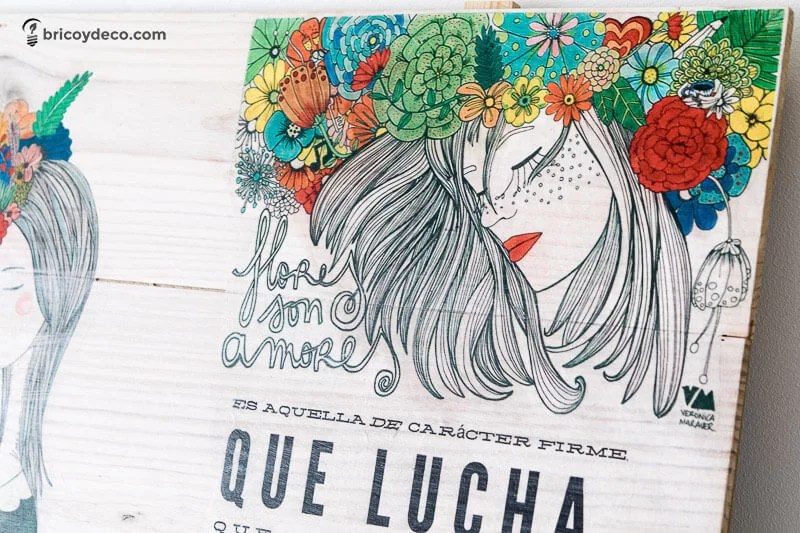
The colors stand out on the bleached wood but at the same time the grain is still visible, creating a nice contrast. For this reason, decoupage napkins are one of my favorite materials when it comes to decorating wood.
If you liked this post, you can see more tricks and DIY projects at .


