

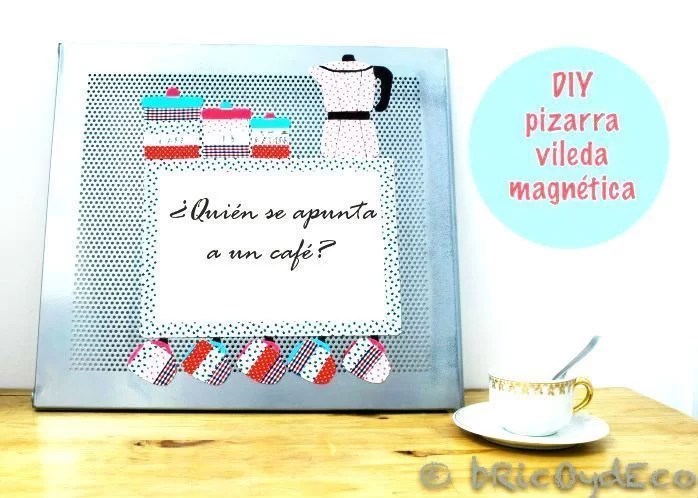
I’m still determined that this Christmas your gifts are DIY, so in today’s post I’m going to show you the Step by Step to make a magnetic whiteboard for the fridge. This DIY gift is not only decorative, but it will also be very practical when writing down the shopping list, the menu for the week or anything else that comes to mind.
You already know that I try to make this series of special DIY gifts for Christmas not difficult to do so that anyone is encouraged to try it. Perhaps my previous DIY gift proposals (the fabric whale or the felt poinsettias) are a bit complicated for those who are not very familiar with the needle and thread, but with today’s proposal there is no possible excuse because it is undoubtedly the simplest of the three.
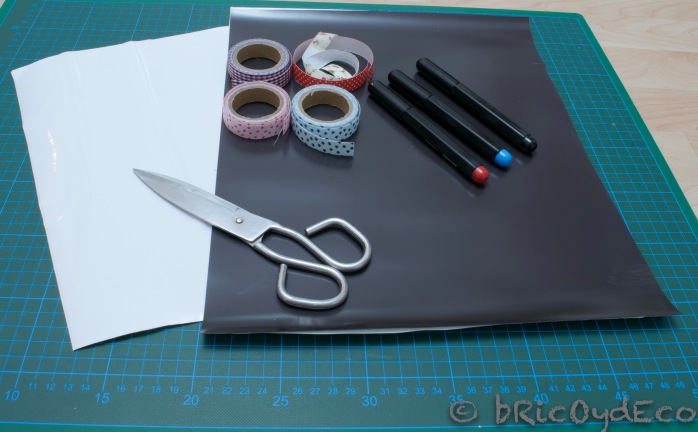
The materials that we will need are the following:
– Magnetic vinyl, the size will depend on how big we want to make the board but I recommend a minimum of 210 x 300 mm (A4 size)
– Vileda whiteboard, the amount will also depend on the size of the board but it will be less than that used for magnetic vinyl.
– Washi tape (self-adhesive decorative paper strips) or fabric tape (self-adhesive decorative fabric strips).
– Permanent or indelible markers, I have used one black, one red and one light blue.
– Scissors.
For those who are not familiar with magnetic vinyl, vileda whiteboard or wahsi tape, I can tell you that magnetic or magnetized vinyl It is a type of vinyl that has a black magnetic sheet on one of its sides and on the other we can write, print or apply adhesive and cover it with different materials. You can see in this link how to make magnets with magnetic vinyl.
On the other hand, the vileda blackboard (also called velleda), is a type of vinyl with which you can cover any smooth surface (walls, furniture, boxes…) and on which you can write, draw and erase, using a special marker for this type of blackboards.
Finally, washi tape and fabric tape are self-adhesive decorative strips (the first ones are made of paper and the second ones made of fabric), you can decorate a multitude of objects with them (you can see it here).
When we have all the materials, we will follow the following steps to make this magnetic whiteboard for the fridge.
1º.- Print/trace the template
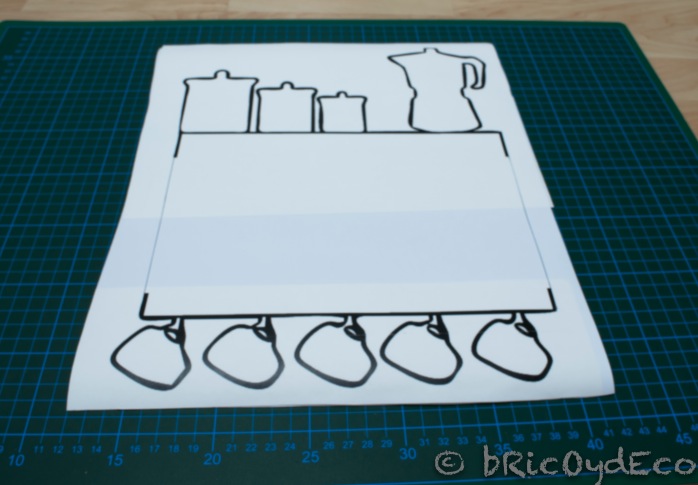
For the blackboard I used a template with the silhouette of some kitchen jars, a coffee pot and some cups (I will include the template in this week’s newsletter, you can subscribe here if you haven’t done so yet, it’s totally free). The size is adjustable since you can trace the top and bottom and make the blackboard box as long as you want.
First we will print the template on the magnetic vinyl. If you do not have a printer or you are going to make the whiteboard larger than an A4 sheet, you can trace the template on a sheet of paper by placing it on top of your computer screen and turning it up to maximum brightness, or print it in parts to trace it on the magnetic vinyl, which is how I have done it.
2º.- Cut
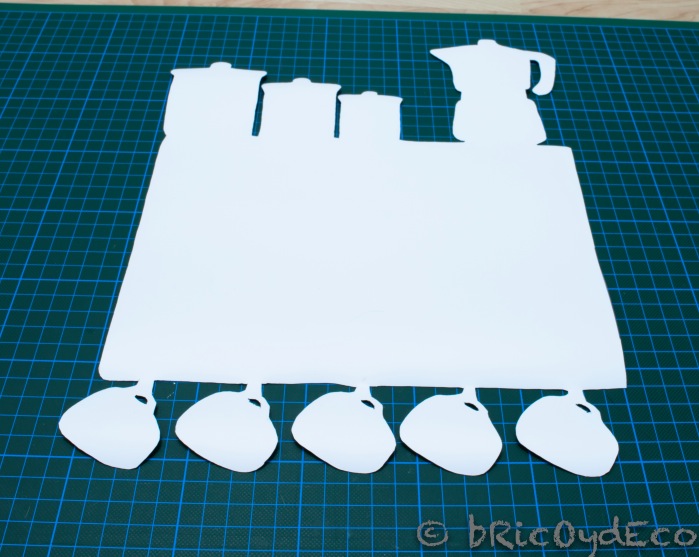
Once we have the template printed or traced we will cut the silhouette with scissors. Magnetic vinyl can be cut very easily, I use normal scissors for straight lines and small nail scissors to cut out details and curved areas.
3º.- Place the slate
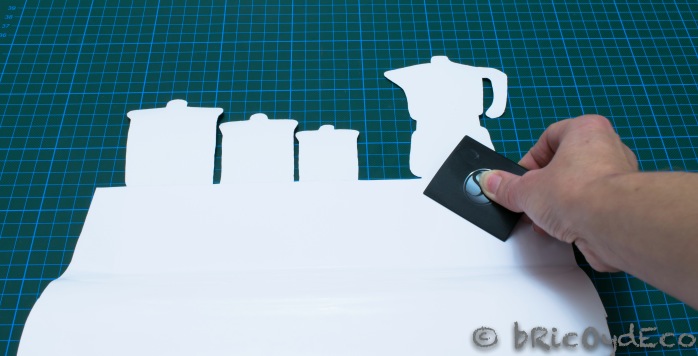
The next step will be adhere the chalkboard to the magnetic vinyl, To do this, the slate is cut to the same size as the inner square of the template (space between the kitchen jars and the cups), the carrier paper is peeled off and with a spatula the slate vinyl is placed on the white part of magnetic vinyl. carefully so that there are no air bubbles (you can see the tricks to avoid the formation of bubbles here). If you don’t have a spatula, a credit card can also work.
4º.- Decorate
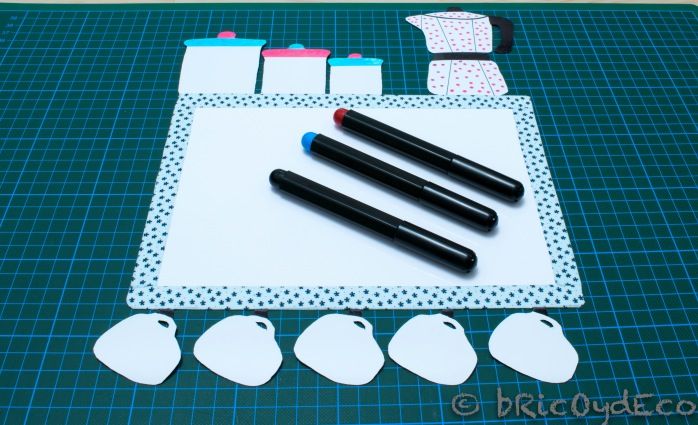
Finally we will decorate the kitchen jars, the coffee pot and the cups:
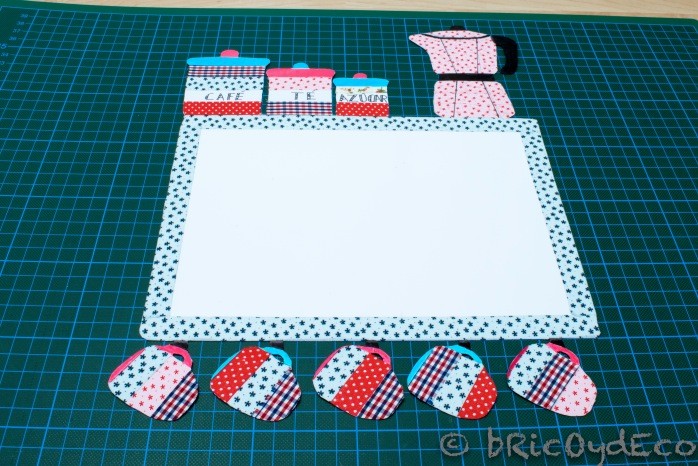
– With fabric tape I have framed the area where I have placed the slate.
– I have painted some details in black on the coffee pot and decorated it with pink fabric tape with small red stars.
– For the kitchen jars and cups I have combined different models of fabric tape and I have also painted some details in red and blue. Also on the jars I have left an undecorated area and on it I have written with a black permanent marker the words “COFFEE”, “TEA” and “SUGAR”.
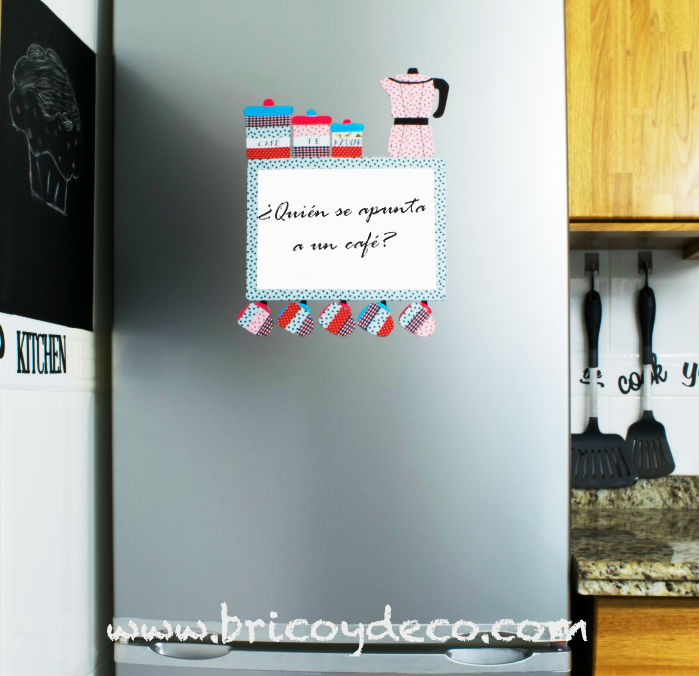
In the following image you can see the finished magnetic whiteboard.
5º.- Gift wrapping
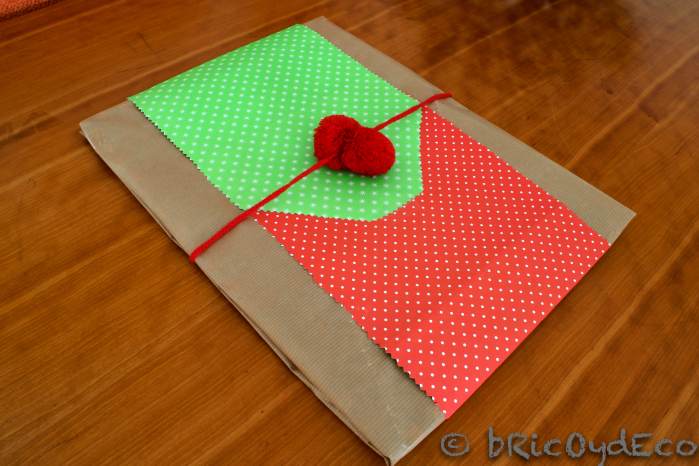
This gift can be easily wrapped although I recommend placing it on a cardboard base to give it rigidity. What I have done has been to wrap it in kraft paper and to decorate it I have used a green and a red paper, both decorated with small white polka dots. To finish off I have used a piece of red wool with two pompoms that I had at home. The end result is quite Christmassy.
The magnetic whiteboard It is a good idea to make a practical and decorative gift at Christmas without having to leave us our entire budget. Also It is a different and customizable gift that stands out from the typical framed blackboard or vinyl blackboard. You can adapt the colors and design to the tastes of the person who is going to receive the gift, you can even change the drawing for others that you like more: a mixer and some cupcakes, kitchen utensils, a display of dishes…
I hope you liked this gift idea and you are encouraged to make it since it is really simple. It is also a fun and very entertaining craft to do with the kids and give to moms and grandmothers.
If you liked this post, I would appreciate it if you shared it on your social networks.


